21 July 2023
Headless WordPress Next.js combo – WP as an API for a Next.js app


WordPress has long been the primary choice CMS to manage your website’s content, but the rapid development of front-end technologies offers new opportunities. Let’s jump into the hype train in 2023 and see a mixture of old and new: the WordPress CMS with the frontend served by the Next.js application!
The recent years have shown that the popularity of the Jamstack architecture is growing and it’s safe to assume that it won’t change anytime soon. Every year, new JavaScript frameworks are being born and the existing ones are growing in popularity and acquiring new users.
Headless WordPress Next.js combo – why?
At the same time, a new CMS (content management system) is being designed with two goals in mind. The first one is to provide a convenient environment allowing editors to create and manage content. The second goal is to expose the data for the frontend layer (frequently written purely in JavaScript) in a way that will make it easy to consume the data and display the carefully crafted content in a beautiful way.
The idea behind the separation of the CMS (the backend layer) and the frontend layer is to make it possible for the frontend developers to do what they are best in, allowing them to use modern and convenient tools to implement the frontend layer and get rid of entanglement between frontend and backend layers which may result in technical debt.
Meanwhile, in our everyday work, it’s frequently necessary to function with and maintain already existing websites without having to rewrite them from scratch. WordPress content management system remains the most popular CMS in the world, and there are many good reasons for that.
The perfect solution for frontend, backend, and non-coding content managers
The WordPress backend is free (both as in beer and freedom) and easy to set up even for a non-technical user. What’s more, many users are already familiar with the WordPress dashboard for admins. WordPress installation is easy (WordPress locally being an excellent easy option for testing) and the WordPress CMS layer is being rapidly developed (just have a look at the Gutenberg Editor – either loved or hated, but an increasingly important tool in your WordPress setup). What’s more, it has a large community that can provide access to countless themes and plugins allowing you to modify your website according to your whims.
On the other hand, the design of a WordPress theme requires knowledge of PHP — which an average frontend developer might not have — and doesn’t allow the use of modern, “out of the box” frontend frameworks. Even when possible, it’s not easy and convenient to implement a WordPress theme using React, and s straightforward implementation could result in a poor SEO score.
Can we get the best of both worlds? How about we assure the freedom of choice of modern tools for the frontend alongside the best developer experience for the backend and still provide the familiar WordPress environment for content editors?
Below, you’ll see the proof of concept of such a solution with Next.js as a framework with which we’ll build the js file frontend layer. This way, we’ll strive to achieve a high SEO score thanks to server-side rendering.
The application will be paired with a headless WordPress site. If you want to jump straight to the code, go to the GitHub repo with a Next.js application and the corresponding headless WordPress theme containing said proof of concept.
💡Want even more expert Next.js content? Check out these articles from my teammates!
WordPress pages
We’ll start with the implementation of the view displaying a WordPress page as it’s a bit simpler than the WordPress post implementation. We’ll fetch WordPress content of every page by its slug in getStaticProps. We also need to fetch a list of pages to be used in getStaticPaths. Let’s create our queries first.
Now, it’s time to use those queries. We’ll use the default route src/pages/[...slug]/index.tsx to display our pages there. We’ll first implement our data fetching functions.
Now we can use data returned from getStaticProps in the React component being displayed on a page.
WordPress posts
In a similar way, we’ll implement a view displaying WordPress posts. Again, we’ll implement data queries first.
Let’s go with the WordPress data fetching functions next in src/pages/[year]/[month]/[day]/[slug]/index.tsx. This time, we will pregenerate only a few first posts (note the fallback: "blocking" in the getStaticPaths). The other ones will be generated the first time and requested and cached for the future. This will reduce the duration of the build. It’s probable that we won’t ever need to display the majority of older posts, so why would we pregenerate them anyway?
Now we can write the component displaying a single WordPress post.
Aside of working together, Next.js can also replace WordPress in many instances.
Check out this case study of an app in which we reduced monthly cloud costs from $30,000 to $2,000 by replacing WordPress with a single Next.js app!
Archives pages
OK, so we’ve implemented post and page views. Now it’s time to implement the archives page. On the /page/<pageNumber>/ URL, we would like to display a list of posts. Additionally, we would like to display the first page at the root of the application and redirect /page/1/` to `/. First, let’s add the redirection in a next.config.js file.
Now, let’s implement an archive page in src/pages/page/[page]/index.tsx. As before, we’ll start with functions fetching data (that is a list of posts) for the archives page. We’ll use static site generation (Next.js Incremental Static Generation feature) to render them first when the pagination page will be requested and serve the cached version next time.
The getStaticProps method for the archives page will look as follows:
What remains is to display data returned from getStaticProps in the view.
That covers the case for all archives pages except the first. This case will be covered by the index page in the src/pages/index.tsxfile.
Fortunately, this can be handled with a few lines of code. We will use the same React component. Even better, the getStaticProps we’ve written previously can be reused!
In a similar way, the categories, tags, and author pages can be implemented. To keep things short, these particular cases won’t be described here, but you can have a look into a repository with a proof of concept.
Triggering a Next.js build on post/page update
All right, we’ve got the application working. The Next.js application is populated with the data from the WordPress site. Still, it would be nice to have the data updated whenever the post or page is being changed in the WordPress admin dashboard.
We’ll assume that the Next.js application is being hosted on Vercel. In fact, any platform will do, as long as it allows to trigger a new deployment via a POST request to a specified URL. In the case of Vercel, we’ll use Deploy Hooks.
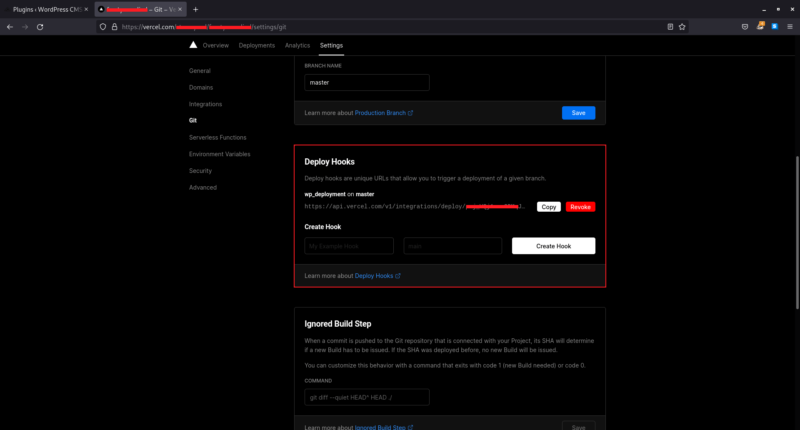

Here is the moment when making only a few initial posts will pay off. Even a small reduction of build time will result in big savings assuming frequent updates in the WordPress admin panel.
We will use the Vercel Deploy Hooks WordPress plugin to trigger a new deployment on every post/page change. Let’s generate the URL for the Deploy Hook as described in the Vercel documentation. Copy it to the plugin’s configuration, tick the “Activate deploy on post update” checkbox, and voilà!
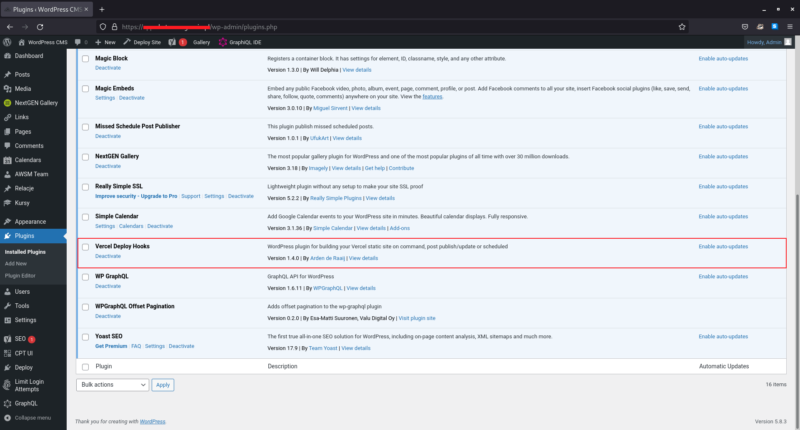
Every time the page/post is updated or a new post is created, a new deployment will be triggered to ensure that the content for our Next.js application is always up to date.
Posts and pages preview
First, we’ll make a few more assumptions about our applications for the previews to work:
- The WordPress site uses the Headnext theme,
- Both the WordPress instance and Next.js web apps are on the subdomains of the common domain (for instance
admin.domain.comandnext.domain.com) - Alternatively, the WordPress site is on the subdomain (for instance
admin.domain.com) of Next.js application domain (that isdomain.com), - WordPress cookie names are set on a domain with a leading dot, which will require adding the line below in
wp-config.php.
The Headnext theme modifies the default URL of the WordPress preview. The remaining assumptions guarantee that the Next.js application will be able to access WordPress cookies to authenticate and fetch the preview data.
The preview route in Next.js application
Since we want our editors to be able to preview the content they are creating before it goes public, we cannot build a static page for them to see how their content will look after publication. We also don’t want to use getServerSideProps as we don’t want to implement the post/page views once again.
We’ll use Next.js Preview Mode to override getStaticProps data for these pages. This way, we don’t have to give up the speed of static generation while still being able to reuse existing code.
But first, we’ll implement an API endpoint for post/page preview in the src/pages/api/[type]/[id]/preview/index.ts file. Both preview type (post/page) and the ID of the post/page will be passed in the URL. We’ll also pass nonce in the query string to access the protected data from the GraphQL API.
First, we have to make sure we’ve received the necessary data in the query string. Next, we will extract cookies and build headers to access data requiring authentication.
Now, while sending the headers to act as an authenticated user, we need to fetch WordPress page/post revisions by the page/post ID from the API and fetch the ID of the preview. The preview is a WordPress post —as all revisions are instances of the posts — so we need to fetch the data by preview’s ID.
And now, we can use the Preview Mode. Let’s set the preview’s ID and headers in the preview data using setPreviewData. Unfortunately, its size is limited to 2KB (it’s basically a cookie, but its size is being limited by the Next.js itself), so we won’t be able to pass the entire preview’s data there.
Finally, let’s redirect to the page/post view to where we’ll use previously set data.
Post view
Now, in the post view, we have to adjust the getStaticProps function. When the preview data is set it’s being available in context. Let’s have a look at the updated function.
What’s changed? The first if
What about the page view? Likewise, a similar if clause should be added. To keep things short, we won’t elaborate on that. Have a look at the POC code yourself 😉
What remains to be done? We should ensure that WordPress will point our editors to the preview API endpoint rather than to the default preview WordPress page.
The Headnext WordPress theme
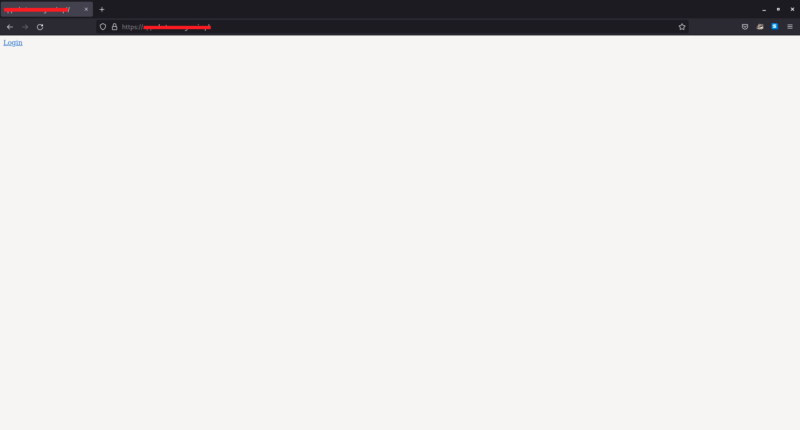
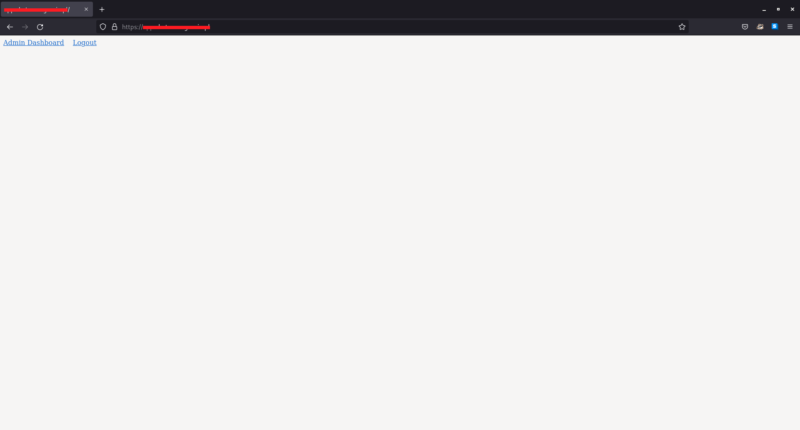
The Headnext theme is a basic headless WordPress theme, allowing users to modify the default URL of the WordPress preview. Additionally, it doesn’t contain any unnecessary code and displays only a login link on the theme’s index page – nothing more is needed as the Next.js application will handle the frontend stuff.
Frankly, the possibility to modify the URL of the WordPress preview page could (and probably should) be extracted to the plugin to allow setting the WordPress preview URL in a generic way instead of being hardcoded (now it only allows to customize the Next.js application domain). For the purpose of the proof of concept, that will do.
From the code, we can see that the user clicking the Preview button during sample post edition will be redirected to https://domain.com/api/post/1/preview?nonce=b192fc4204while the sample page preview URL will look like this: https://domain.com/api/page/2/preview?nonce=796c7766b1
Cleaning up
To be honest, we’re not done yet. The preview data will persist as it’s the cookie. We have to clean it up ourselves. Let’s create a new API route in the src/pages/api/exit-preview/index.ts file.
We should call this API endpoint every time we display a preview. Let’s create a React hook for that.
We should use the hook in every component that may allow us to display preview data. Let’s see how it’s being used in the post view component.
We’ve handled displaying previews both for the frontend and for the CMS layer. This should work like a charm!
Headless WordPress Next.js – so you say it’s just a proof of concept?
But yes, it’s still a proof of concept. There are several things that should be done to consider this production-ready. The list below could probably be even more exhaustive. So, what needs to be done?
- styling in the WordPress Gutenberg editor; our users should have an idea of how their content will look like without the necessity to use a preview button (a new
theme.jsonfeature may be used or you may use traditional CSS styling), - introducing multiple tweaks in WordPress to replace all its redirections to its frontend layer; our theme should reroute it to the Next.js application instead (as it redirects in the case of preview),
- styling in the Next.js application; it should handle at least a basic set of (not so) new WordPress Gutenberg editor components,
- implementing image optimization in the Next.js application using Next.js’ image component,
- both images and WordPress Gutenberg editor components may require heavy use of
html-react-parser, - if SEO is an issue (and it probably is if we consider the Next.js framework) you may want to use Yoast SEO and WPGraphQL Yoast SEO Addon plugins.
So try it out starting with a hobby project, but you better believe that it does have a lot of potential!
And if you need developers who have already used WordPress as a headless CMS for Next.js...
then contact The Software House and…

