01 September 2020
How to bootstrap a Vue 3 project quickly using the new Vue CLI? Install Vue CLI with this guide


Vue.js keeps on evolving thanks to the continuous efforts of the open-source community. One of the most interesting recent changes in Vue 3 is the new improved Vue CLI version. You can use it to configure a new project in a much faster and more streamlined way than ever before, using the command line interface. How to do it? I’m going to walk you through the entire process in this Vue CLI 3 tutorial so sit back.
In this article, I’m going to show you why the freshly released Vue CLI is the best way to start a new Vue project. But before we get to it…
What is Vue.js?
Vue.js is a modern progressive JavaScript framework. You can use it to build user interfaces and Single Page Applications. It’s one of the three most popular JavaScript frameworks (besides React and Angular). According to the recent State of Frontend 2020 report we made, it was the 3rd most popular frontend framework and 45,2% of respondents expressed interest in learning it.
Vue stands out as one of the few big JS frameworks built from scratch and continually developed only by an open-source community. There is no big tech corporation behind it. Just a group of passionate devs, who dedicate their free time to the Vue cause. As I’m writing this article, the work on Vue.js 3 is still underway. This version is going to bring a lot of changes to the current API as well as many other enhancements.

What does CLI stand for?
CLI stands for Command Line Interface. It’s an app you can control through your terminal. Sounds nice, doesn’t it?
CLI in Vue 3 is written entirely from the beginning. The creators prioritized the ability to configure the environment and extendability with plugins. Even the name of the package has changed – from vue-cli to @vue/cli.
VUE CLI requirements
Not much, just:
- Node.js version 8.9 or above (8.11.0+ recommended). To check which version you are using, just type the following command into your terminal: node -v
- A terminal
How to install Vue CLI
The first thing to do is to perform Vue CLI installation. In order to do this, I need to open the terminal and run:
npm install -g @vue/cli
I make sure everything is correct by running:
Vue --version
Because I installed the package correctly, I can now see the version of Vue CLI I just added. While I was writing this article (August 2020) the current version of Vue CLI was 4.5.4.
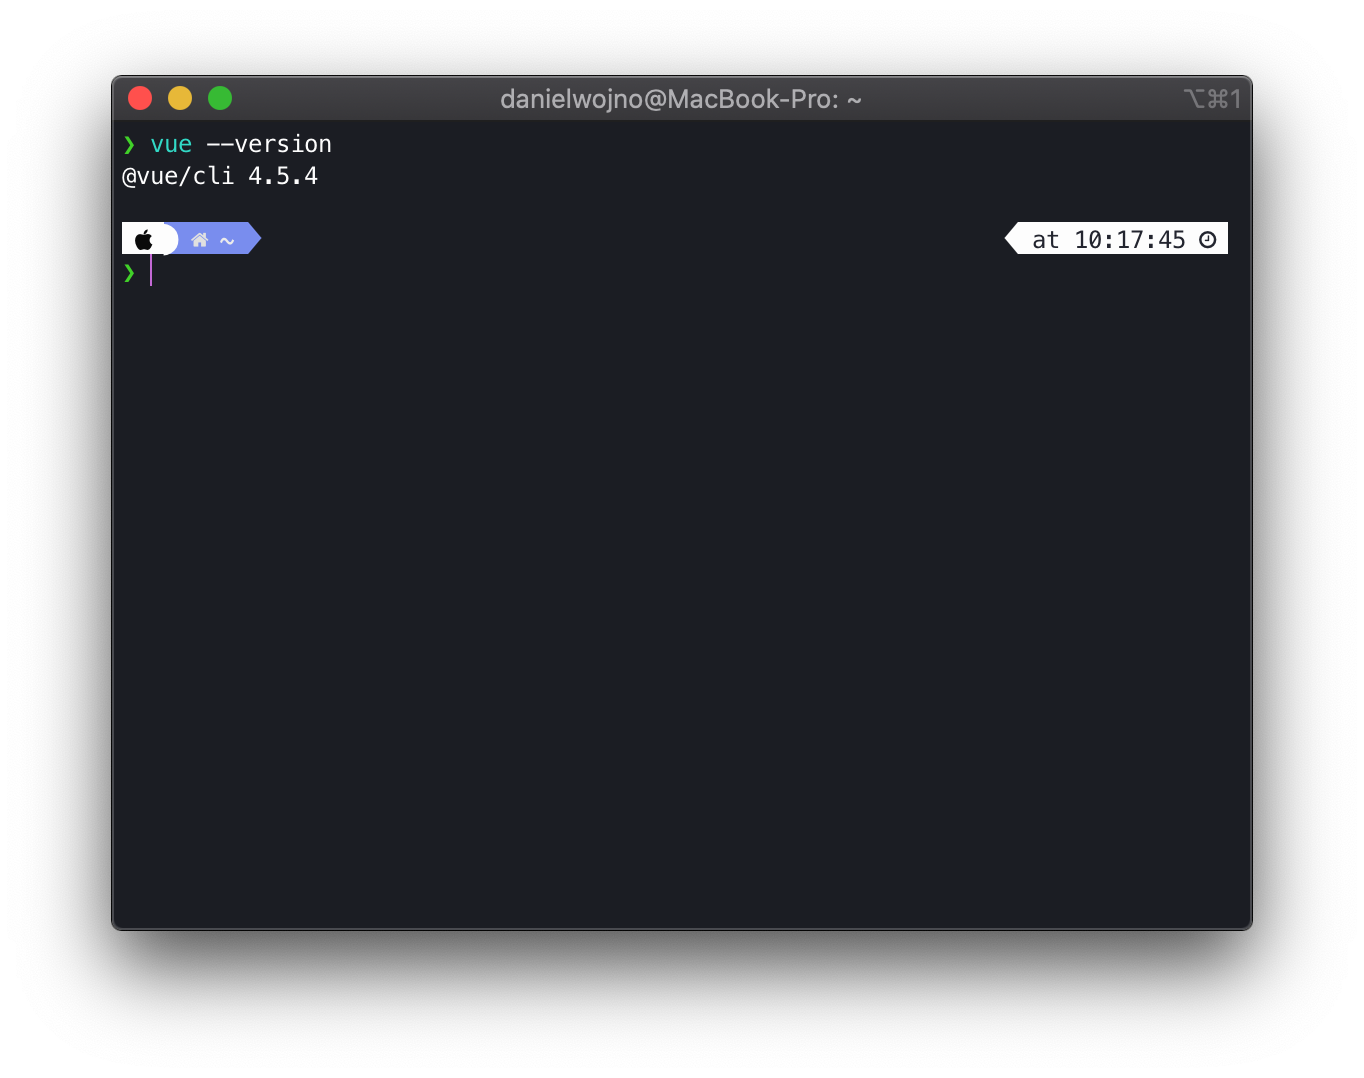
And that’s it as far as Vue CLI installation is concerned!
Start a Vue project with CLI only
To start, I just need to type in the command: vue create your_project_name
The name I choose will also be the name of the directory where the app will be. It will also be added to package.json as the application’s name.
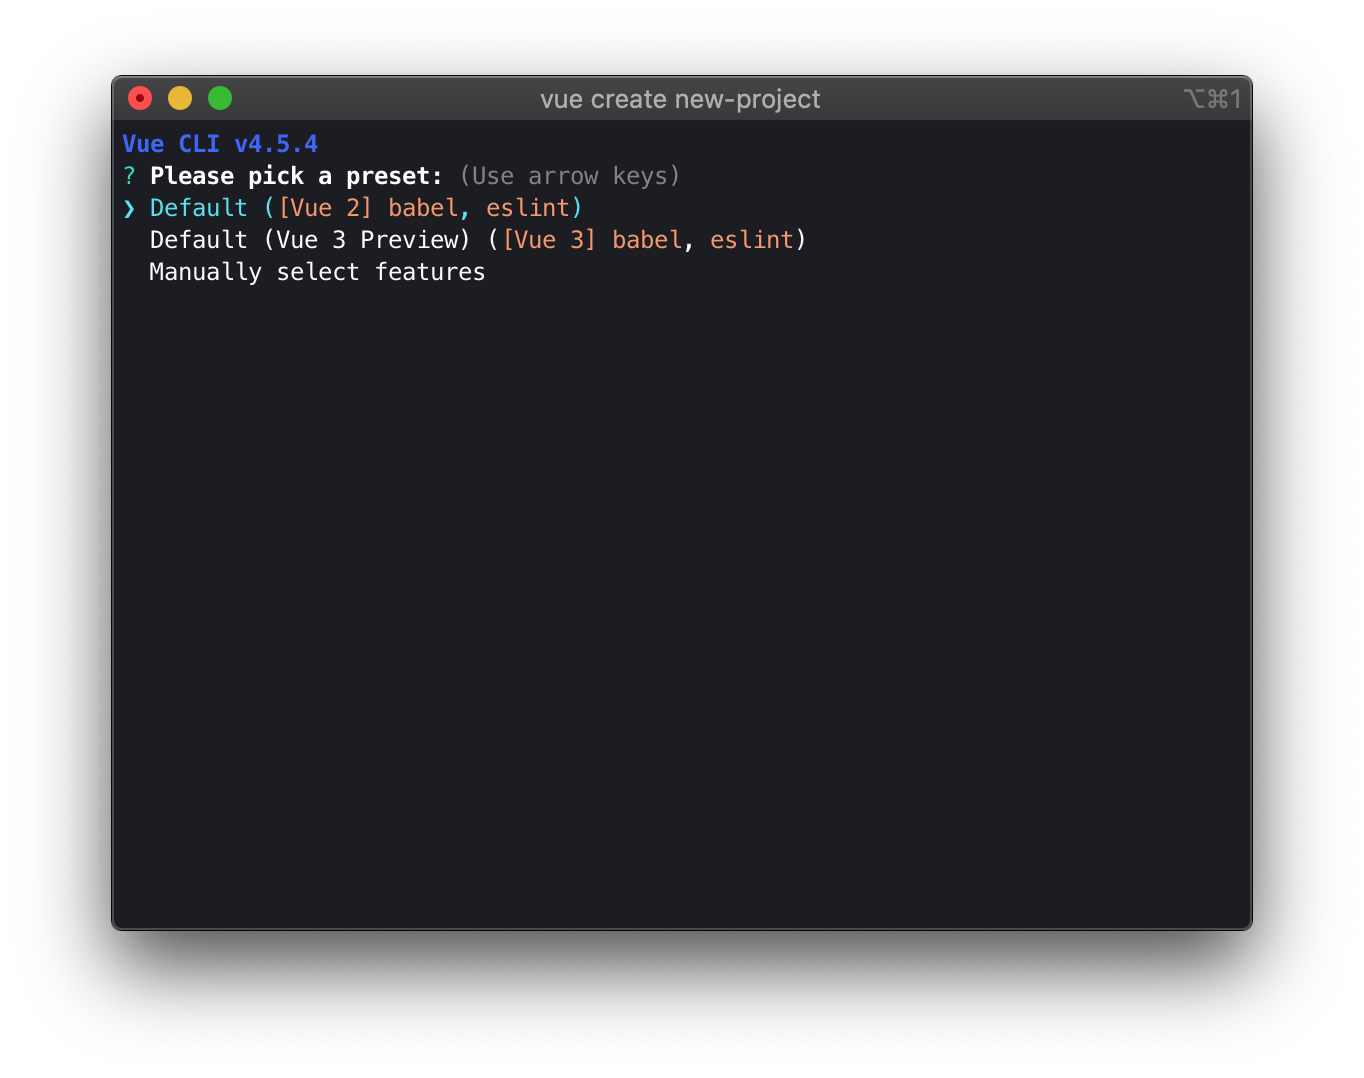
Once I run that command, I should get three options to choose from. The first two include the default recommended configuration for Vue 2.x and Vue 3.x. When I choose one of them, the app is pretty much ready to work with.
However, to configure the environment as I please, the third option is needed. So I scroll down using arrow keys and choose the last option.
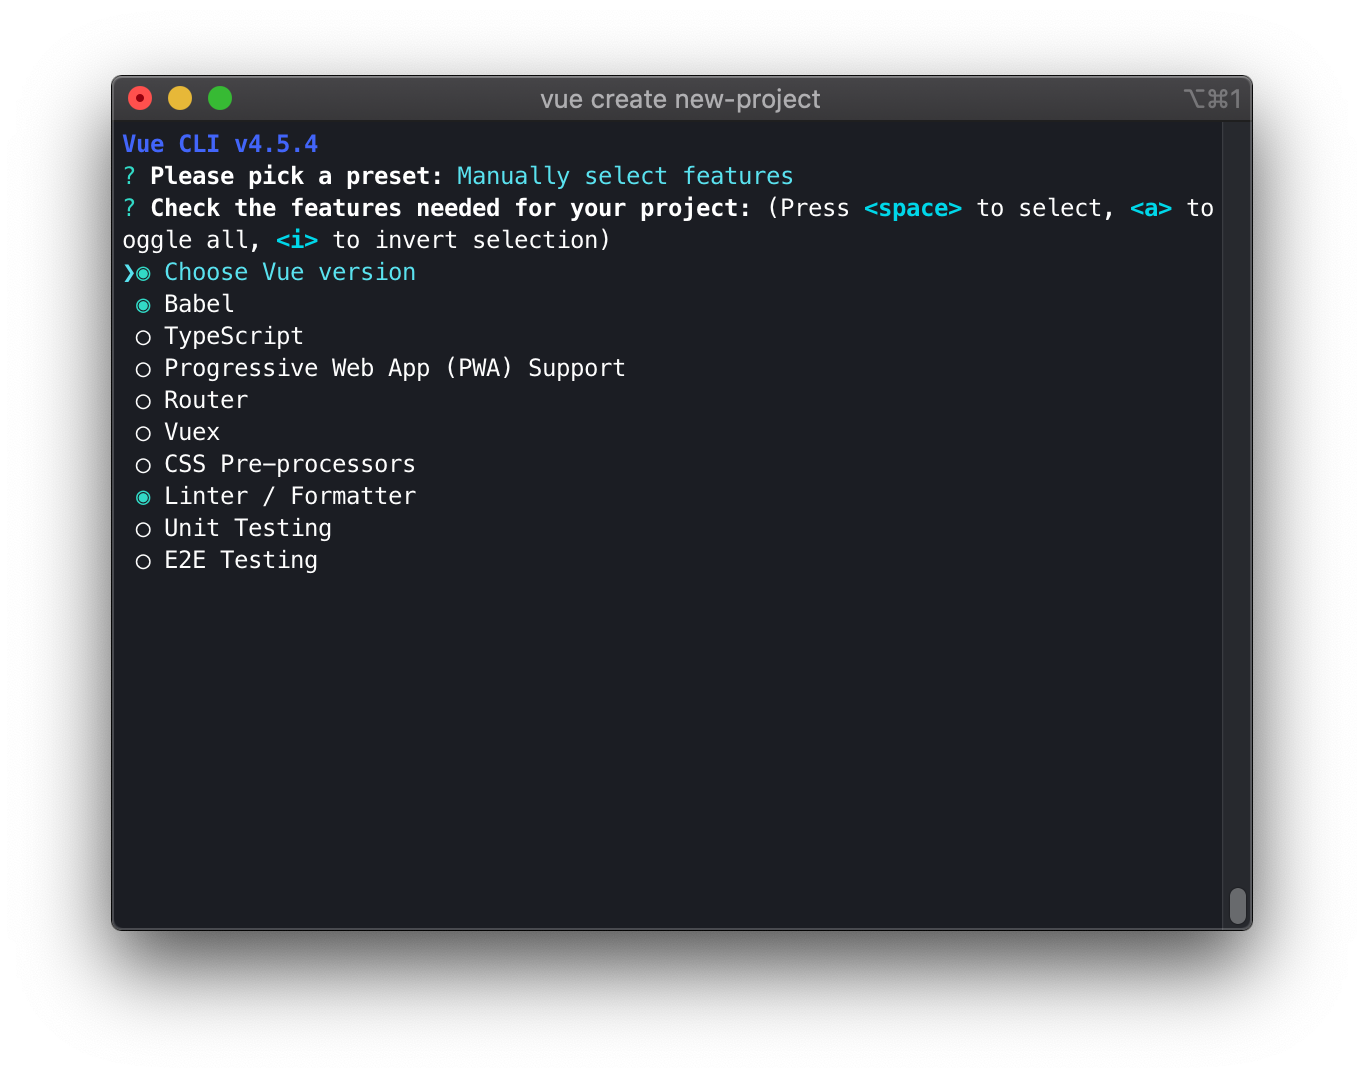
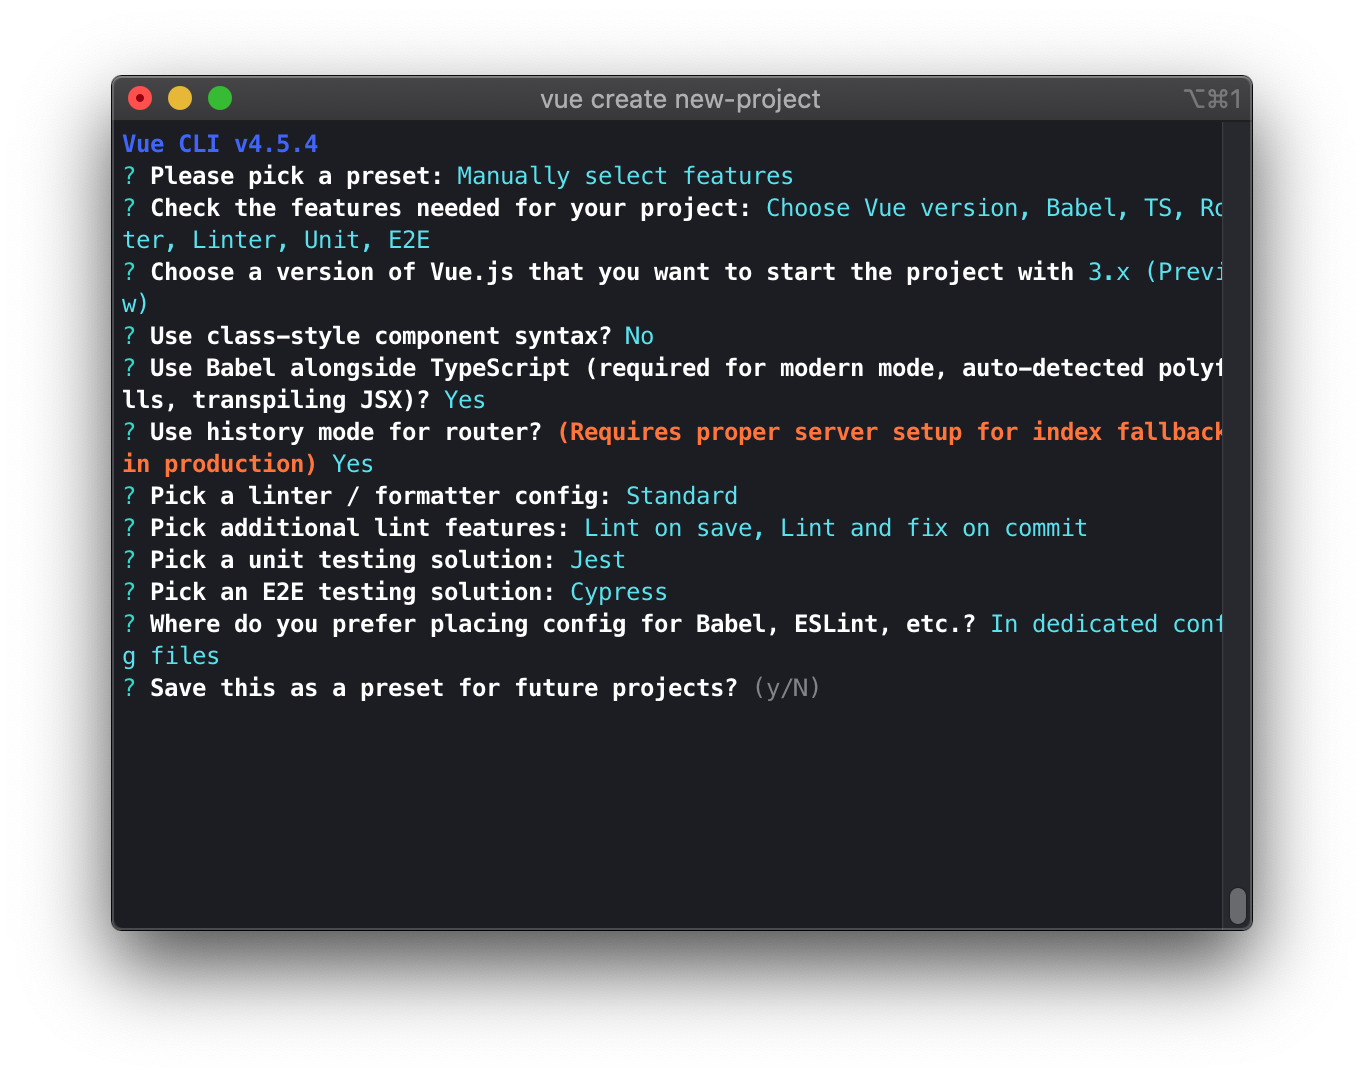
Now, I can see all the features that I can configure or add to the newly created project.
Let’s talk briefly about each of them:
- Choose Vue version – choose the version of Vue.js to start the project with,
- Babel – configure babel,
- Typescript – add TypeScript support,
- Progressive Web App – add PWA support to the app (service workers etc.),
- Router – add dynamic routing,
- Vuex – add Vue state management,
- Css Pre-processors – add support of SCSS, SASS, Stylus or LESS,
- Linter / Formater – edit settings for ESLint,
- Unit testing – choose a unit testing framework,
- E2E– add and configure support for E2E testing.
I’m going to choose some of them and walk you through the rest of the configuration.
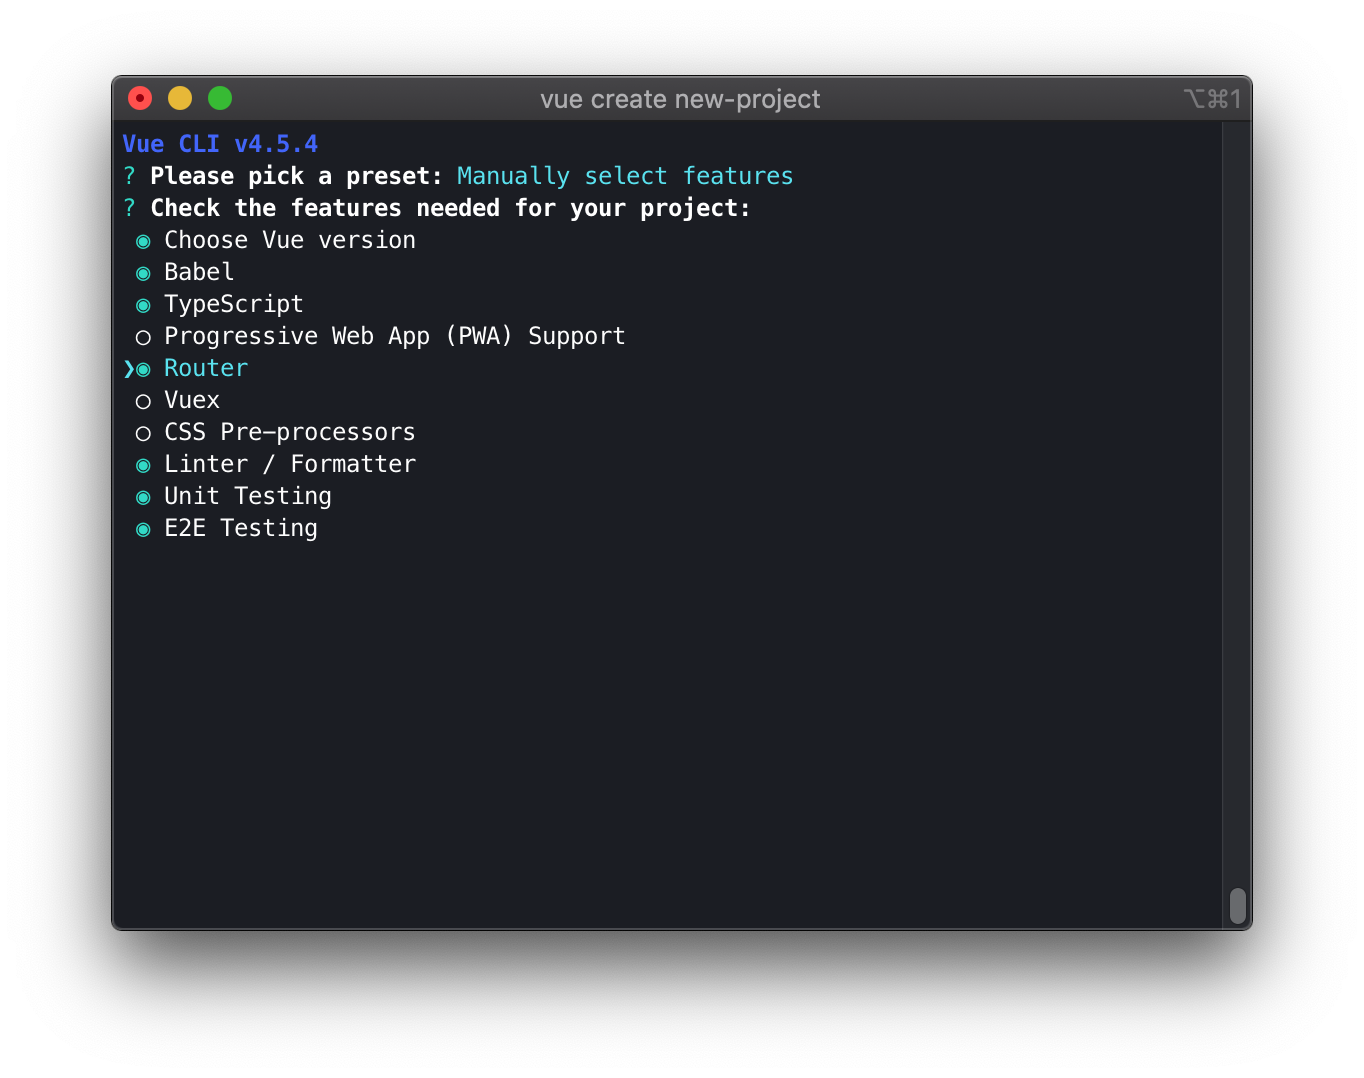
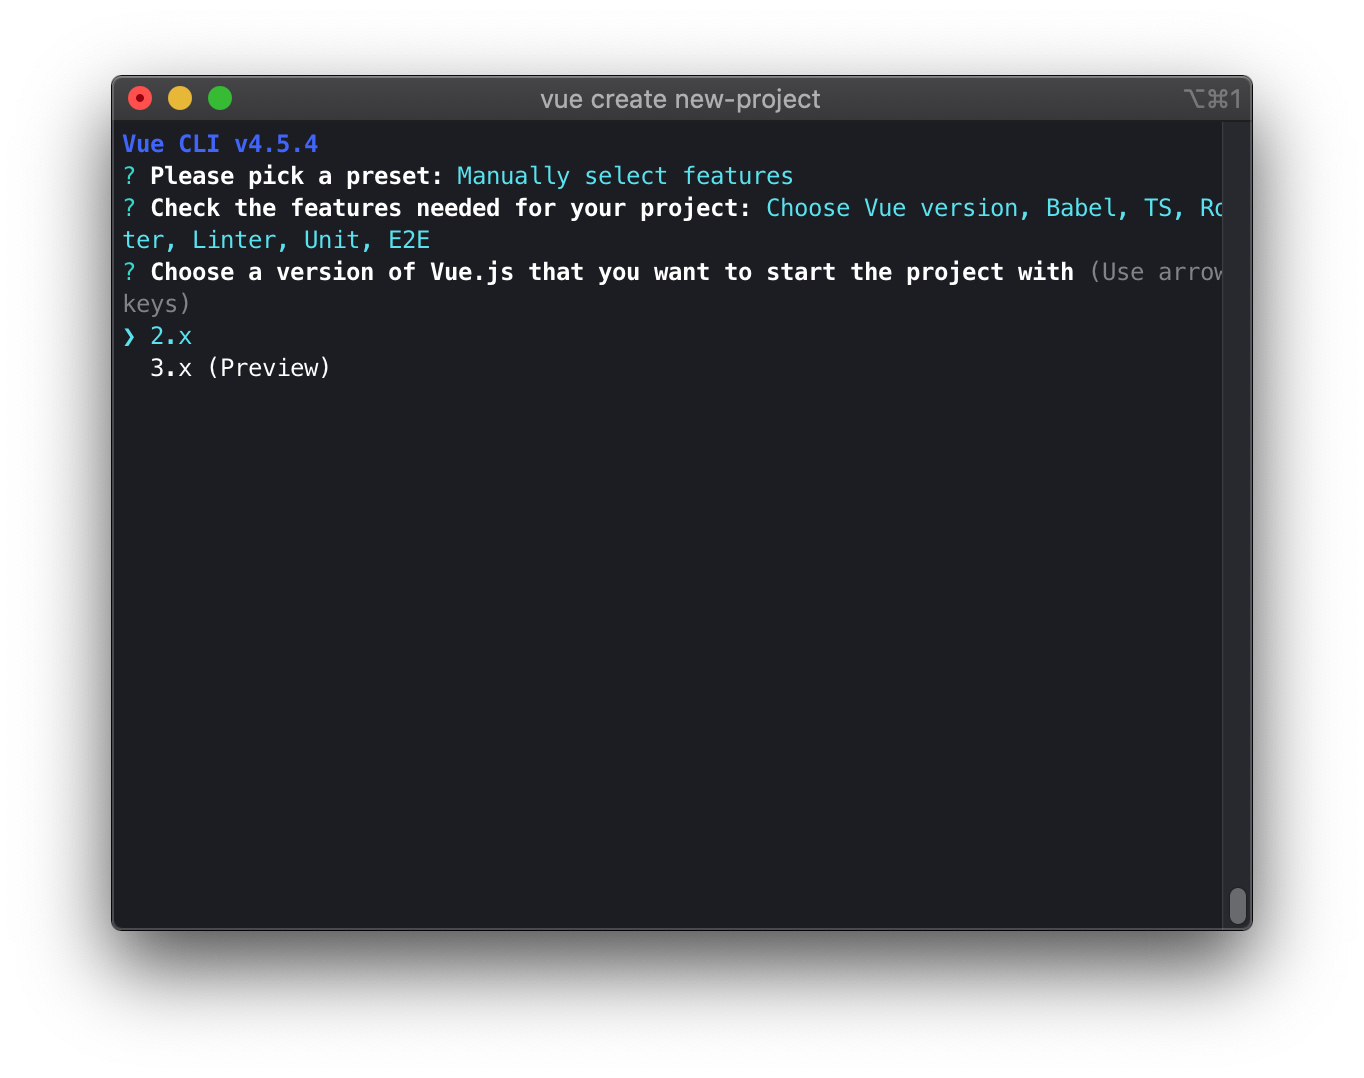
👆 These are the options I chose.
First, I choose the version of Vue I want to work with. As I said, the version 3.x is still in development. The API is still changing so it’s not ready to be part of a stable production-ready application. If you don’t know which version is best for you, go for 2.x.
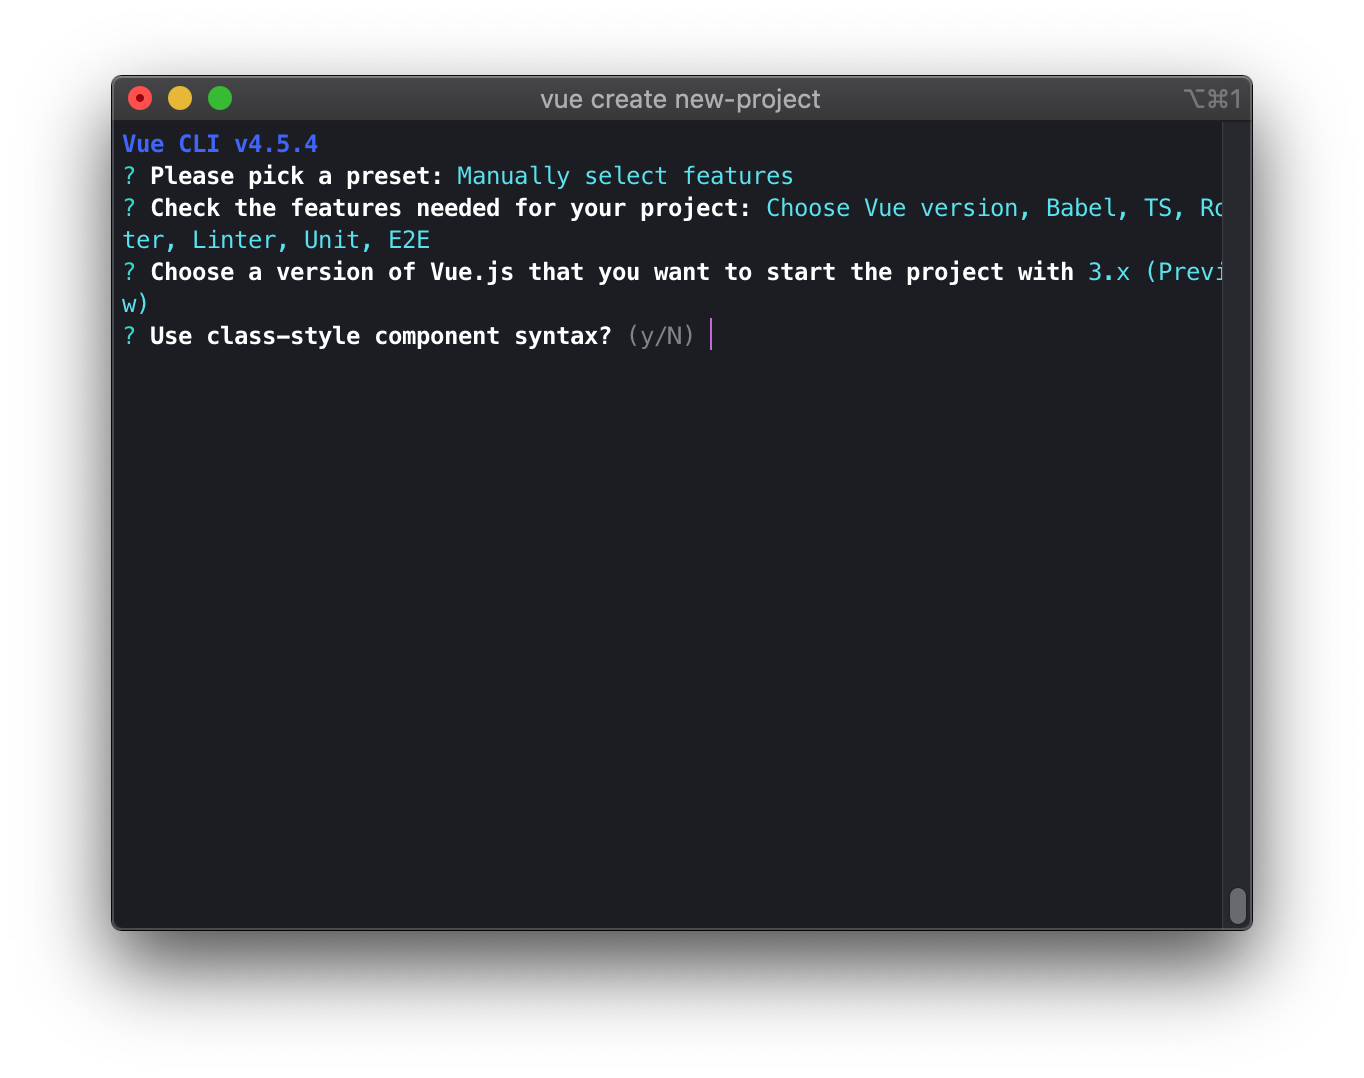
In the next step, I need to choose which type of component syntax I want to use. As you may know, Vue provides two ways of creating components. The first uses the Vue.component or Vue.extend syntax. The second one is using the @Component decorator and JavaScript class syntax. As you can see, Vue CLI creators are suggesting to use the first way of creating components, but still, the choice is yours.
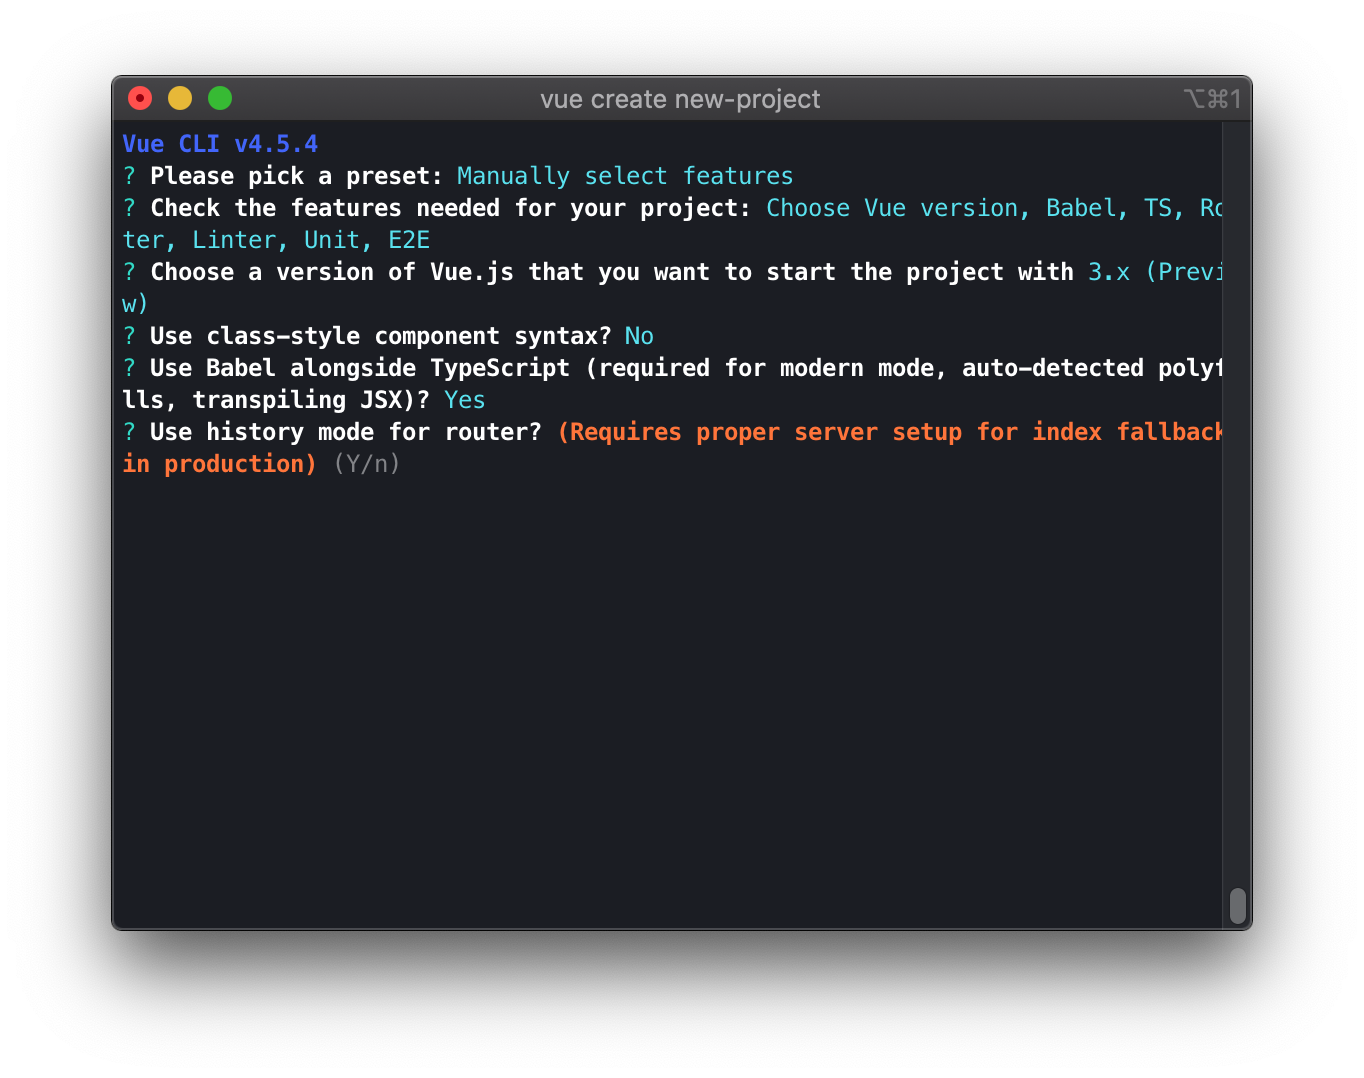
Because I selected to add full support for TypeScript ❤️, I prompted CLI to ask if I still want to use the babel transpiler. In my opinion, babel adds tons of great features so it’s a good idea to keep it.
💡 You might want to know
![]()
Hash mode is the default mode for routing. It uses hashes to simulate real routing. To use full routing, I need to turn on the history mode. However, it needs some server-side configuration. In the simplest way, I need to configure the server so that when it’s not able to find the path requested by the user, it always directs routing to the main index.html file.
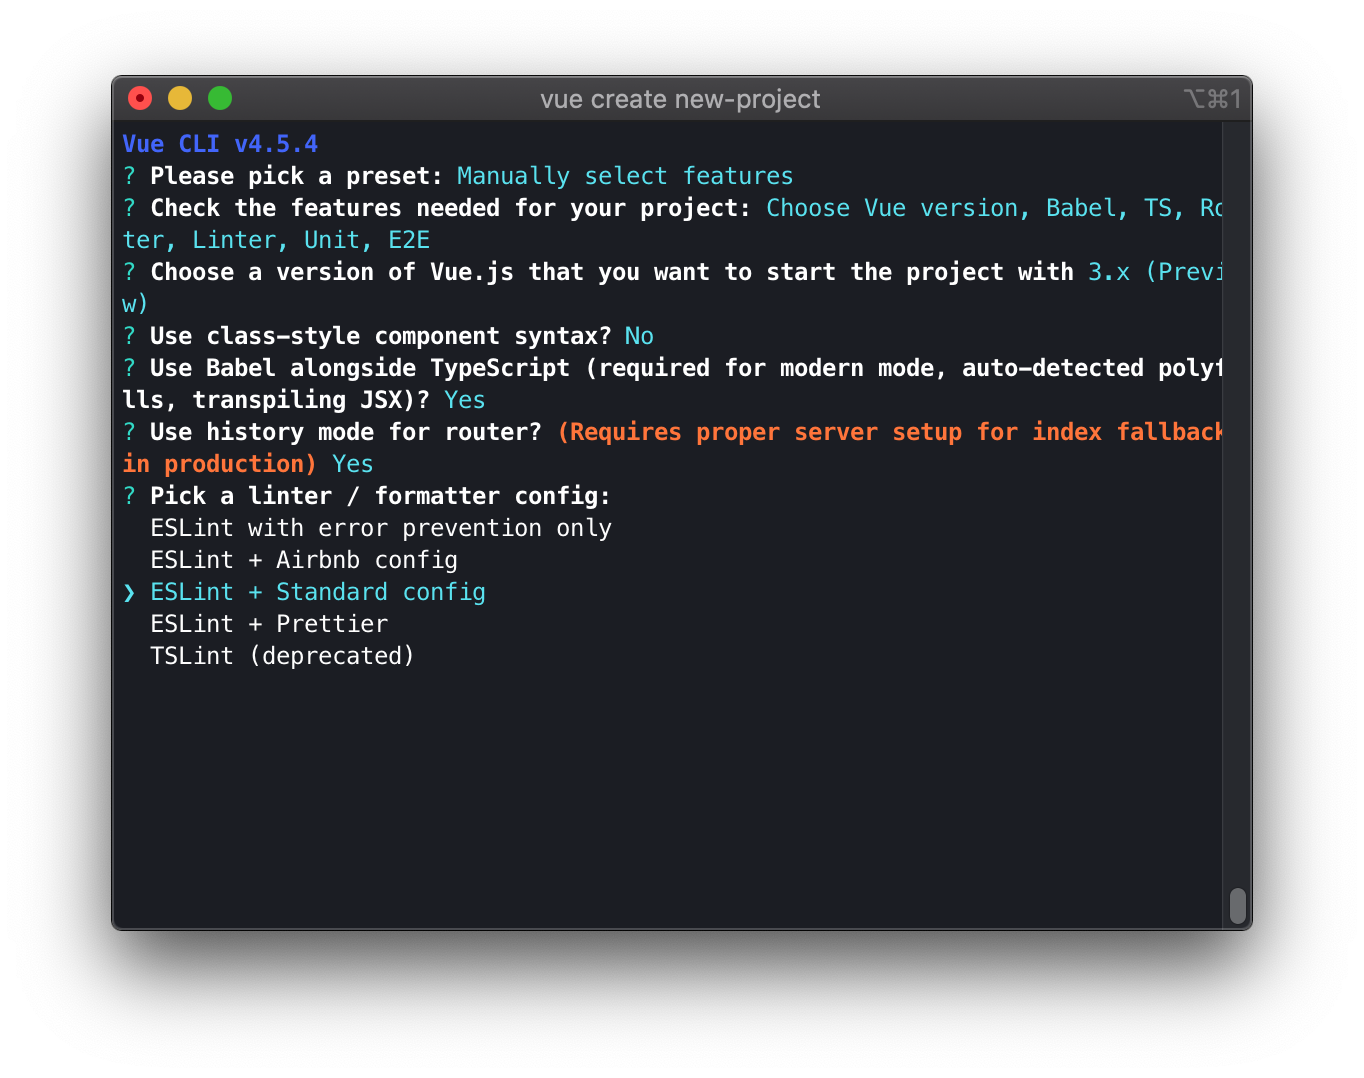
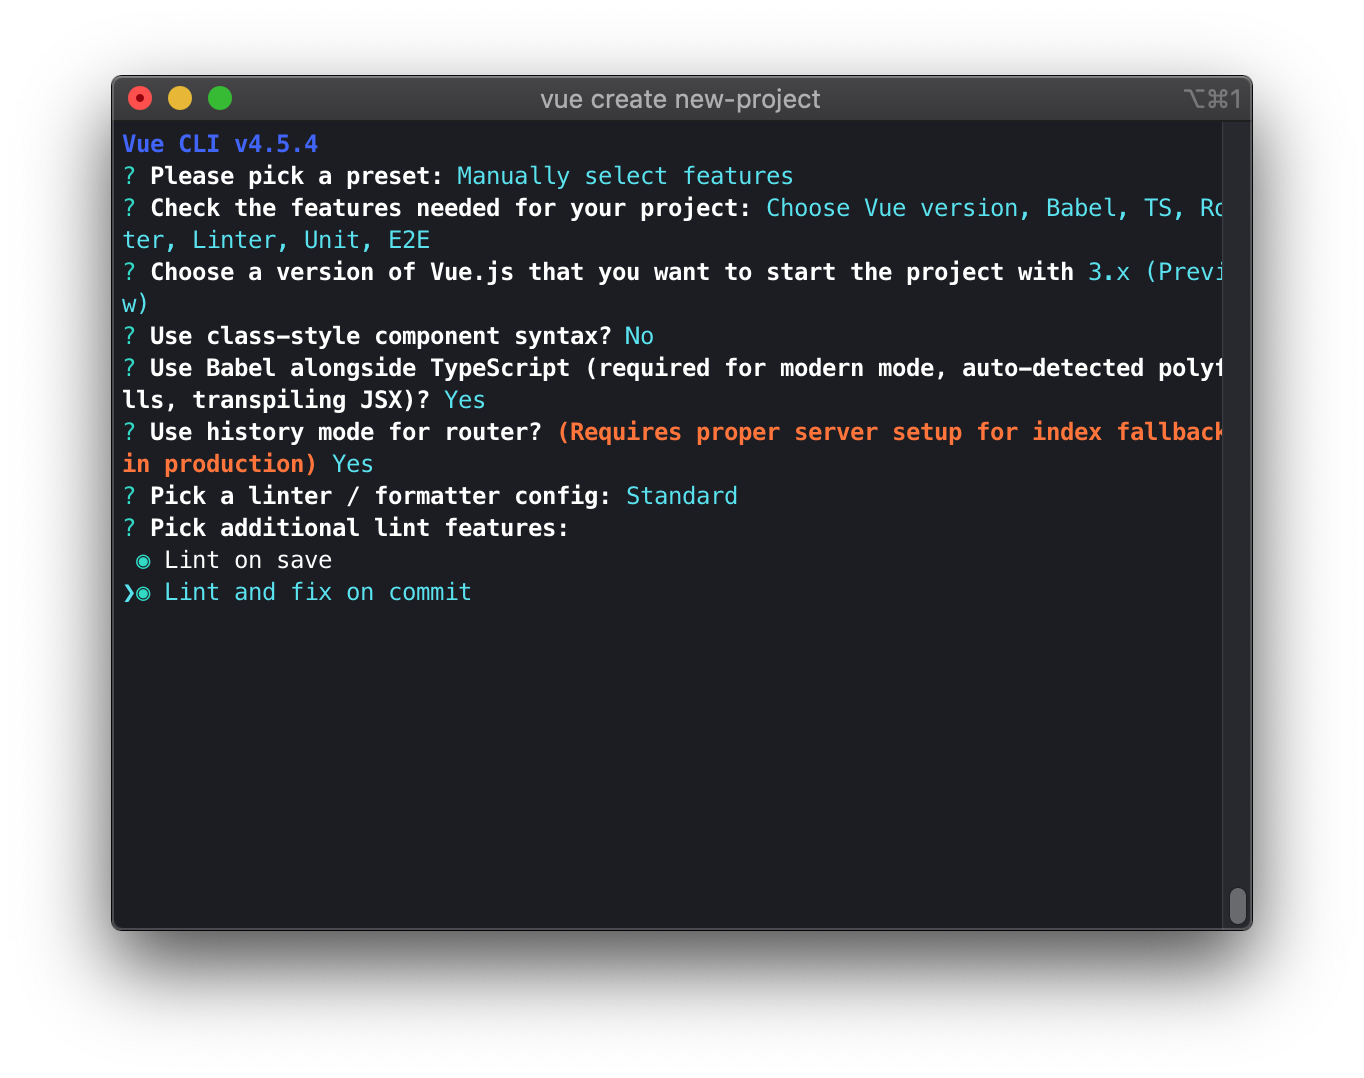
In this step, I need to decide how ESLint will be configured. As you can see, I have a lot of options. I like ESlint with the standard JS config, but this is just my preference. You can choose the option that you want, but you need to be sure that you still want to use TSLint, which is being deprecated.
In the previous step, I picked rules that make sure that my code is consistent. Now, I’m going to decide exactly when Linter should be launched. It may be every time I save the changes, or right before each commit. It’s possible to choose either one of these two options or both simultaneously.
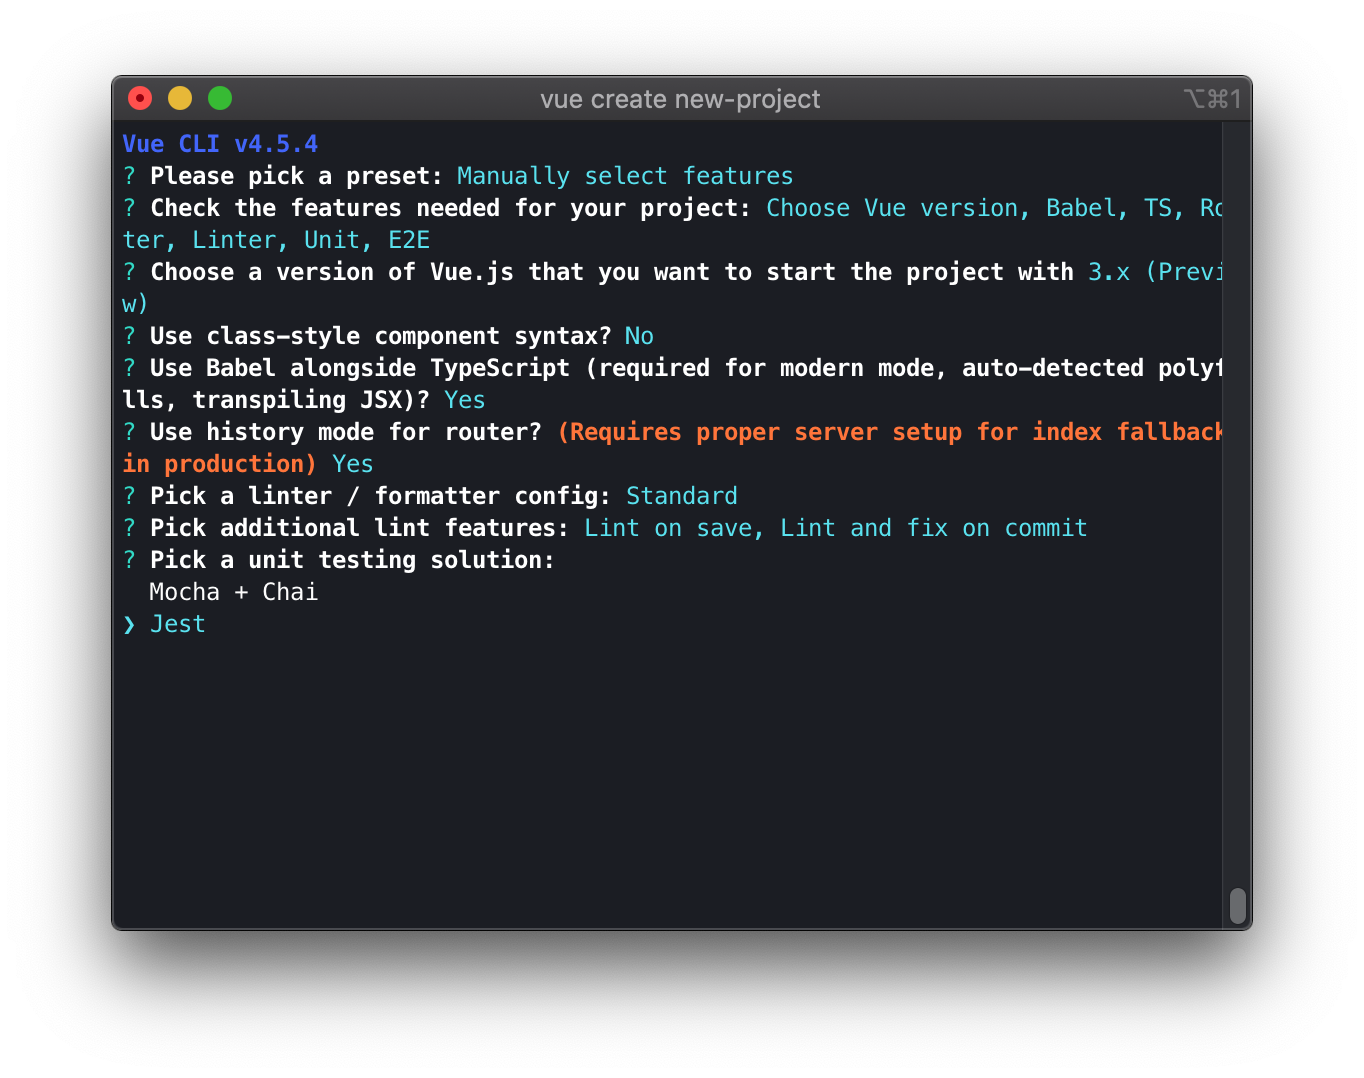
Now, I’m choosing a unit testing framework for the app. It really depends on your preferences. I like Jest as it is a “batteries included” kind of framework and has all the necessary modules built in.
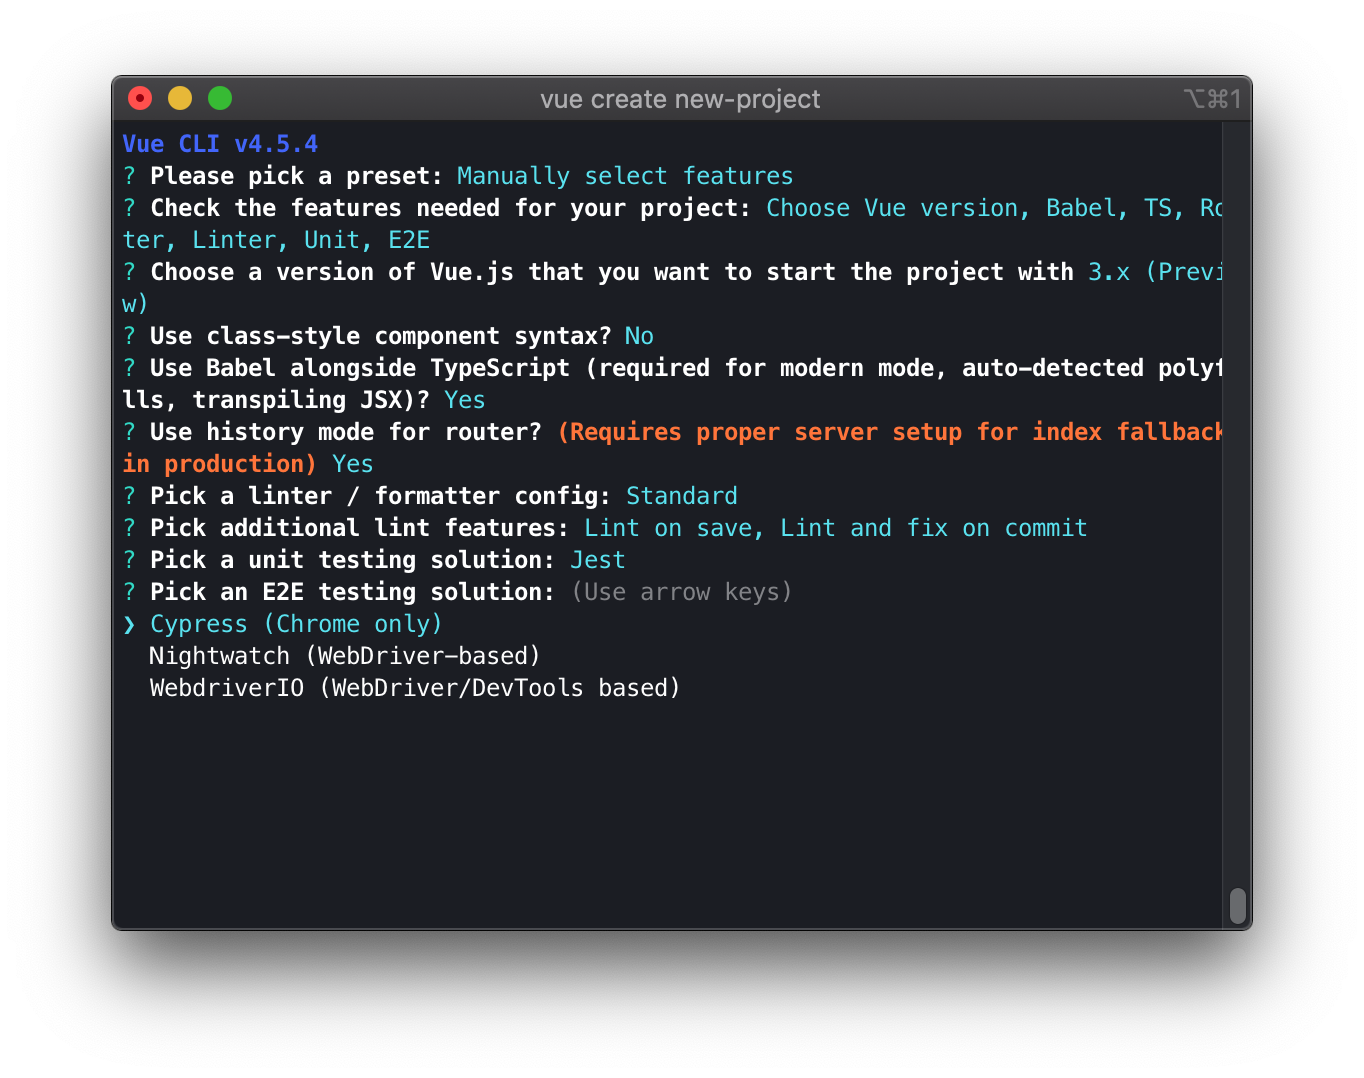
These days, E2E tests are increasingly important. I think it’s great because E2E tests make it possible to test the app in a way that is similar to how end users will interact with it. On the other hand, unit tests only check if the code is correct. If you never had anything to do with E2E tests, Cypress is a good place to start – it’s a mature framework. As of now, it only supports Chrome, but support for Firefox and Edge (in the Chromium version) is well underway.
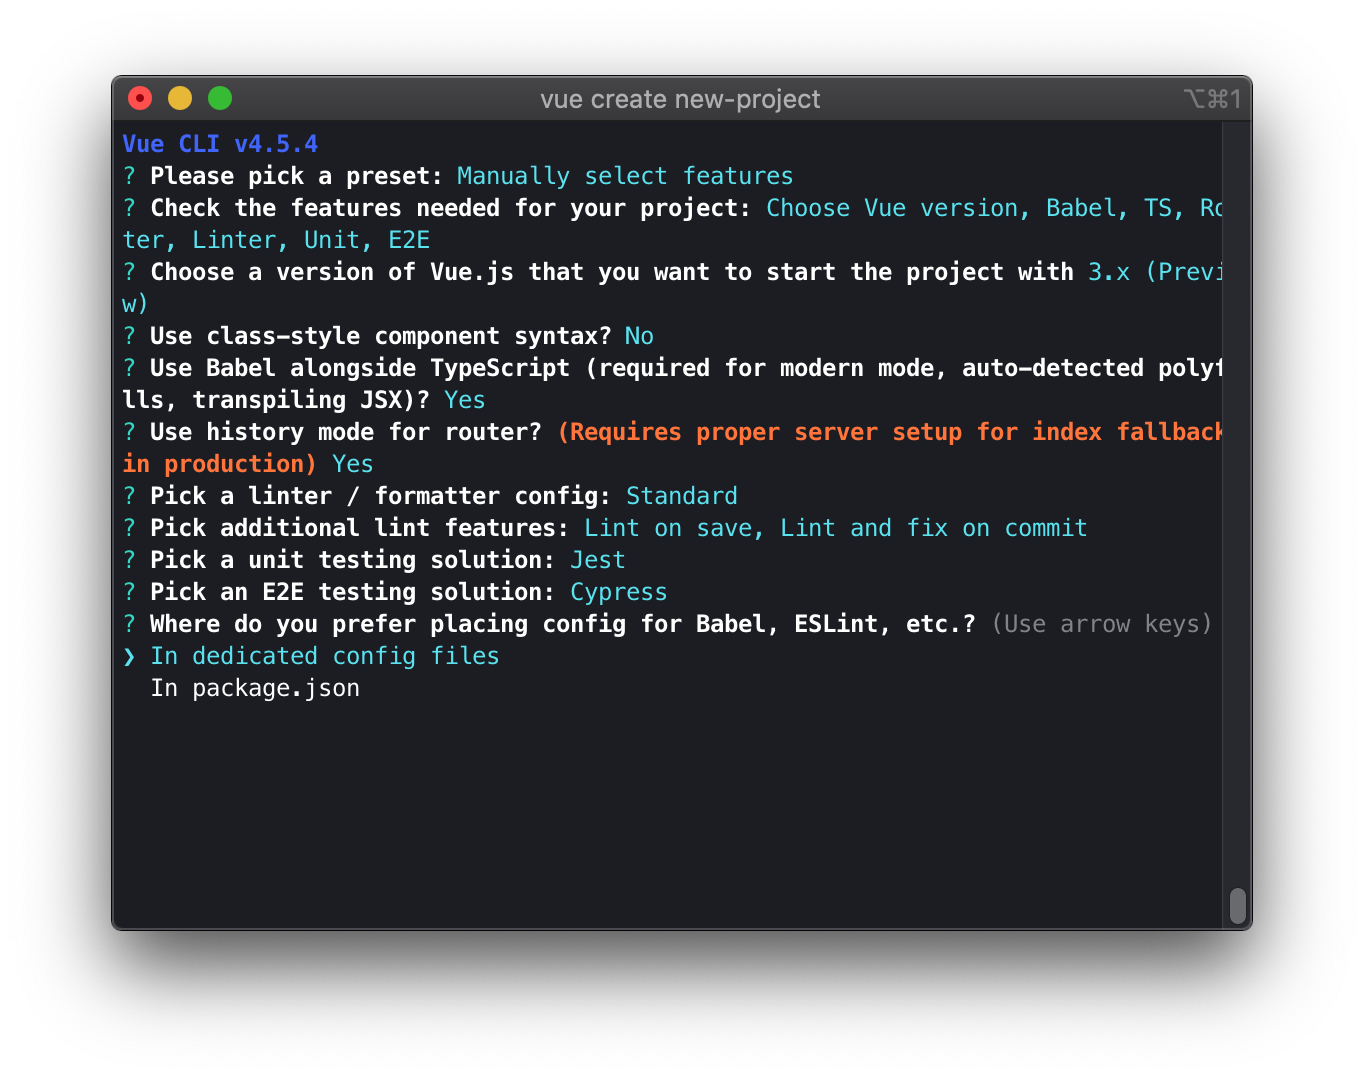
In this step, I have to decide if the configuration is to be saved to separate files or placed in its entirety in the package.json file. I recommend creating separate configuration files for each of the tools.
Vue CLI makes it possible to save the whole configuration so that it can be reused in future projects.
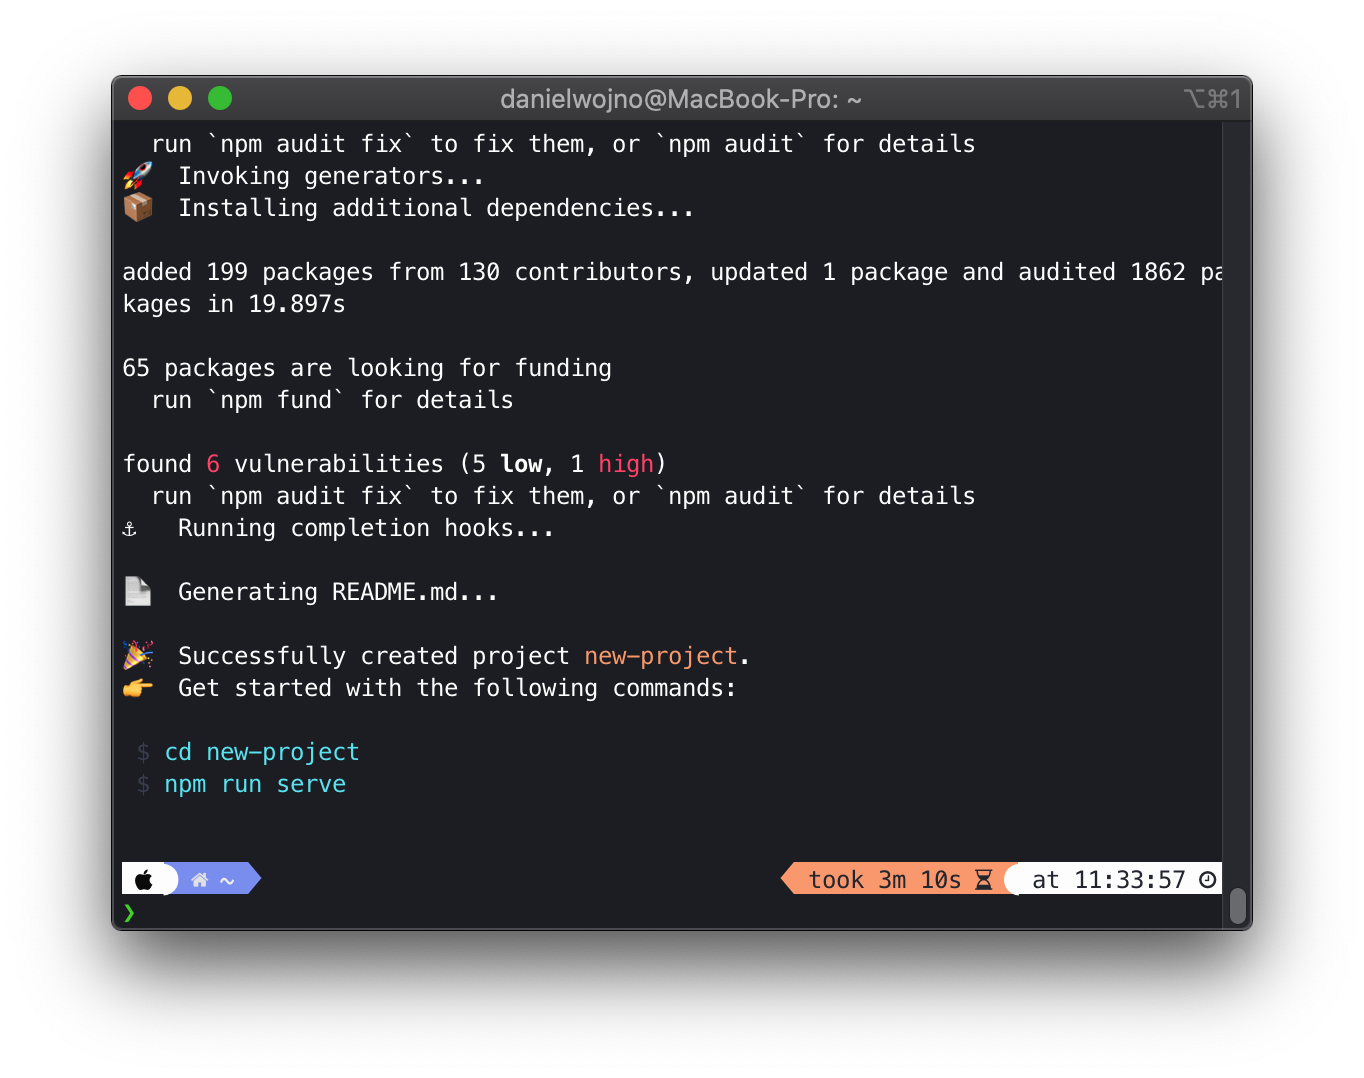
Since everything went smoothly, I can see 👇 a success message in the console.
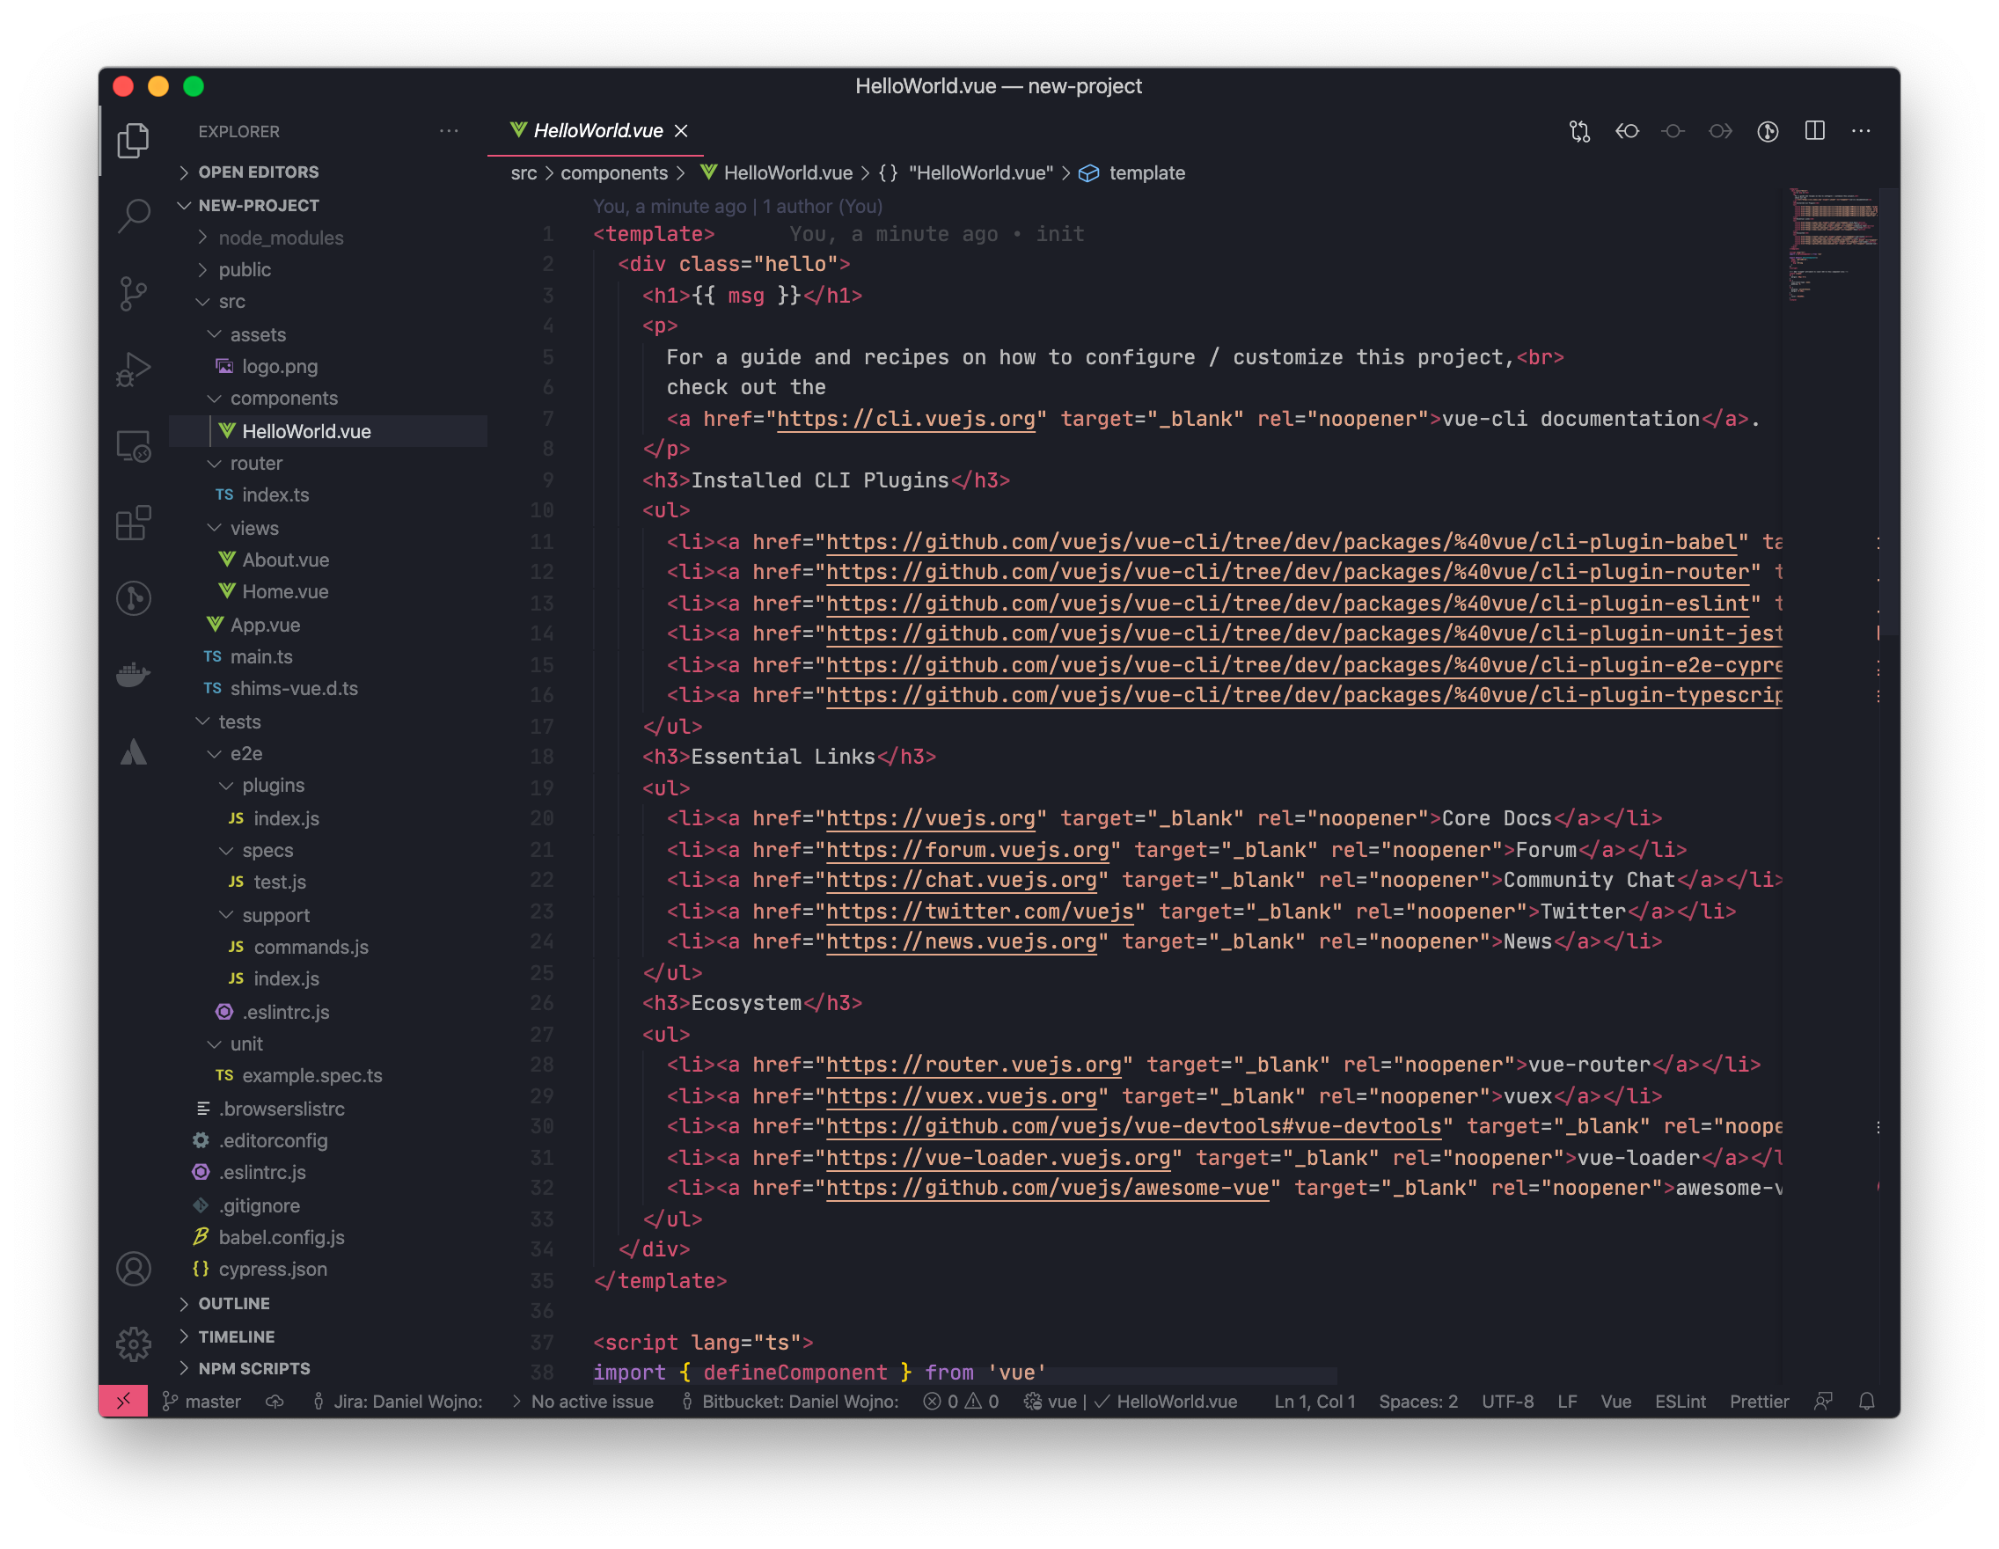
Alright! I just configured a project with Vue CLI. I can see the default Vue directories structure in the editor.
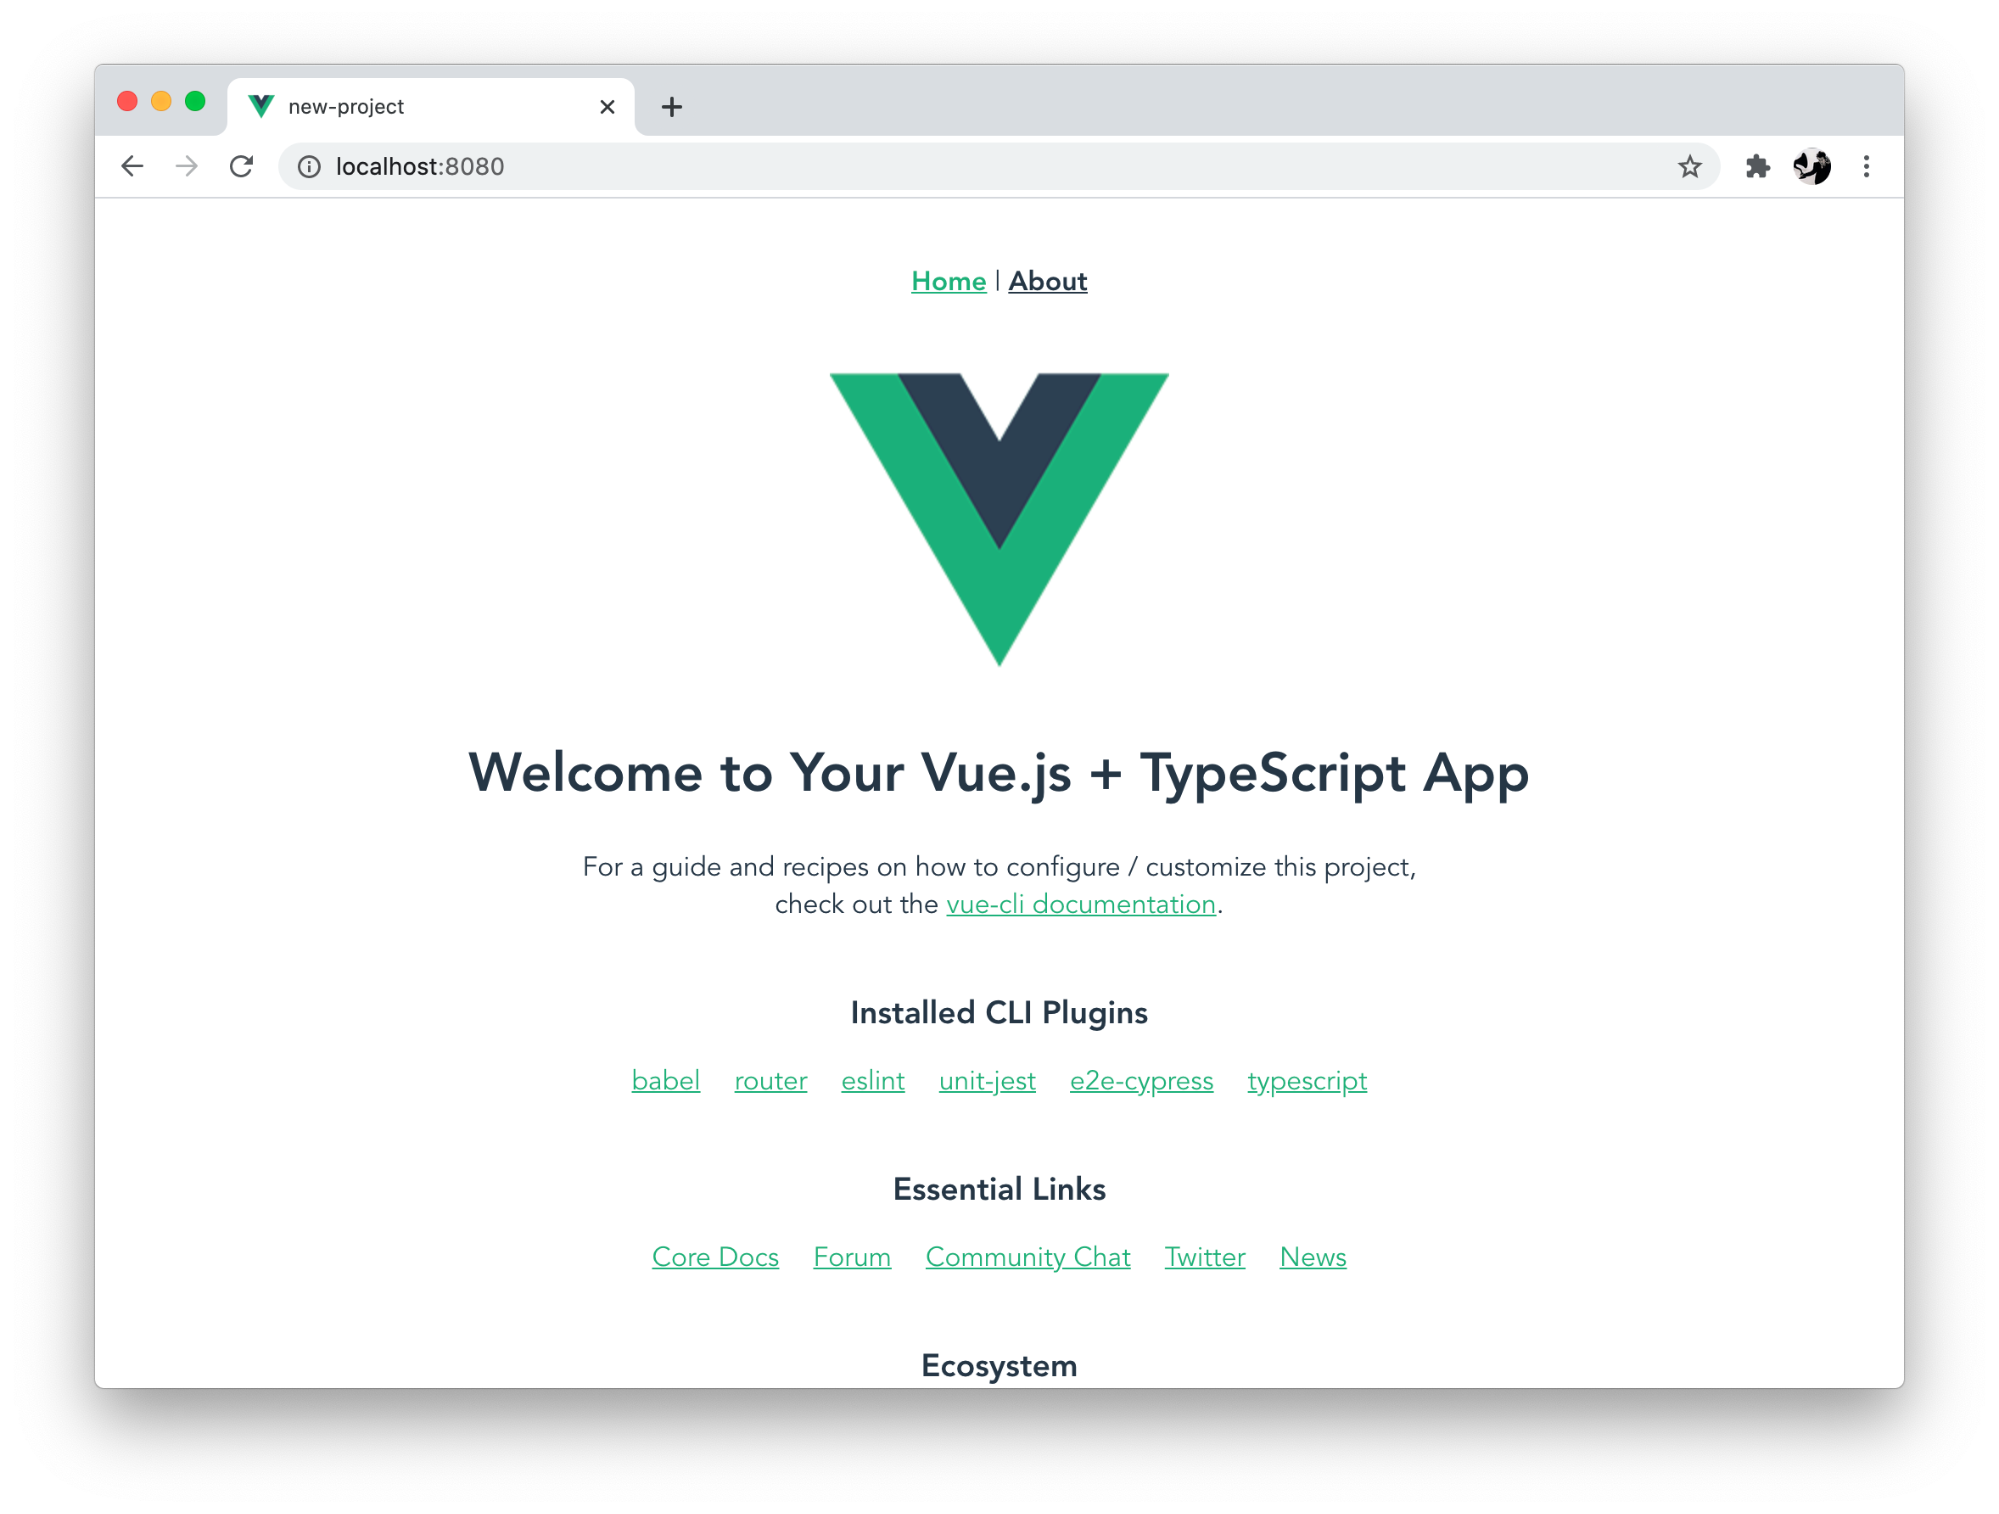
When I run the command made available after completing the configuration, I was able to see it in the browser.
Vue CLI – summary
And that’s it! I quickly created a new Vue project using the new and improved Vue CLI. The new version offers:
- quick setup full of key options,
- the ability to save configurations for future projects,
- more configuration and plugin extension options than ever before,
In essence, I can create Vue app and run Vue app much faster than ever before. Not bad for a JavaScript framework developed entirely by an open-source community!
That’s it for this Vue CLI tutorial. Are there some other Vue topics you would like me to cover? Drop me a line using the site’s contact form!
💡 Master your Frontend game

