23 April 2019
JavaScript static site generator: let’s build a website from scratch!


Contents:
Have you heard about static site generators? If you haven’t followed this topic for the past couple of years, the first thing that may be coming to your mind right now is Microsoft Frontpage and a lot of bad code. However, modern static site generators have nothing to do with that. They are sleek and elegant, and, most importantly, you can use them to develop a fast and beautiful website/blog if you’re a non-technical person. Sounds good? Let’s practice and make a website with a static site generator with JavaScript!
In this article, I’m going to show you how to create a website using a JavaScript static site generator tool called Hexo. This is the first part of my tutorial. In the subsequent parts, I’ll tell you more about deploying and managing these websites as well as about making them even more accessible for non-technical users. Let’s get to the point.
What is a static site generator – introduction to modern static site generators
According to the latest stats, WordPress powers 43% of the web and is the most commonly used CMS platform of all time. It’s almost a natural choice when it comes to creating a blog or a documentation website. But we’re not average developers, are we? We are destined to make things fancier than others!
As you may have already figured out, we’re going to use a tool commonly known as a static site generator. What is it? In simple terms, it’s a tool that, given content and a template, generates static HTML+CSS+JS websites.
Seem a bit 1990ish? Well, yeah, the truth is that we’ve already been there in times long gone. But the tools were different.
Content editing isn’t done with Dreamweaver or Notepad++. We’ll make it a whole lot more elegant and easy. Let’s delve deeper into the modern static website generator.
Static website – project scope
Before we get to code, let’s describe our target website and define the tools we’ll use to accomplish our goal. We’re going to create a blog that has text and images. An inline gallery would also be great.
The whole project can be split into a few parts:
- the site generator itself – deciding which tool to use to generate the website,
- making the actual website – content plus template,
- hosting solution – finding a nice little place that can host our website,
- editorial flow – figuring out how to ease content management for the masses.
Choosing a JavaScript static site generator
Here’s a task that will be absolutely fundamental for the quality of the end result – let’s find a tool that suits our needs.
Check out the StaticGen website – a place that collects information on the latest open-source static site generator tools. There are dozens of tools to choose from, sorted by popularity, programming and templating language, or even a license used. I wanted a pure JavaScript static site generator, which offers clean code, quick setup, and satisfying performance. I’ve decided to use a tool named Hexo. Why is that?
Hexo is written entirely in Javascript. It supports custom post types and multiple-purpose plugins. In addition, its templating capabilities are similar to WordPress, so we won’t get lost that easily. It also produces clean HTML code without any gibberish inside (HI there, MS Frontpage fans!).
If you’d like something even fancier, you can check out Gatsby, which is a React.js-powered site generator. For VueJS fans, nuxt.js or VuePress will provide similar capabilities and experience.
Hexo installation
First things first – we need to install the hexo command (globally):
npm install hexo-cli -g # yarn global add hexo-cli
Now, we can initialize our new project:
hexo init hexo-gallerycd hexo-gallery
npm install # yarn install
And that’s it! Our newly created website is almost ready to be served! Just run a command to test it locally:
hexo serverOur new website is now being served on localhost:4000.
We’re good to go. We can now start writing interesting content and gather visitors!
Creating a blog with Hexo static site generator
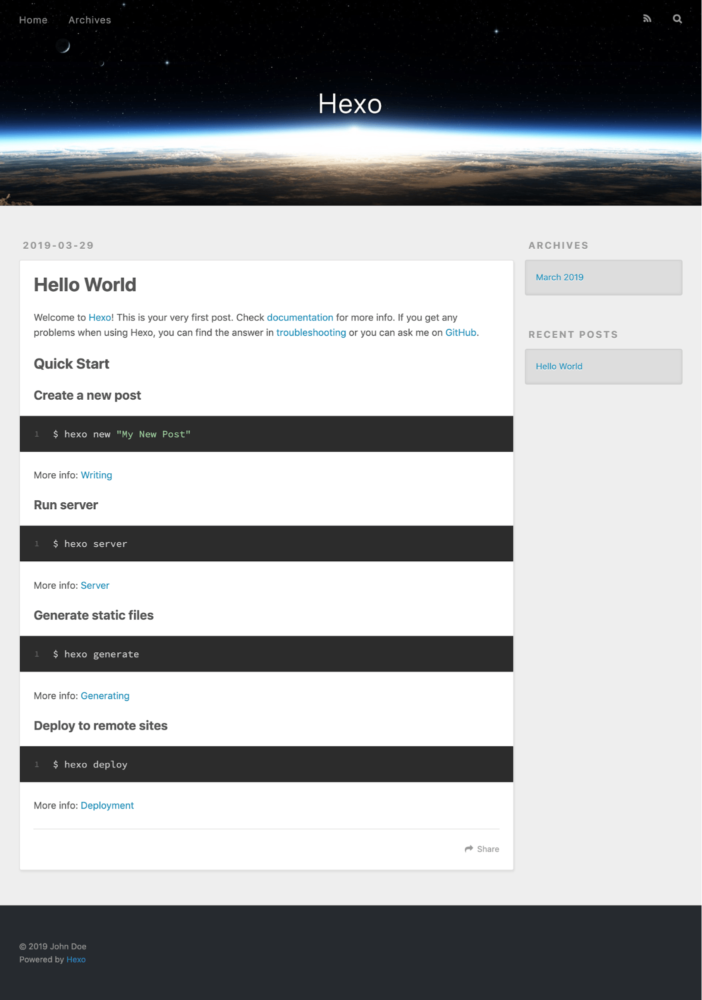
After a clean installation, we will only see the “Hello World” post inside. Let’s create a new one. First, let’s run a command (remember to stop the server beforehand):
hexo new "second post"Now, refresh the page (running the hexo server command again). Voilà! Our newly created content is already there!
Already thinking where our posts are located? They’re inside the source/_posts dir. Open the freshly created file source/_posts/second-post.md and edit its contents:
After refreshing the page, the contents will be instantly updated. Magic!
As you can see, all posts use the Markdown format. Editing them is quite easy even for people with just a basic grasp of its syntax.
Frontmatter – making static site generators more powerful
The last thing to explain is the intriguing topmost part of the Markdown file. It’s not a clean markdown and its contents are not explicitly displayed on the page. This part is called frontmatter – a common way of providing metadata for posts employed by static site generators. Can it be used for anything more sophisticated than inserting the post title and date? Of course, it can! In fact, we’ve already used it to attach tags to our post. Just take a look at the bottom of our article – the tags are already there.
Let’s make something less trivial. We’re going to edit the file above as follows:
*In order to see exactly how to write markdown for this, please view the raw version of the gist above.
If we refresh the page, nothing will change. The front matter is not visible by default. We still need to update the template to display the images. Let’s make two changes:
In the file: themes/landscape/layout/_partial/article.ejs find the following line:
and put the following block right above it:
Some styling for the images is also necessary. Let’s get to the file…
themes/landscape/source/css/_partial/article.styl… and paste the code below at the end of it:
(Don’t mind the Stylus syntax. I’m not a fan of it either, but for the purposes of this tutorial, it’s fine. For your next template, you can use SCSS simply by installing a proper SCSS renderer plugin).
Now, let’s refresh the page and see the magic happen! We’ve created a gallery!
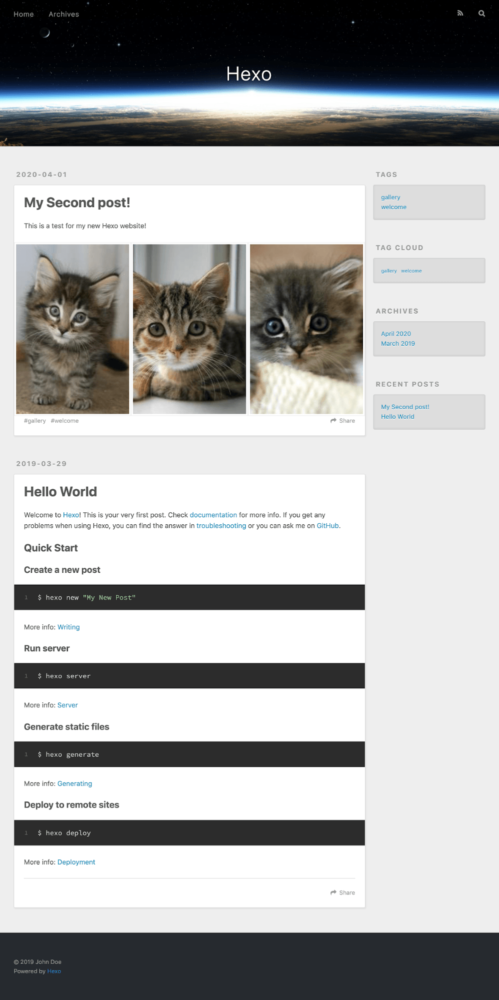
That’s it! We can now fully utilize our website by adding new posts and galleries.
(It’s high time we make a snapshot of our changes. Let’s commit them to the repository. Here’s one that I’ve also created.)
Making our static site production-ready (let’s generate HTML, CSS, and js!)
We’ve created a few posts and run the website in development mode. But we still don’t know how to make it production-ready. In the beginning, we agreed that the final product will be plain old HTML+CSS files. So where are they? The thing is, so far we’ve only been using Hexo in development mode. Let’s generate the final product by issuing a single command:
hexo generateWhat happened?
Hexo parsed all markdown posts and generated final HTML files along with CSS and JS inside the public directory. We can now test it by serving the contents of the above dir – let’s run the http-server tool:
http-server public/(Hint: you may not have the http-server tool installed; in this case, run first npm install -g http-server to fix it.)
There it is! We’ve created a static website that’s easily extendable and editable. In just a couple of minutes, we succeeded in creating a good-looking and full-featured blog that offers good performance and a clean codebase. Site generation with a tool like this is easy. It can be used for a personal blog or even open-source project documentation (a good example of that is TSH’s very own open-source project Kakunin, which uses another static site generator tool called Docusaurus). But in order to do all that, we also need to deploy it.
And this is exactly what we’re covering in the second part of the tutorial.
On a side note, if you are also interested in developing a dynamic CMS-based website, read our best PHP CMS comparison article published on TSH’s blog a couple of weeks ago. Enjoy!
We teach we create, and we design
Take a look at our product design services and tell us about your project idea
Modern static site generators are nothing like the clumsy tools you might have used in the past. They can be used to generate elegant and blazing-fast websites. That’s exactly what we did in the first part of this tutorial, using Hexo. This time, we’re going to deploy our freshly created static website. What is the best way to go about static site deployment?
In the previous section, I talked about the nature and benefits of modern static site generators and walked you through creating a simple website with one. This is a cool challenge – but if you want experts go on through to our agile development teams here. This time, we’re going to deploy it. I will also show you a really great tool that can be used to do much, much more than that.
Basics of static site deployment
We already know that the website we’ve created is just a bunch of static files. This allows us to push it to literally every web server on the Internet.
Although Hexo tool contains deployment commands, we want to make it even fancier, without having to run the deploy command manually. In this scenario, we’ll use the excellent Netlify CMS platform, which has a few interesting advantages over regular static file hosting.
See also: The best CMS comparison
For other alternatives, there’s a quick-and-easy solution based on Firebase Hosting. You could also try Heroku (free tier) or even just push the files to S3 cloud. Another reasonable solution is Github pages, which also works using static site generators underneath.
Static site deployment with Netlify
What’s so special about Netlify that I consider it worth a try? Having in mind that our website is Git-driven and managed by editing text files, let’s think of a typical editorial flow:
- Create or edit a post.
- Commit and push the change (this is an optional step, although we’re cautious about our change history, aren’t we?).
- Generate new HTML code (using the hexo generate command).
- Deploy to the target machine (using either hexo deploy or good old FTP).
Seems easy, isn’t it? Well… yes. But would it be this easy for a non-technical content manager? Are all your customers familiar with a computer terminal, Git & probably a few other tools required to do all that? Doh…
Here comes Netlify – a hosting provider that facilitates automating tasks for serving static websites, but limits the configuration and required work to a bare minimum. And it does so really well!
All you need to know is how to git-push your changes, and everything else will be handled automatically for you.
For our next steps, we’ll assume you’ve pushed the code to a remote repository. We’re going to use GitLab for this. It will come in handy in the next part of the tutorial.
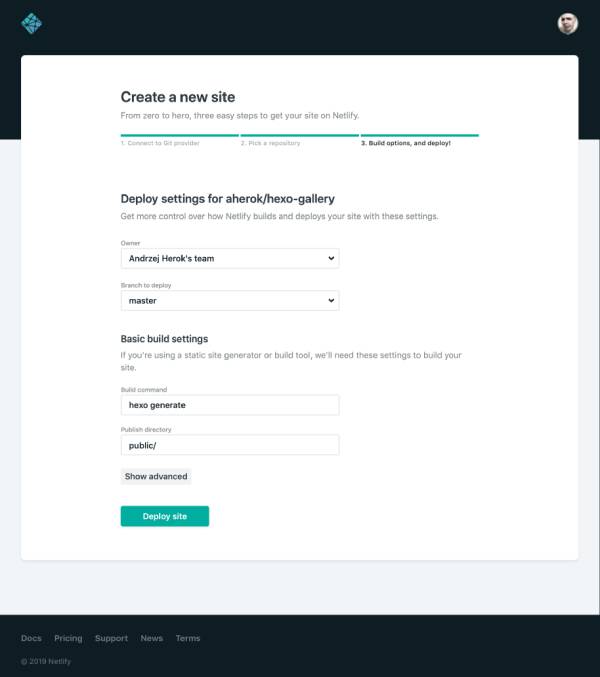
Let’s get going – there are only a few steps to configure automatic deployment for our website:
- Create an account on Netlify.com.
- Create a new project and connect your GitLab account via OAuth dialog.
- Select the repository that contains the project.
- The next step is the basic configuration: select the proper branch to be automatically deployed and configure build command. Netlify has already guessed that we’re using Hexo so we can leave it as is.
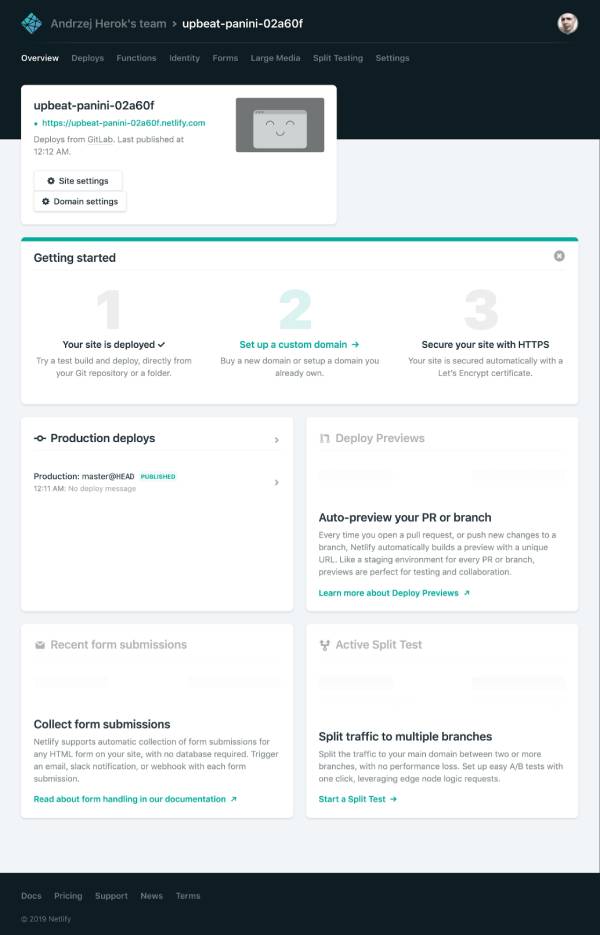
- Wait about 1-2 minutes for the build process to finish (you can see the “Site deploy in progress” message)
- … and here we are! Our new website is live! You can check it out by clicking the link Netlify has generated for you.
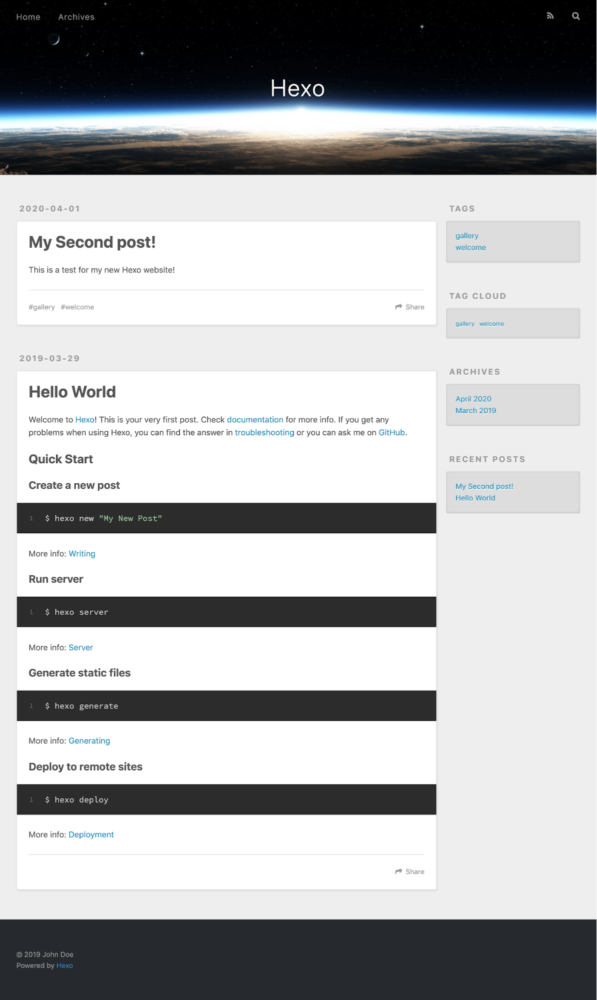
Let’s see what happens when we add new content to our “second post” file and push changes to the repository:
title: My Second post!
date: 2020-04-01
tags: [welcome, gallery]
images:
  -
    alt: First image
    url: http://placekitten.com/200/300
  -
    alt: Second image
    url: http://placekitten.com/210/315
  -
    alt: Third image
    url: http://placekitten.com/220/330
---
This is a test for my new Hexo website!
Tutorial on [TSH Blog](https://tsh.io/blog) rocks!
Now, if you commit and push the changes to the repository, you’ll see that Netlify automatically starts regenerating your website. After a minute or two, you’ll get to see your fresh content live.
Does this process seem magical to you? Let’s break it down to see what actually happens under the hood:
- Netlify attached a webhook to watch for changes in your repository. This way, it gets notified each time you make changes to the repository
- Each change triggers a build command that you’ve specified in the configuration step (runs hexo generate command).
- After the command succeeds, the new version is pushed to a web server using contents from the /public directory specified during the configuration step.
See also: How to prepare for a penetration test?
Beyond deployment – Netlify features worth mentioning
Although the website is live, there are still a few important things we can (or rather should) do. We want a user-friendly URL. To do that, we need to attach a custom domain. Another logical step is to add an SSL certificate. With Netlify, doing both is extremely easy. Adding a certificate can be done at the click of a button, using the superb Let’s Encrypt service and its automated API.
Of course, Netlify’s wide range of features is not limited to supporting static sites. It includes:
- Form submissions – helps create a contact form and handles data collection.
- Config variables – allows injecting variables during the build process so as not to compromise sensitive variables by putting them inside the code
- Branch deploys – a brilliant idea to simultaneously deploy more branches apart from the primary one. Each branch resides on a different subdomain, which allows for testing changes before they are pushed to production. A great solution for quick A/B testing or verifying draft builds.
- AWS Lambda functions support.
- Providing a basic yet powerful authentication system for your frontend applications.
- Redirects configuration – should you need to redirect URLs from your previous website.
- Development environment (fresh news at the time of writing this article), which allows for running the whole Netlify environment locally.
The number of benefits is quite impressive. For more details, take a look at the docs.
Commercial use of Netlify’s free tier service
Since I already mentioned the use of Netlify as a testing environment, it may be worthwhile to talk about its commercial use. Netlify’s ability to launch and update in a couple of minutes saves a lot of time and makes it a great and very practical testing environment. It turns out that even the free version of Netlify can be used in commercial projects to its full extent. I highly recommend you play with it and see if it can become a part of your organization’s development process as well.
See also: PHP & Websocket
Static site deployment with Netlify – recap
We’ve already prepared a static website. We also know how to edit the blog and create metadata. Now, we also got to learn how to facilitate the deployment of our website. In the next article, we’ll find out what more we can do to make content management of a static website easier. Again, we’re going to use Netlify to achieve these goals.
With the emergence of modern static site generators, this type of websites is getting popular again. Being lightweight, simplistic in features and quick to set up, they are perfect for blogging or as a website for an open-source project. But for non-technical individuals, using a static website everyday may prove too difficult. In the final part of my static site generator tutorial, I’m showing you how to add CMS functionality to make management easier.
In the previous parts of my static site generator tutorial, we have created a static site with Hexo and then we’ve pushed it to the web. The tutorial may seem complete, since the website is available publicly. Yet, it still lacks a crucial feature – content management for the masses.
As I’ve mentioned before, the default editorial flow for the majority of static site generators may become a little cumbersome for people that are not tech-savvy. We’d need to teach them the Markdown syntax and tell them a few words about Git versioning (push commands are required) as well as about all the multiple steps required to complete trivial tasks such as writing a blog post.
Static site content management – how does it work?
Luckily, static site generators became so popular that we’ve got plenty of options to facilitate all this without the hassle. In this tutorial, we’ll focus on an alternative called Netlify CMS. Why is that? Because it’s open-source, self-hosted and under active development by Netlify – our favorite static sites hosting solution!
You may be wondering: how do CMSes for static site generators work? Well… It depends, but most of them will connect to your GitHub repository and save the modified files directly to it. Once the changes are pushed, Netlify CMS takes over the job of updating the website’s content.
Netlify CMS – setup
As I mentioned before, we’re going to use Netlify CMS to create our admin panel. The CMS itself is being distributed as a JS script file (well, that’s not the only option, but that’s the easiest one) that may be loaded in any HTML file. Let’s prepare an HTML file that will be our entrypoint for the admin.
We want the panel to be accessible publicly (don’t worry about privacy, we’ll take care of authentication later). Let’s put it under the /cms_admin/ URL of our website. In order to do that, first we’ll need to update the Hexo config file. By default, Hexo parses all files under the source directory and converts them using included plugins. We don’t want our admin files to be converted in any way so we need to make sure Hexo will pass the conversion. In the _config.yml file, insert:
skip_render:
 - "cms_admin/*"
This will inform Hexo that all the content inside the cms_admin dir should not be rendered or transformed by the tool, but simply copied to the destination directory.
Now, let’s create an index.html file inside the newly created source/cms_admin directory and paste the following content to our entry file:
As you can see, the file is pretty straightforward. The only actual thing it does is loading the JS file that contains the CMS app.
When you run the app now and head to the http://localhost:4000/cms_admin/ URL, you should see the the “Error loading the CMS configuration” message. That’s a good sign. We’re going to need to prepare a configuration file for our panel to work. Let’s create a file named config.yml inside the source/cms_admin dir and put the configuration inside.
The configuration can be split into three parts which we’ll explain separately:
- Repository information and authentication method.
- Directories and the corresponding URL’s configuration.
- Content configuration.
Repository info
Let’s paste the first part into the config.yml file:
backend:
  name: gitlab
  repo: /
  auth_type: implicit
  app_id:
The backend option is almost self-explanatory. It defines where the repository is located and how to authenticate with it. We’ll use a Gitlab repository and an implicit authentication, which is the simplest way of authenticating as it doesn’t require running a separate OAuth service (we use the Gitlab one).
More information about authentication alternatives can be found in the documentation.
To generate the APPLICATION_SECRET value, you’ll need to create an OAuth application config inside Gitlab settings. In order to do that, go to the Settings page of your Gitlab account and create a new Application under the Applications tab. After creating it, you should get your APP ID value in the next screen.
Media handling
Let’s move on to the second part of the config file. Paste the following options:
media_folder: "source/images/uploads"
public_folder: "/images/uploads"
The entries above define how to handle media paths:
- media_folder defines where to find images that we can use inside our posts.
- public_folder defines what will be the public URL of images.
If you’re not convinced about keeping all media files in the repository, there’s also a way to host your images using CDN services. You can find more information in the docs, but for the sake of brevity we’ll use the default variant – keeping all media files inside the repository.
Posts structure
We’ve got one more thing to configure – the structure of our posts for the editor to know which data we want to save into our Markdown content files. Let’s take a look at the last post that we’ve created in the previous article to get to know what types of data we need to handle in our CMS:
title: My Second post!
date: 2020-04-01
tags: [welcome, gallery]
images:
  -
    alt: First image
    url: http://placekitten.com/200/300
  -
    alt: Second image
    url: http://placekitten.com/210/315
  -
    alt: Third image
    url: http://placekitten.com/220/330
---
This is a test for my new Hexo website!
Tutorial on [TSH Blog](https://tsh.io/blog) rocks!
Going from the top we can distinguish:
- title: a text value,
- date: date value,
- tags: a list of text values,
- images: a list of objects that contain a text value and a URL
- body: the last, yet the most important part – the Markdown.
Luckily, all the required data types are handled automatically by our CMS of choice so we can just define the fields in the YML config file. Let’s create a whole definition for our CMS. Paste the following content to have all the required fields covered:
collections:
  - name: "post"
    label: "Post" # Used in the UI
    folder: "source/_posts" # The path to the posts
    create: true # Allow users to create new posts
    slug: "{{slug}}" # Filename template
    fields:
      - { name: "title", label: "Title", widget: "string" }
      - { name: "date", label: "Date", widget: "datetime" }
      - { name: "tags", label: "Tags", widget: "list" }
      - name: images
        label: "Images"
        label_singular: "Image"
        widget: list
        fields:
          - { label: "Alt", name: "alt", widget: "string" }
          - { label: "URL", name: "url", widget: "image" }
      - { name: "body", label: "Body", widget: "markdown" }
As you can see, the collections option defines a list of content types that are available to edit. It’s important to know that Netlify CMS handles multiple content types at once and for each of them the fields structure may be defined separately. We’ll use only one type – post – but if you’d like, you can copy-paste the inside structure and adjust the new structure for videos, announcements and more.
Most of the options are self-explanatory and the real magic happens in the fields option.
This is the heart of the CMS as this setting defines all the metadata that we’ll be able to edit in each of our posts.
The widget field informs our CMS how the input field should look like. Netlify CMS comes with plenty of Netlify CMS custom widgets defined out of the box (take a peek in the docs), but if you’d like, you can also use your own ones.
Now that it’s configured (you can review the whole file here), it’s time for a test drive!
Run the website and enter the CMS URL (http://localhost:4000/cms_admin/). You should see a login prompt:

Click the login button and authorize yourself using your Gitlab account. If all goes well, you’ll see a list of your posts, much like the one below:
We write tutorials because we're know-it-alls
See how to work with our custom agile team wise guys
