21 February 2023
Zustand. React state management done right with bear minimum


Contents:
If you never heard of Zustand before but still wake up from night terrors with Redux as the main baddie of your nightmares, you definitely need to become friends with this jamming bear. It requires only THREE minutes to set up, it’s flexible, unopinionated, and probably the easiest to learn and operate. So bear with me – today, I’m gonna show you how to use Zustand.
What is an application state?
State is a piece of data that is stored by our program to reflect the changes that occur when it’s running and when the user interacts with it. This totally sounds like a boring Wikipedia definition so let’s take a look at what can actually be stored in a state:
- information about the logged-in user,
- list of products fetched from the backend,
- flag indicating opened/closed state of the navigation bar,
- the sum of prices from each product in the user’s shopping cart.
We distinguish two types of states in React applications
Local state
State that is strictly connected with a component that changes the UI appearance. This state doesn’t have to be shared across multiple components. Flag keeping the navbar state from the list above is a good example. The navigation bar is probably the only component that cares about this piece of information so you don’t have to worry about sharing it.
Global state
On the other hand, this state represents the data that can be used by multiple nested components in your application.
Evolution of state management in React
Before modern frameworks, managing state in web applications was quite a challenge. Especially, scaling and managing websites introduced a lot of problems.
After SPAs and other fancy tools like React were introduced, we’ve gained the possibility to keep the state in the outermost component and pass it down to nested state components through so-called “props”. This sounds nice and simple but this kind of “prop-drilling” was triggering too many re-renders. It had a terrible influence on performance, and components quickly became super hard to work with.
React tried to solve this issue by introducing the Context API. Even today, this is quite a popular tool. But there was one state manager that completely changed the approach to managing state – Redux. Redux introduced the idea of a single store that keeps the entire state in one place. API allows you to modify the data using action creators and reducers. For some time, Redux became an industry standard. Every single React job application required Redux to be a part of the candidate’s skill set. The prop drilling issue was gone, and components did not have to keep and manage too much stuff. This sounds like a solution to a state management issue, right? Well, it was, for a bit…
However, there was a problem with Redux – it was super complicated. The amount of boilerplate was crazy and the entry threshold for beginners was really high and even pros were complaining about it. React team reacted by introducing the Redux Toolkit, quite similar to Redux but much simplified. Toolkit was much easier to lunch and the boilerplate was limited as much as possible.
The market wasn’t going to be idly waiting for Redux devs to simplify their solution and took matters into their own hands. Two more aspiring players were introduced to the game:
- React-Query – a library that helps you to manage server state. Give it a shot, I guarantee it’s worth it,
- Zustand – the main character of this article.
INB4: The truth is that there were more state management libraries than just these two but I if wanted to mention everything, you’ll be here all day.
What is Zustand?
![]()
Zustand is a state management solution developed by Jotai and React-spring’s creators. If thinking about a new frontend tool is unBEARable to you, here are some numbers that might convince you to try it out:
- received 26 000 stars on GitHub,
- downloaded 37 000 000 in total,
- bundle size is only 1.14kB,
- still hits over one million weekly downloads.

How do you use Zustand in practice? (finally some code!🎉)
I’ll show you how to create a simple store and connect it to a component. I’ve created my example with the Create React App. If you feel like following along, just create a simple react project using the script below:
npx-create-react-app
… or use another online playground, e.g. React CodeSandbox.
Install Zustand
In order to install Zustand, run the following command:
npm install zustand
or
yarn add zustand
Create some interface elements
I’m going to create a simple counter component that allows the user to click + and – buttons to modify the number between those buttons. I’ve added some custom styles but feel free to add your own styling. My version looks like this:
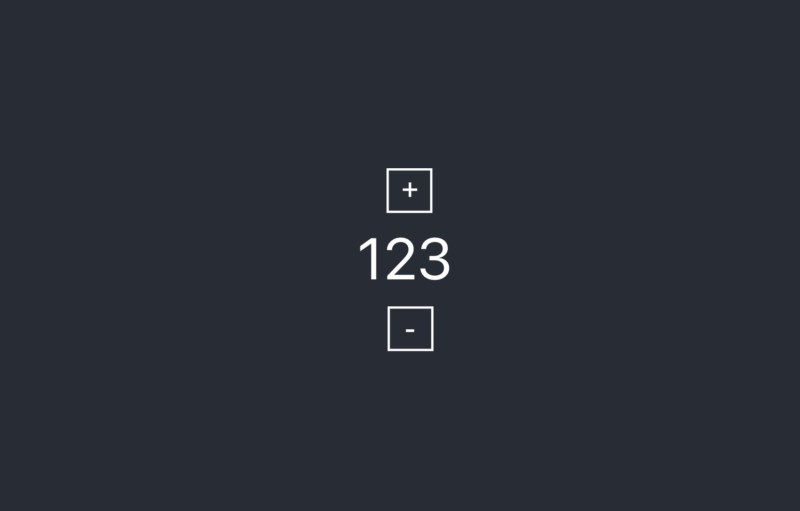
Counter component
After the counter component is ready, you can mount it in the main component.
App main component
Connect the application with Zustand’s store
The first step is to create the store. Create a new file and name it Store.js. This is what your store will look like:
Cool thing? Your store is a hook!
In the example above, I used the create function taken from Zustand. The callback function passed to create() returns the object and this is exactly where you define the properties you want to store in Zustand.
Your simple store is ready, so let’s take a look at how to use it in a counter Component.
So what happened exactly with this snippet?
- began with importing your brand-new store,
- inside the Counter component, we used the useCounterStore hook to reach for the data we declared in the store, and then assigned it to the counterNumber variable,
- used the counterNumber in the brackets between the buttons to show it on the UI.
… the end.

However, we are not completely done-done yet. The next step is to make your app a bit more interactive. Let’s jump right into it!
Learning about state management? We've got more resources:
Update the state
Begin with the “+” button. First, create the proper function in the store.
Under the initial piece of state “number”, we created a increaseCounterNumber function that calls “set”. The set comes from the argument passed to create callback. This is really important because this is exactly how you modify the store data in Zustand! It’s really similar to how you modify state in React because in order to achieve that you need to call setState() function or your custom state-setting function coming from useState hook.
Back to our example – the last thing we did was to pass the state argument to set() callback and return the modified data.
number: state.number + 1
Now, attach that function to the button.
That’s it! Run the app and click the + button. You should see that the number value between the buttons gets incremented after each click.
Decrementing functionality has to be created by analogy. Update the state with the following line:
decreaseCounterNumber: () => set((state) => ({number: state.number - 1}))
The final version of the counter component looks like this:
Side note
You’ve probably noticed that we didn’t have to use the spread operator while updating the state object.
In React without Zustand updating the state usually looks something like this:
setState({...state, number: state.number + 1})
That’s not the case with Zustand because set() merges the state with your new value. It means that it connects the current state object with the new value on its own. You don’t need to tell it how to do it by spreading.
IMPORTANT: This only works for objects with one level of nesting. If your state value is deeper in the state object structure, you have to use spread anyways.
Example:
Get() the state value
You want to implement an action that logs the current value of the number from the state. It rings a bell, didn’t we do something similar previously? We used the set() function and it gave us access to the entire state object. You should be able to simply use the same technique, right?
Well, not really.
What if we don’t want to update state? We don’t want to use the set() function at all. How do we read the state value outside the set() function?
Zustand has a solution and it’s called get(). Take a look at the example below to see how you can use it.
Let’s take a look at the new version of our useCounterStore.
In the first line, we added the get() parameter and used it inside the logNumber function to get the particular value of your state. That’s it.
How to create async actions?
Sooner rather than later you will have to create asynchronous actions inside your state object. How do you do that in Zustand?
Let’s create a simple PokemonList component that will fetch the Pokemon from the API and display the results in the form of an ordered list. We’re going to use the Poke API endpoint.
First, update your store.
As you can see, we introduced two new state pieces to our useCounterStore hook – the array that is responsible for storing Pokemon and the fetchPokemon method. Cool thing is that You can easily use async/await inside the hook and simply call set() whenever the data is ready. Check out here:
then(data => set({pokemon: data.results}))
One way to implement the PokemonList component looks like this:
As you can see in the snippet above, we used the good old useEffect to call the getPokemons action and we took the fresh and updated list and assigned it to the pokemonList variable. This variable was later used to dynamically render the list items.
Don’t forget to mount the component in the main app file!
There is one more thing that is worth mentioning. Take a look at the useCounterStore. Now, it consists of data related to two totally different areas of your application. On one hand, we store counter-related data and on the other hand, we manage our Pokemon data and fetching logic. It’s not a big deal in the example above because the app is still quite small but imagine how messy it will become when the app grows and you have dozens of state pieces. Storing everything in one place might be really hard to maintain in the long run. Is there something you can do to handle that issue?
Splitting state into multiple pieces
Start with dividing the store. This snippet represents the first chunk:
…and here’s the second.
You have two separate functions that group logically parts of the store together. How can you combine them? Take a look:
No surprises here, we used the create function and spread the results of createPokemonStore and createCounterStore inside. Thanks to that, you are able to divide the store into separate chunks, much easier to maintain as the app grows.
“…params” used in the brackets were necessary to pass get and set to inner functions.
Finally, replace the store imports inside your components. Remember that now all of the state values are stored inside the useCombinedStore, not in useCounterStore.
Congrats, you successfully managed to logically separate the state contents!

To sum up, we moved from a messy hook containing all kinds of unrelated data looking like this:
… to nice and clean functions storing related pieces of state.
TIP: To improve the readability even more, you can move the createPokemonStore and createCounterStore into separate files.
Benefits of Zustand
✅ Pros
- a minimal amount of boilerplate code,
- one of the simplest-to-use state managers on the market,
- easy access, as it doesn’t require building providers like React context API does,
- unopinionated,
- maintained and well-supported,
- flexible (e.g. you can easily integrate Zustand with Immer for immutability),
- allows to create multiple stores that can be combined into one.
❌ Cons
- documentation could be more specific and detailed,
- relatively new on the market and sometimes it might be hard to find best practices,
- the unopinionated character of Zustand might also be a disadvantage if you and your team need to come up with the proper folder structure and your own procedures for working with that tool (especially on bigger projects).
It’s impossible NOT to love Zusand
Have you ever tried to ask this question in a room full of developers: “Hey, what are the best practices to handle user authentication in Single Page Applications?” If you have, you probably caused a never-ending discussion and maybe ruined a friendship or two for good measure.
The same applies to state management. You can’t just simply ask how to manage state in React and expect to have a quick answer.
That’s not going to happen for two reasons:
- there are a lot of tools fragmenting the market,
- part of the development community is still traumatized after Redux and how difficult it initially was. I personally think that Redux is fine but I can agree with some points about its disadvantages.
In this article, I wanted to show you this simple alternative that might fit well in small to medium size projects (with a bit of work large ones will BEAR it too).
If you are currently selecting a tech stack for an upcoming software project, I think Zustand is worth your attention. Zustand is my choice for managing state in projects small enough that I feel using Redux would be an overkill.
I love how easy and fast it is to set everything up. It’s literally 3 minutes of work and you are ready to use your global state. On top of that, I also think that Zustand is the simplest state management choice for creating POC (proof of concept) when you don’t want to spend time on boilerplate code. Zusand library helps me to focus on what’s really important and allows me to deliver business value faster.
Thank you, Mr. Bear! 🐻
We will choose the most fitting tech stack for your project. Just write to us
There’s no need to work on legacy technologies or overpay for unnecessary subscriptions when great alternatives exist. Book 1h free consultation with our specialists. No strings attached!
