18 March 2020
Strapi: Getting started with the Node.js headless CMS

When you see the abbreviation CMS (Content Management System) — you may unconsciously think about platforms like WordPress, Drupal or Joomla. It’s okay, as for many years those services were the most popular choices for anyone who wanted to build a blog or a simple website. Using those is helpful if you need to perform a lot of changes on your website in a relatively straightforward way. Being responsible for building a lot of enterprise projects from scratch — I never had too much experience in using CMS. But one Node.js headless CMS was supposed to change it…
One day, my colleague asked me for help in implementing some changes on his website. He needed me because he lost contact with a person responsible for building his site. It soon turned out that the website was built with a ready-made CMS — Joomla.
Bearing in mind that I have no experience in using this platform and having some concerns…
… I decided to help him! I don’t know what was worse — clicking through the admin panel in search of all the nested subpages or browsing through templates to add any simple change in display. By the way — in my opinion, the editing and displaying should be the most intuitive possibly as all those ready-made CMS platforms were created for people who can barely code or even can’t code at all). Those people want to be able to manage their websites on their own. It’s clearly not that easy though. Eventually, I was able to perform the changes my colleague needed. This whole situation made me think if it’s possible to manage your website in any other way.
Here comes Strapi
I started searching for CMS which is built in the technology I feel confident with. I typed “Node.js CMS” in Google and that’s how I found Strapi. I decided to check what kind of functionalities the platform offers. The very first thing I noticed was the fact that Strapi is “headless”. What does it mean? How is it different from the most popular CMS platforms? Let’s briefly compare the differences between those two solutions.
Classical CMS platforms
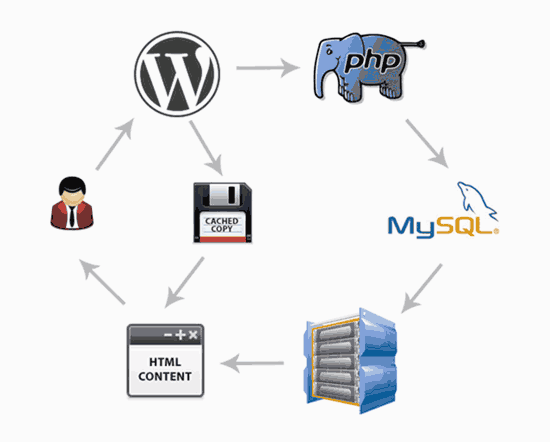
The most popular CMS platforms such as WordPress, Joomla or Drupal are monolithic. It means that they provide the user with a system created for a certain database, with some built-in templates, admin panel and so on. If you decide to use CMS like this, you don’t have that much freedom in terms of customisation. It’s simple — take it or leave it. Obviously, you can use some additional plugins to enhance the possibilities but still — it all depends on the platform you chose and on availability of plugins.
Strapi — Node.js headless CMS
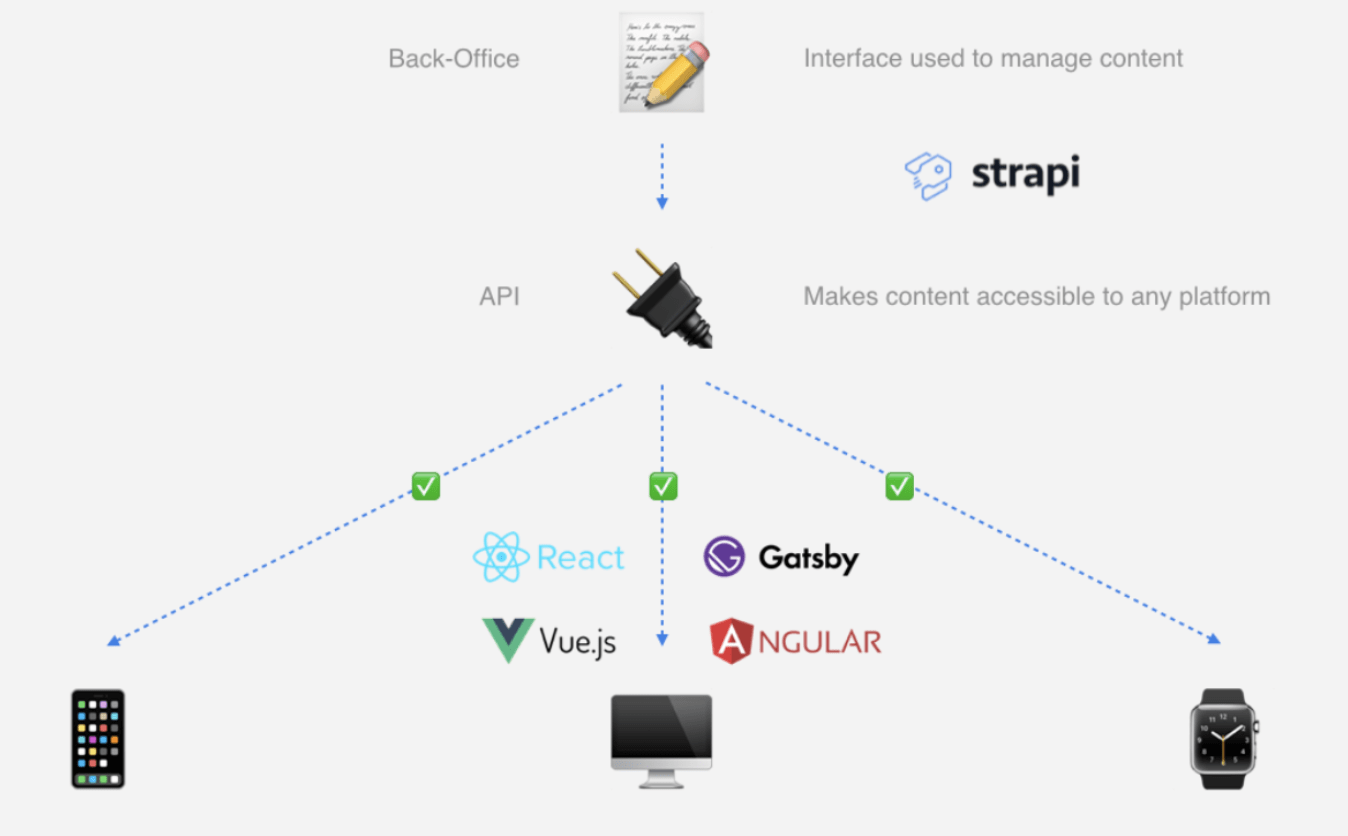
Strapi, being a new generation CMS, offers some other solutions. The main advantage of this platform is that it offers only some basic functionalities for managing your content and users. Choosing the rest of the components of your website (database, display tools) is up to you. Strapi supports a variety of databases such as PostgreSQL, MongoDB, SQLite, MySQL or MariaDB — you can choose whatever you like or need. The same applies to the technology you want to use to present your content. You don’t have to use one certain framework, rendering engines or ready-made templates.
Another huge advantage of this Node.js headless CMS is that you can create and manage your content and then share it via REST or GraphQL. So, you can use whatever frontend technology you like. React? There you go. Vue or Angular? Not a problem. What about jQuery? Well, it works too. Sky’s the limit. What’s more — you can even use a simple index.html file with basic JS script. It will get content from Strapi and display it in a browser.
So, wrapping it up — “classical” CMS platforms allow you to add some content and save it in an imposed database. Once a user asks for something — CMS will get the data from a database, put in a template of data display and give back a ready-made HTML file to be rendered in a browser.
On the other hand, headless CMS allows you to manage your content in a chosen database. Then, it waits for the data request and returns it to make a client do whatever is necessary.
Let’s get it started — Node.js headless CMS
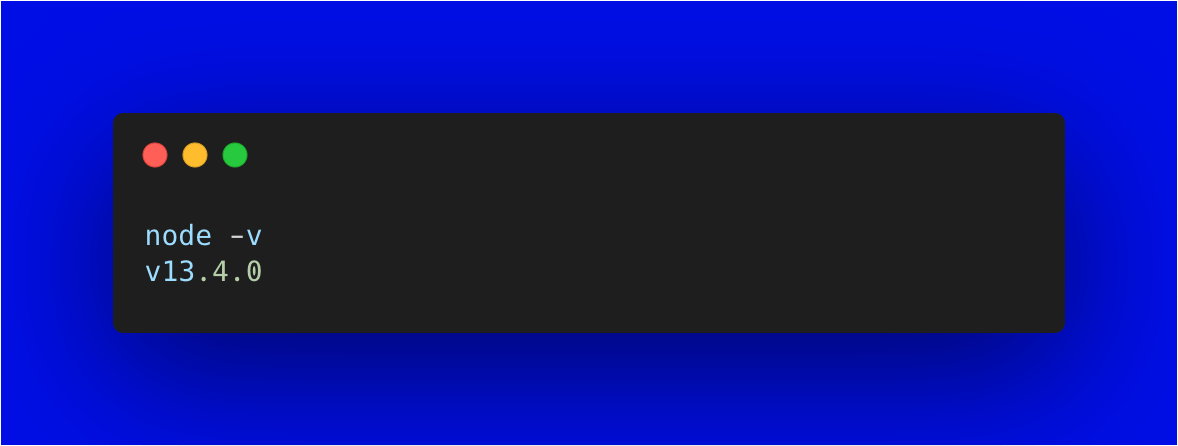
But beforehand, make sure that you have required versions of Node.js and NPM installed in your environment. You will need Node.js ≥10.x and NPM ≥6.x.

Now, I’ll show you what you can do with Strapi. I decided to choose an example of a simple blog to present you how to manage your posts with Strapi.
If you don’t like installing packages from npm globally (as myself) — you can use npx or yarn instead.

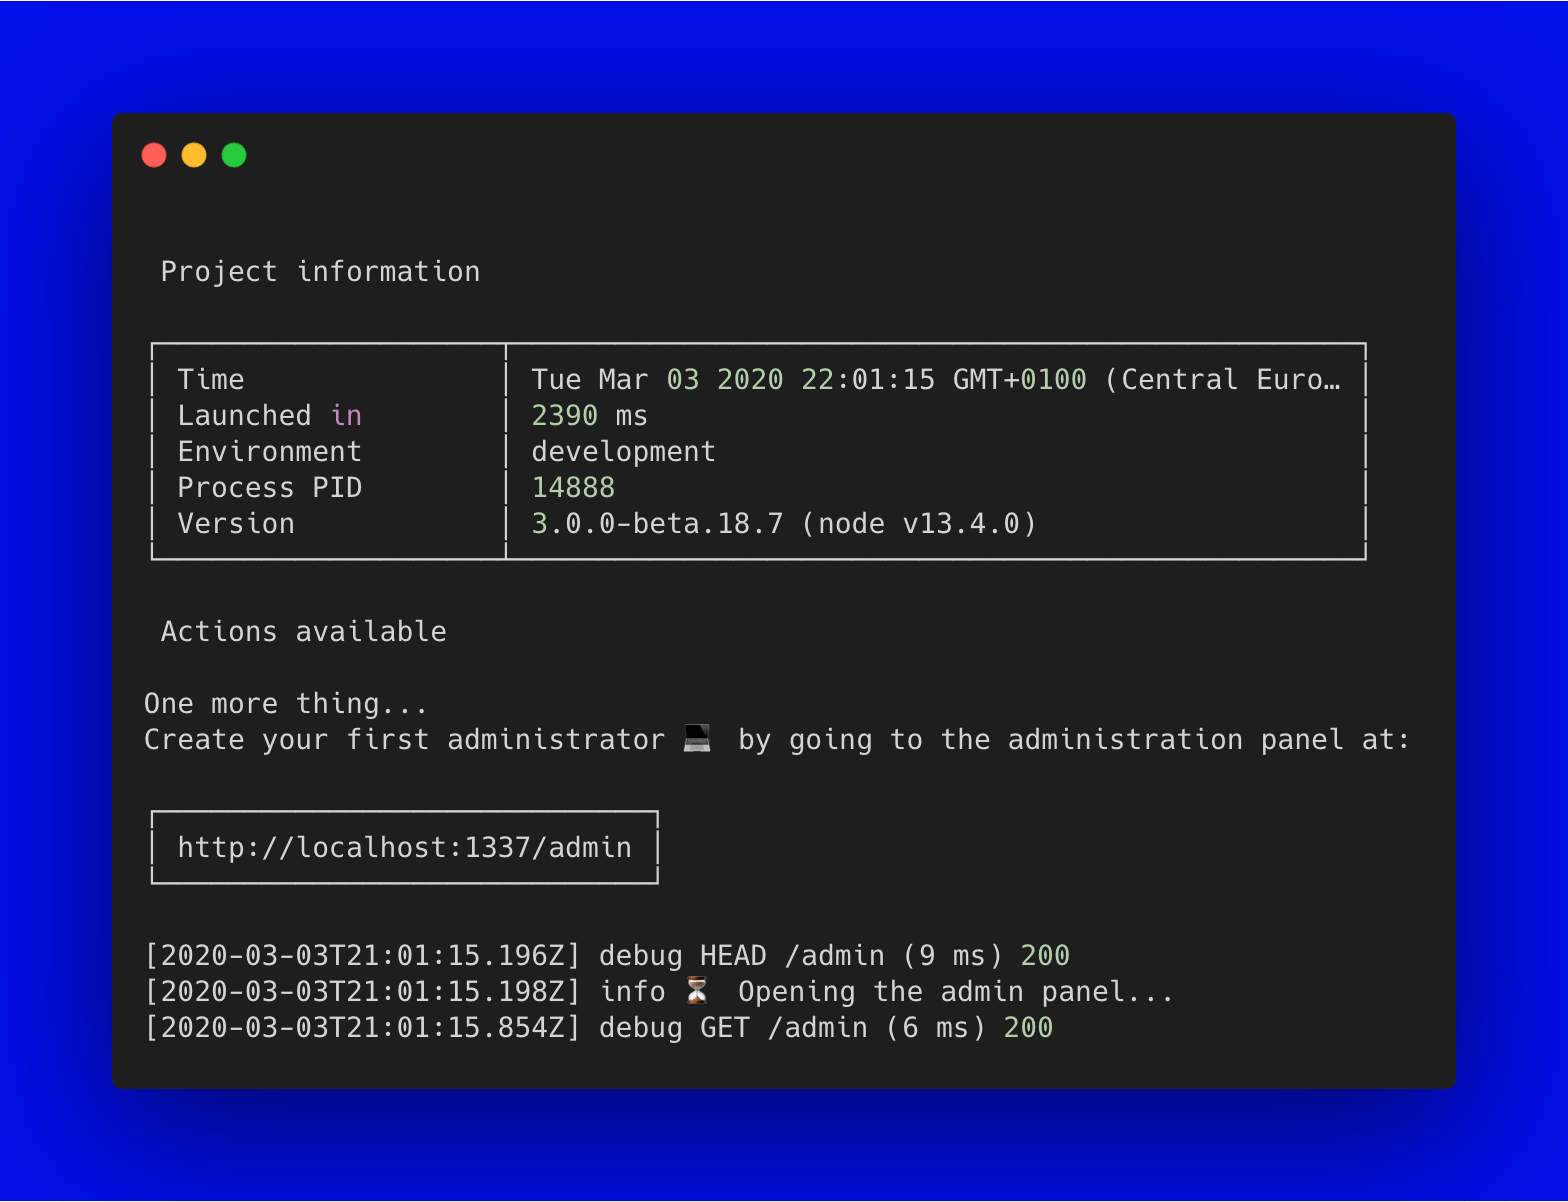
The option --quickstart creates a project with some default settings, using SQLite as a database. I used this option for the needs of an exemplary blog. After launching the command, Strapi will start creating a project in a catalog where you run the command. Once your project is created and Strapi is started locally, you’ll see a screen with some information about your project in the terminal.
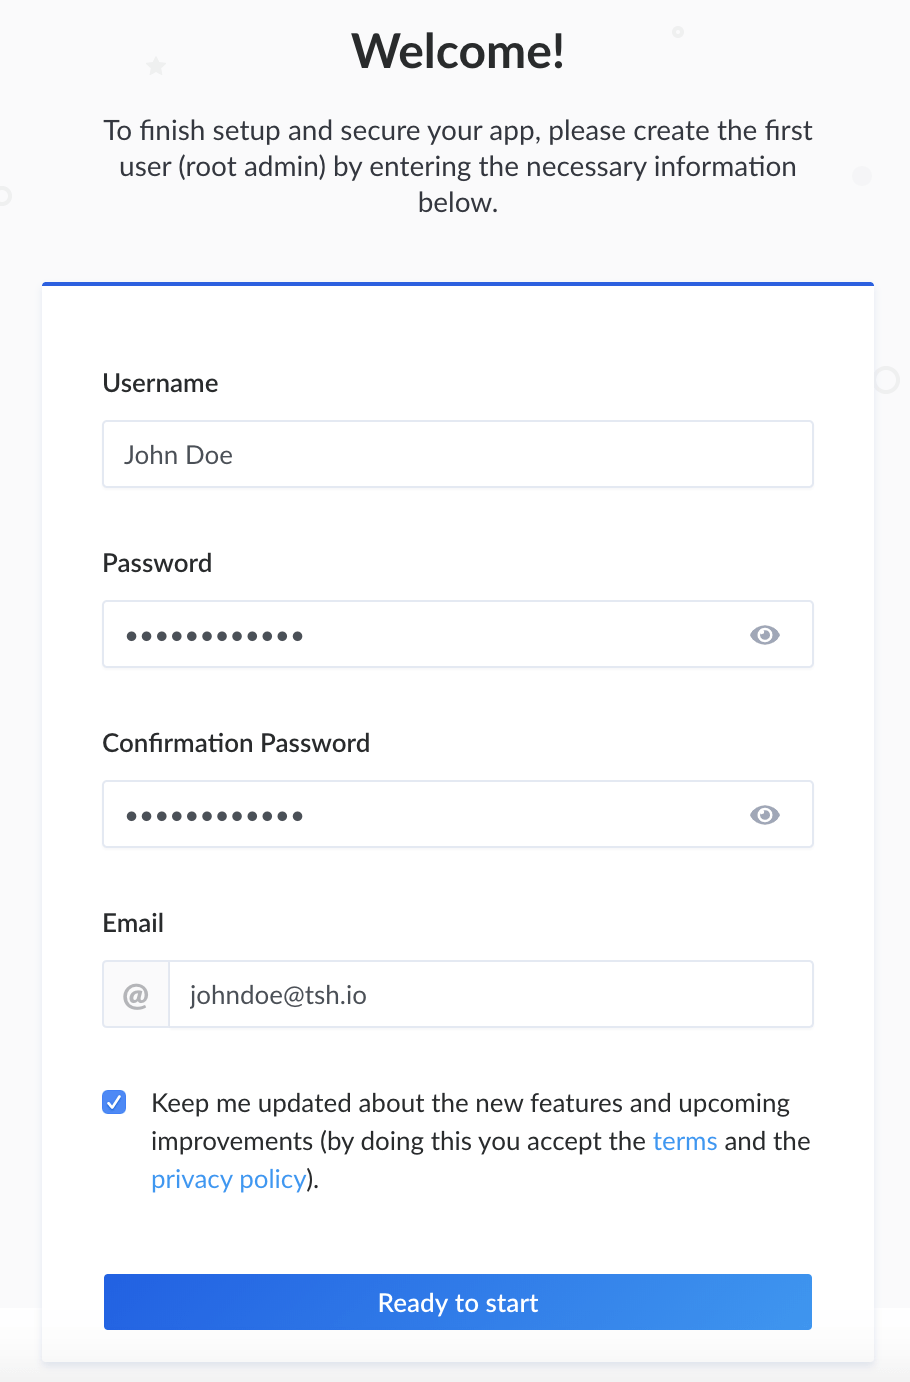
Then, a screen with an option to add an administrator to your CMS will show up.
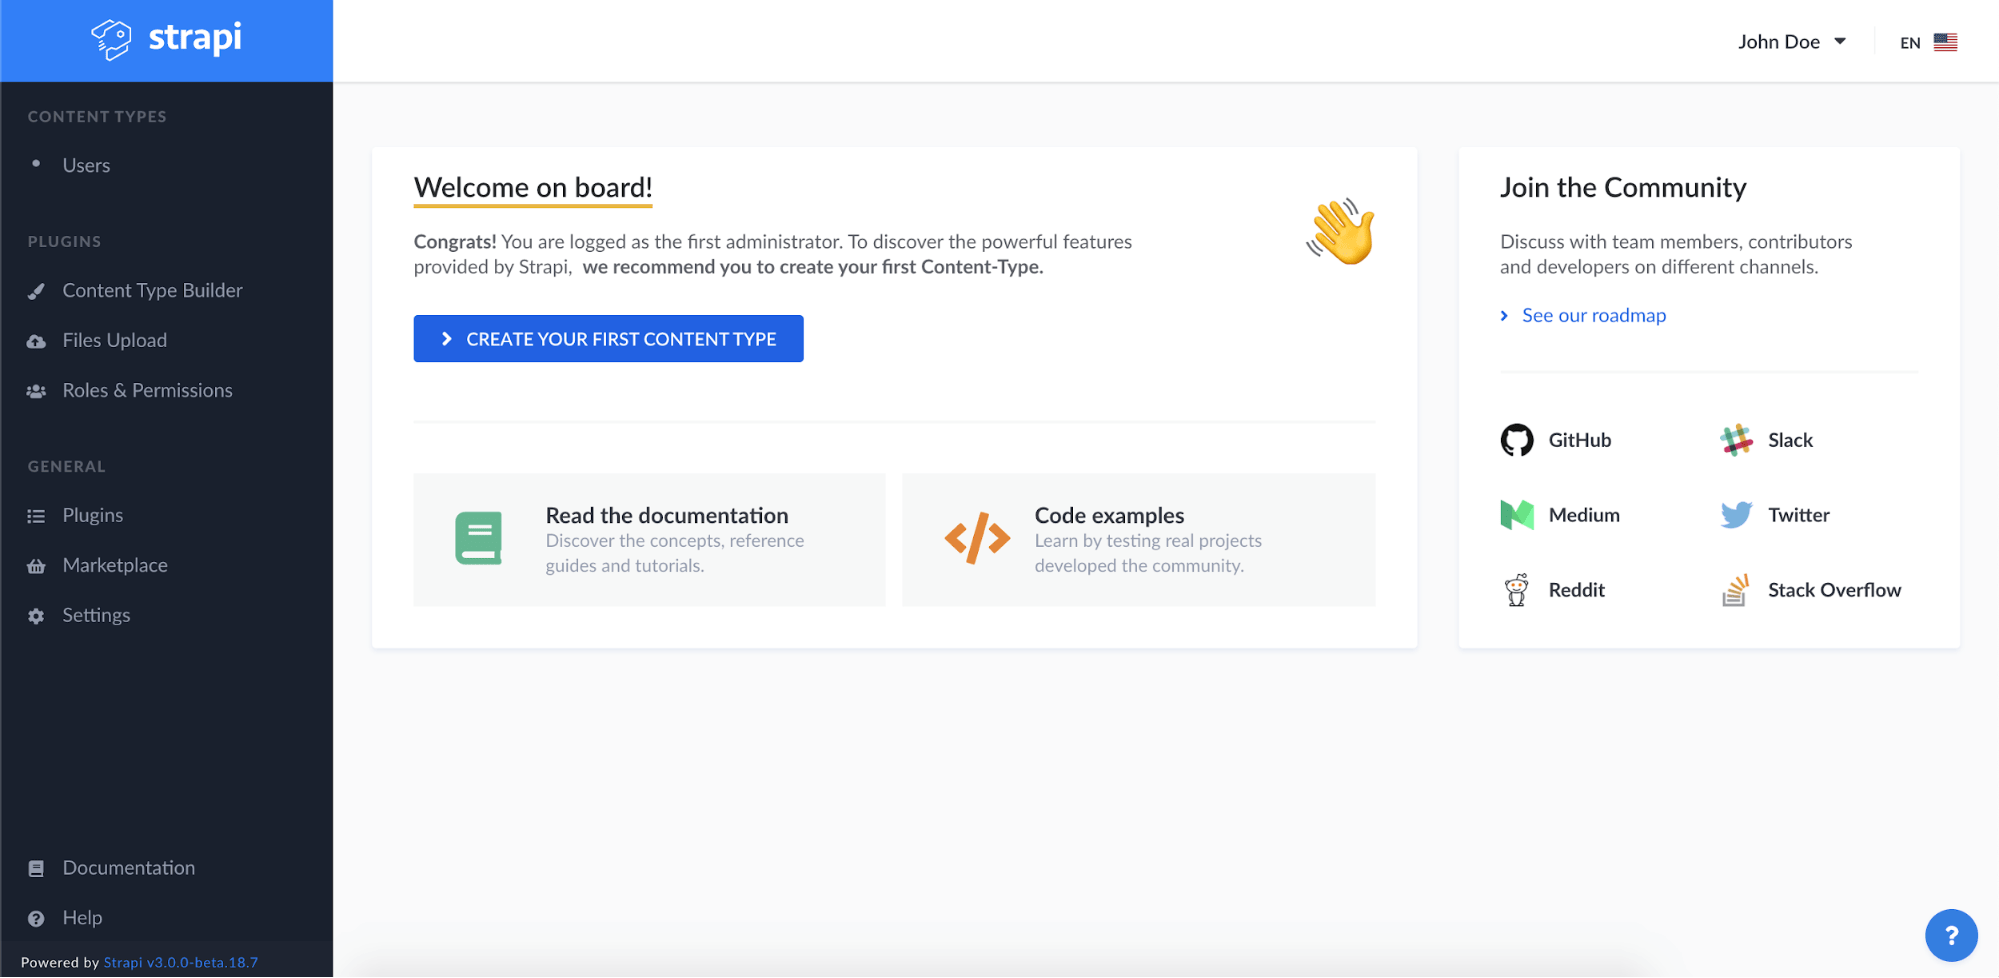
After creating an admin account, you’ll see an admin panel to manage all the Strapi components.
In the example, I created a simple blog where I can manage articles. That’s why it’s necessary to start with creating a new content type.
Content Types section has all the information about the object you’ll manage. What are the fields available, what is the type of a field and so on. Let’s take a look at the content type of a user.
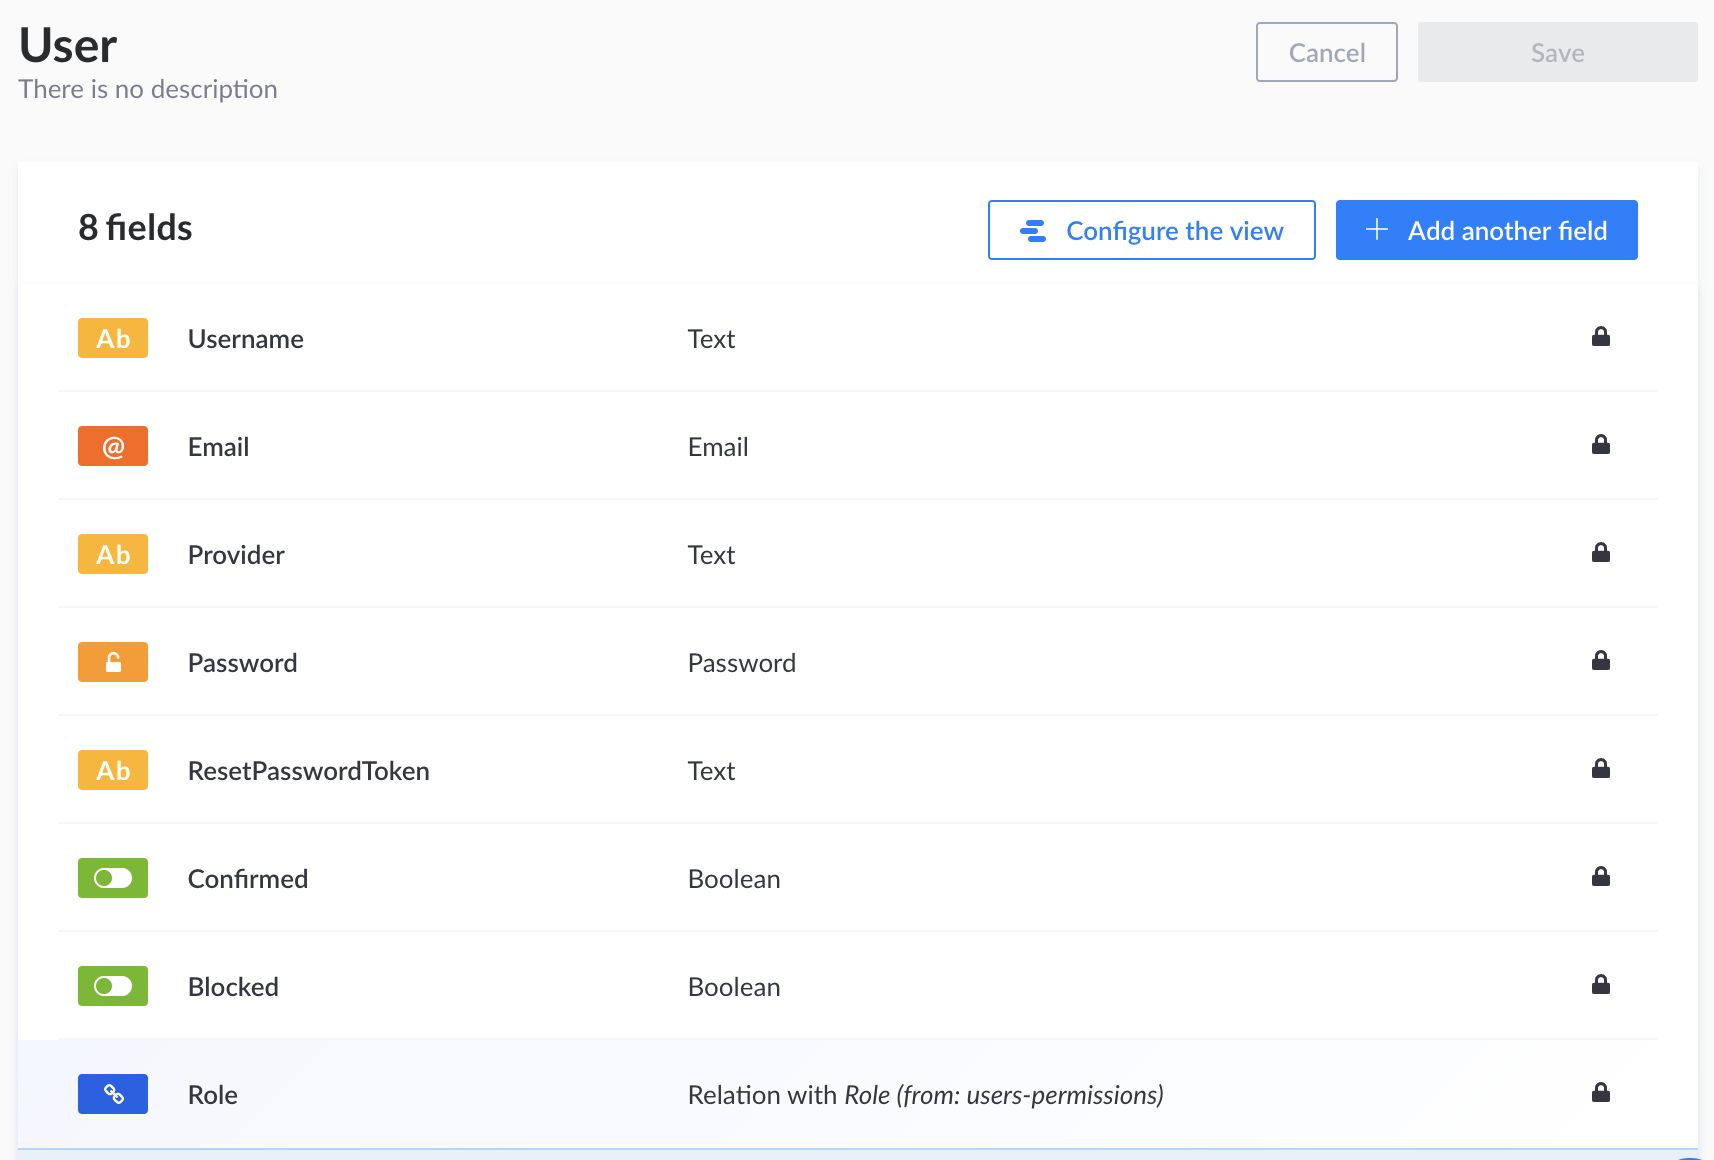
There are 8 fields of different types. Using Strapi, you can create your own content types, basing on the fields which are available on the platform.
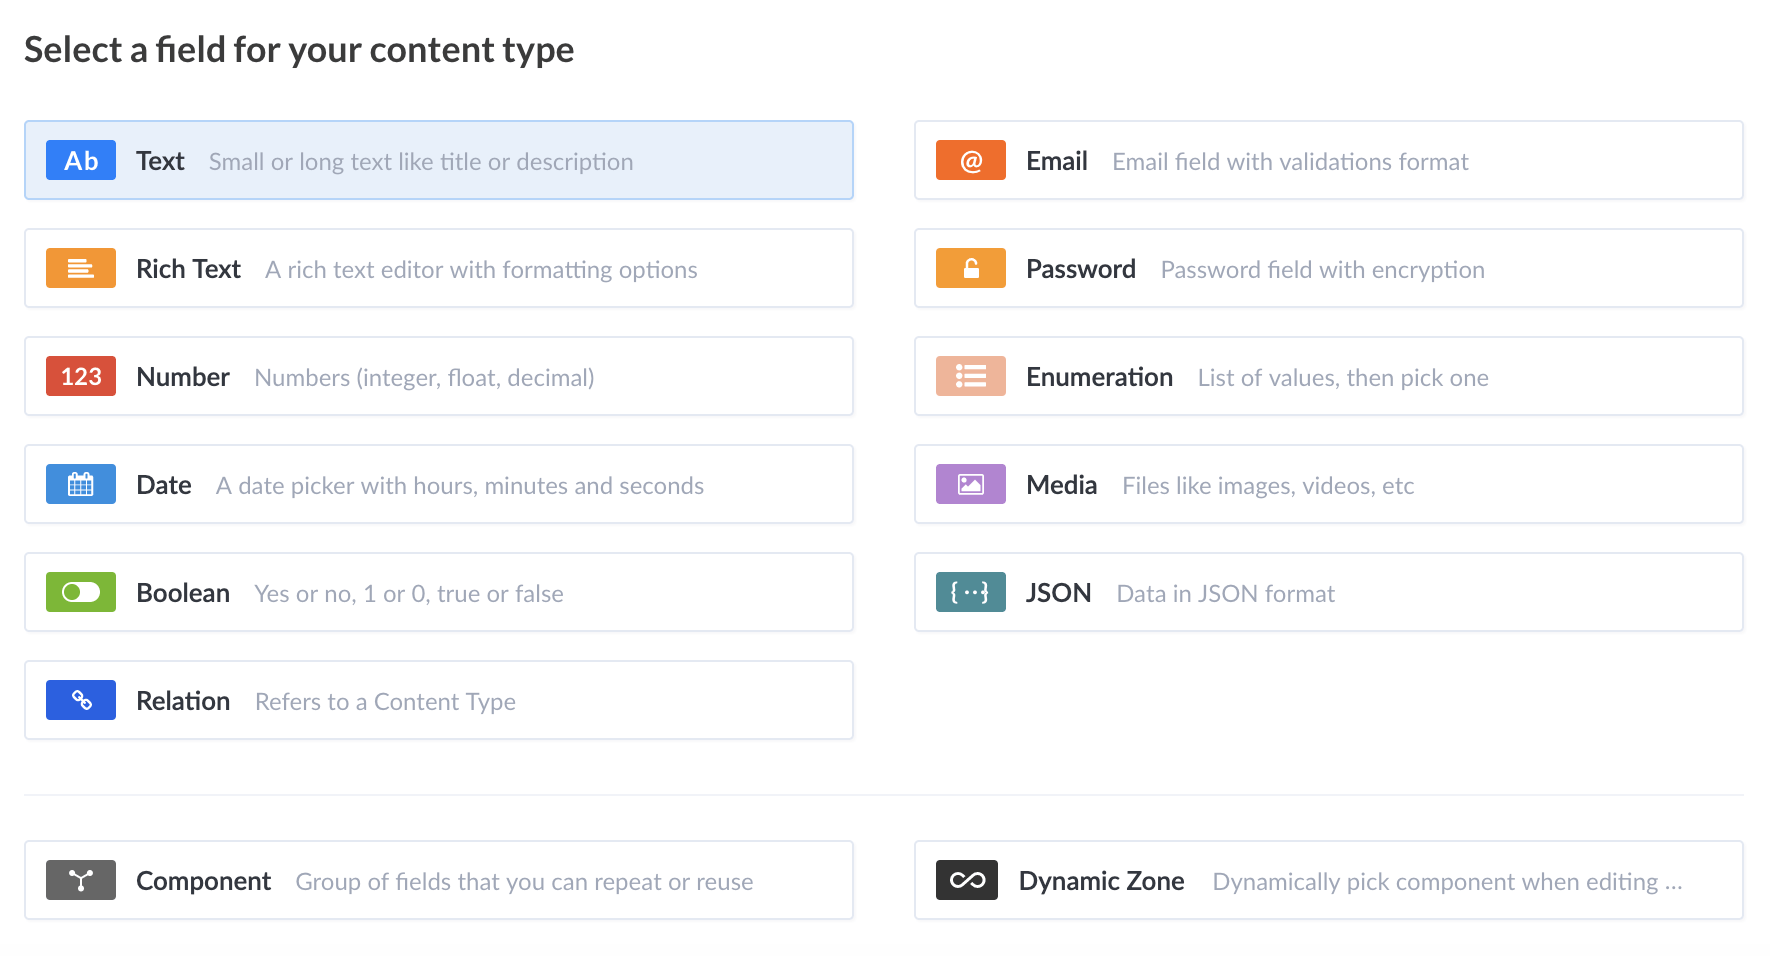
It’s pretty straightforward, so you shouldn’t have any issues with recognising which field is responsible for storing what kind of data. The only ones which may be tricky are “Relation”, “Component” and “Dynamic Zone”.
The field “Relation” is responsible for storing information about relations between content types. In the presented example, I created a content type for a blog post which will have a relation of “one or many comments” (a separate content type). Obviously, you can choose it from a variety of relations.
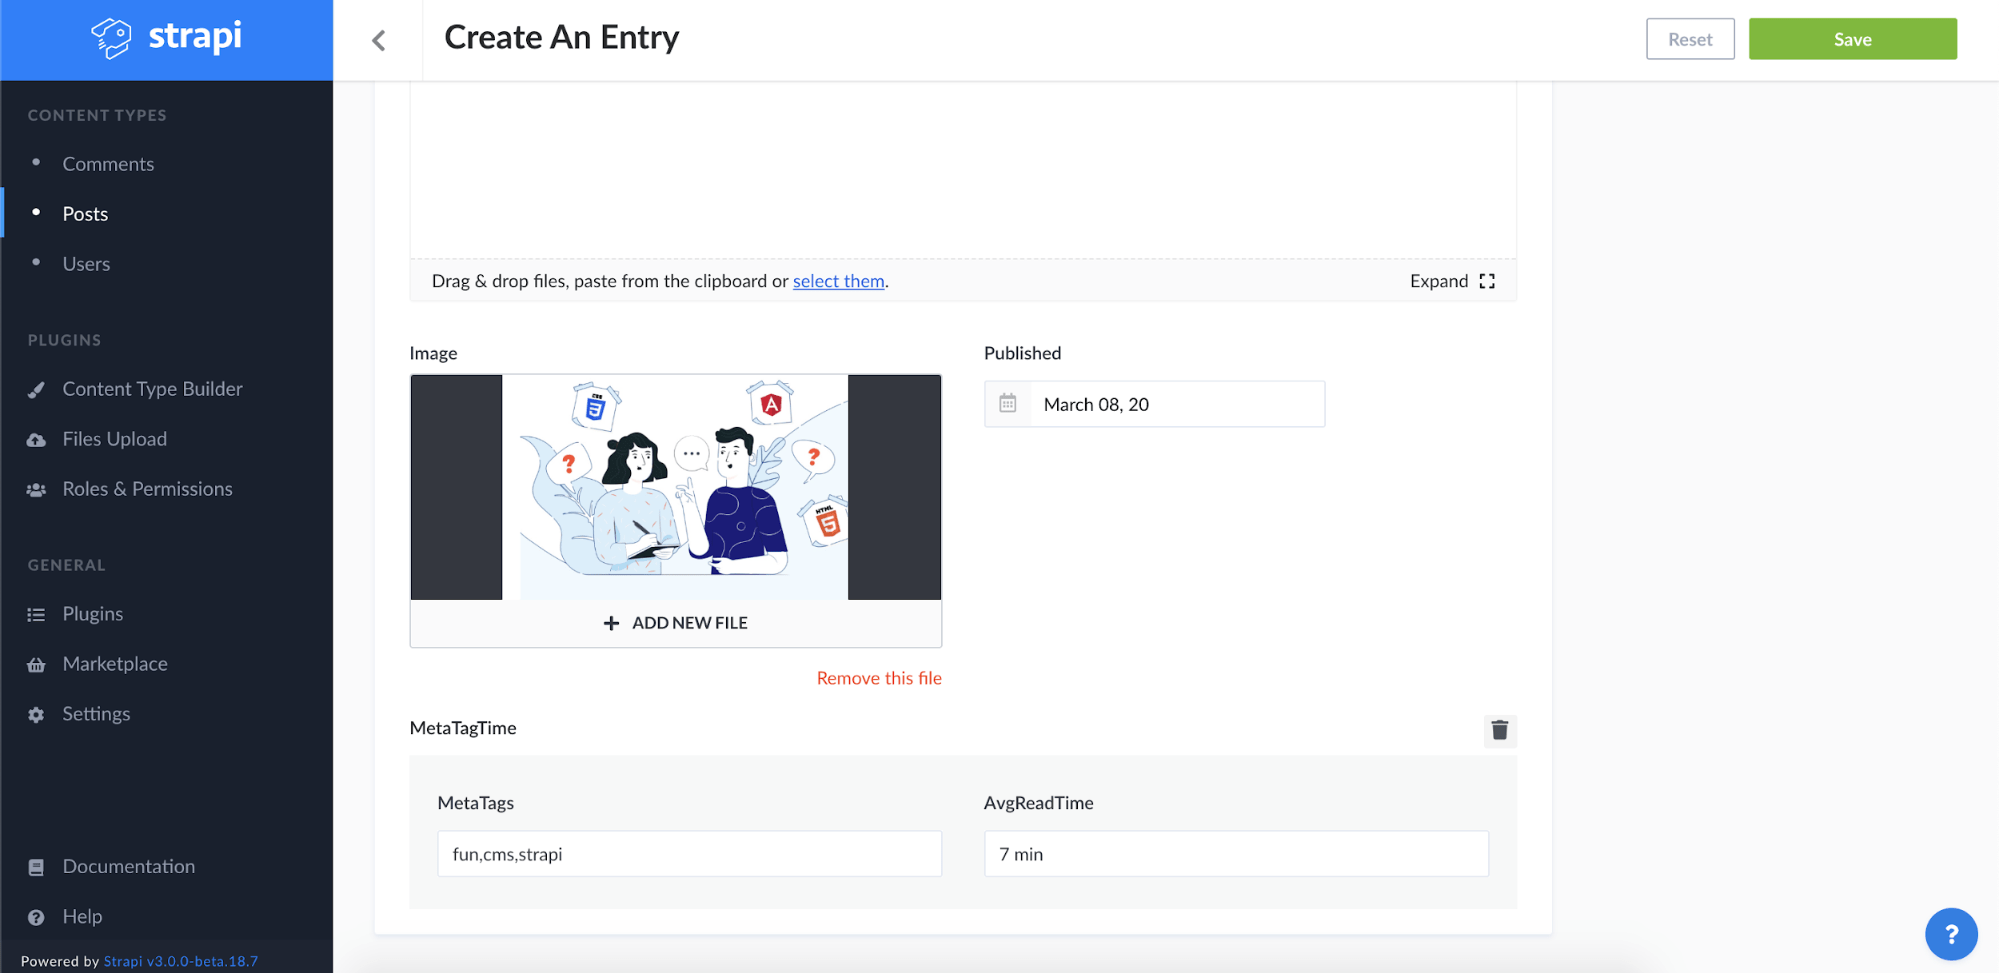
The field “Component” is responsible for adding some reusable components to your content types. And what is a “component” itself? It’s a reusable data structure which can be used in different content types. For example, you can create a component which stores more complex, reusable types. So, one component can store information about meta tags in your blog post and about an average time which a reader needs to read a certain blog post. If you will add a new content type in the future (for example “recipes” for your cooking blog), you can use this component to make sure that all the recipes will also have information about meta tags and average reading time. In the example, I created a component for meta tags, and I added it to a content type of a blog post.
“Dynamic Zone” is the last tricky type of a field. This one can be a topic for the whole new article to be honest. But in brief — thanks to that field, you can easily manage some complicated data structures. If your content type contains 10 different components and additionally in some situations not all those components are needed, you should use Dynamic Zone. It helps with bringing in some new content for content managers.
Enough talk, let’s do something.
The first custom content type
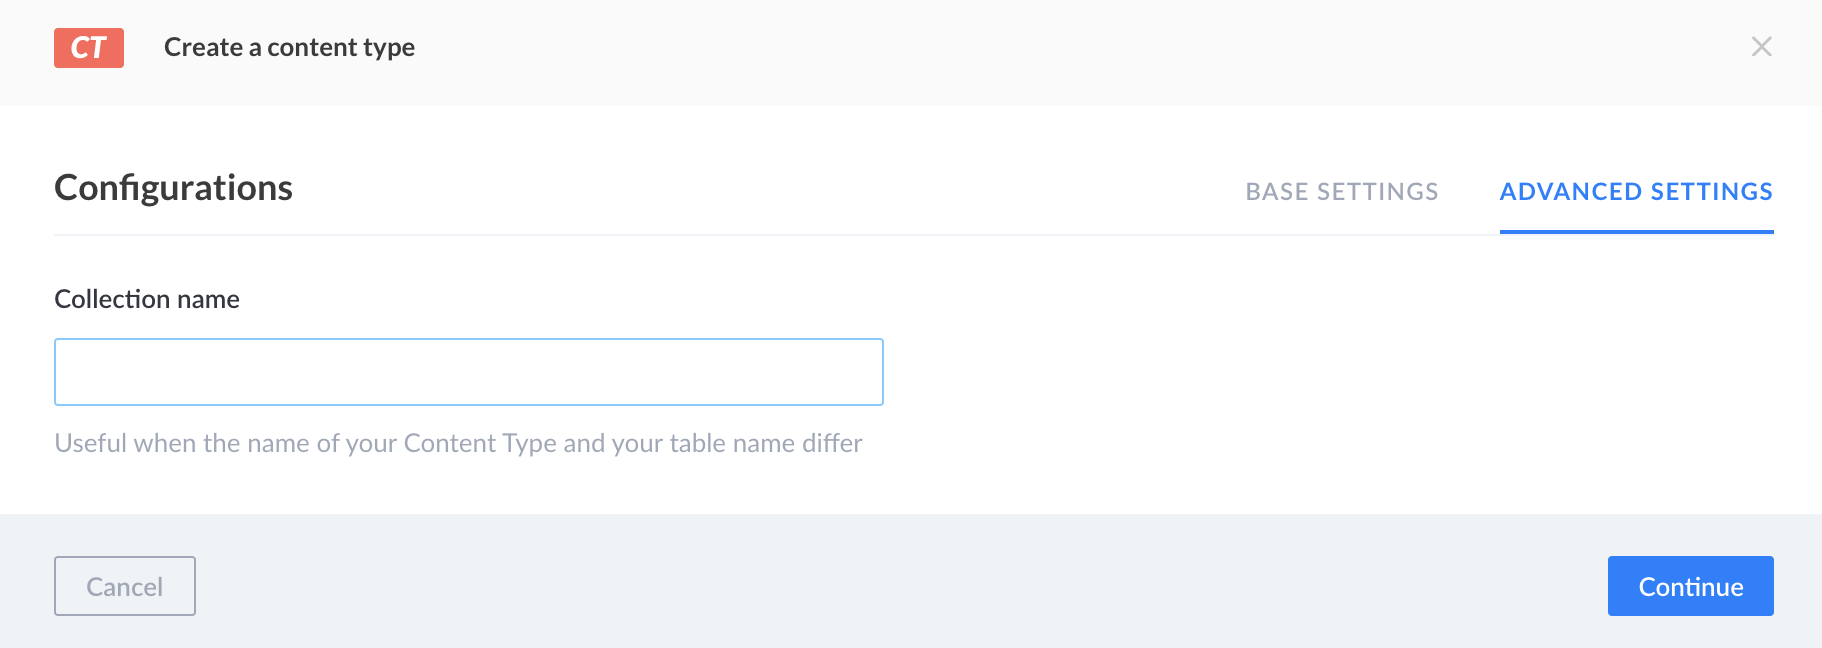
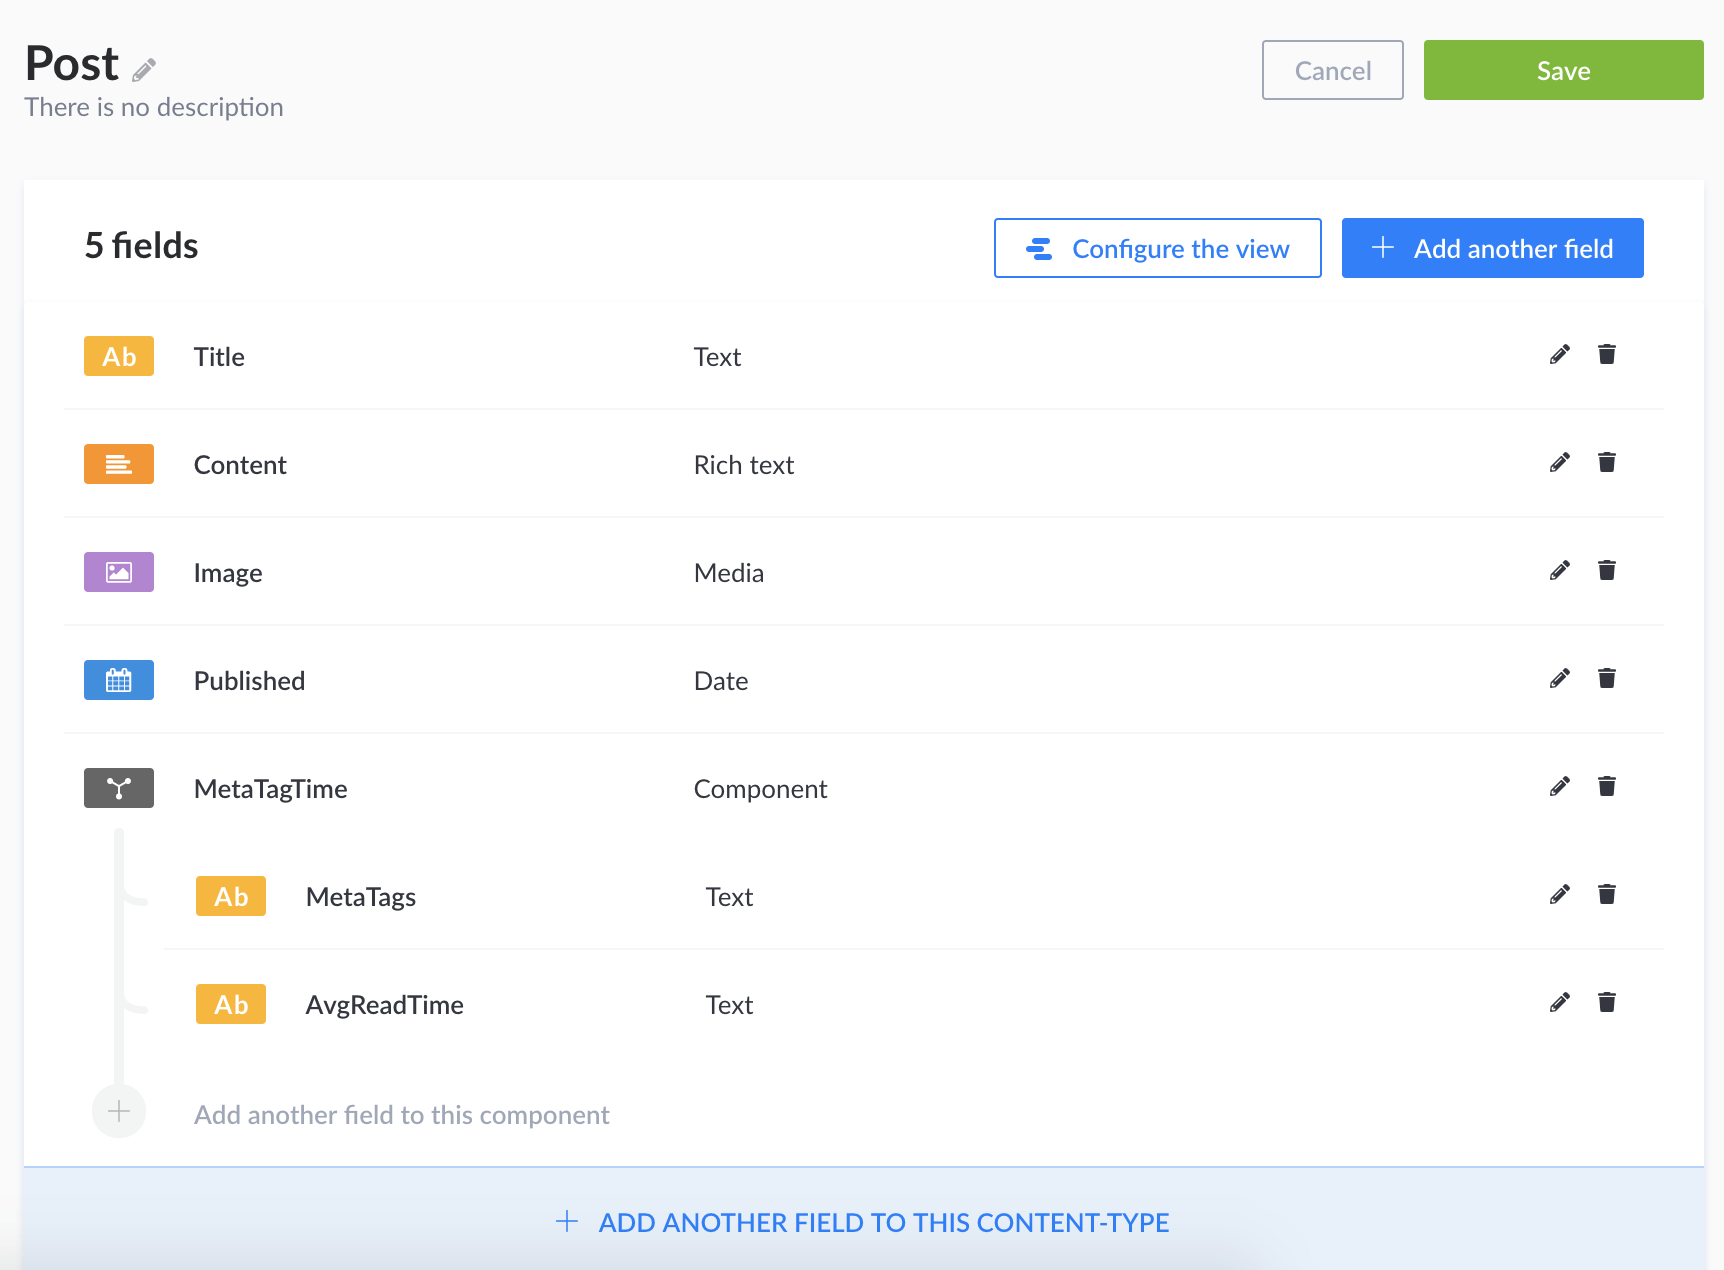
To create a content type of a blog post, you need to open a plugin “Content Type Builder” from the left side of the menu. Then, you have to click on a link “create a content type”. I named the new content type “post”. It’s good to use a singular form for names because the collection of the types will be plural.
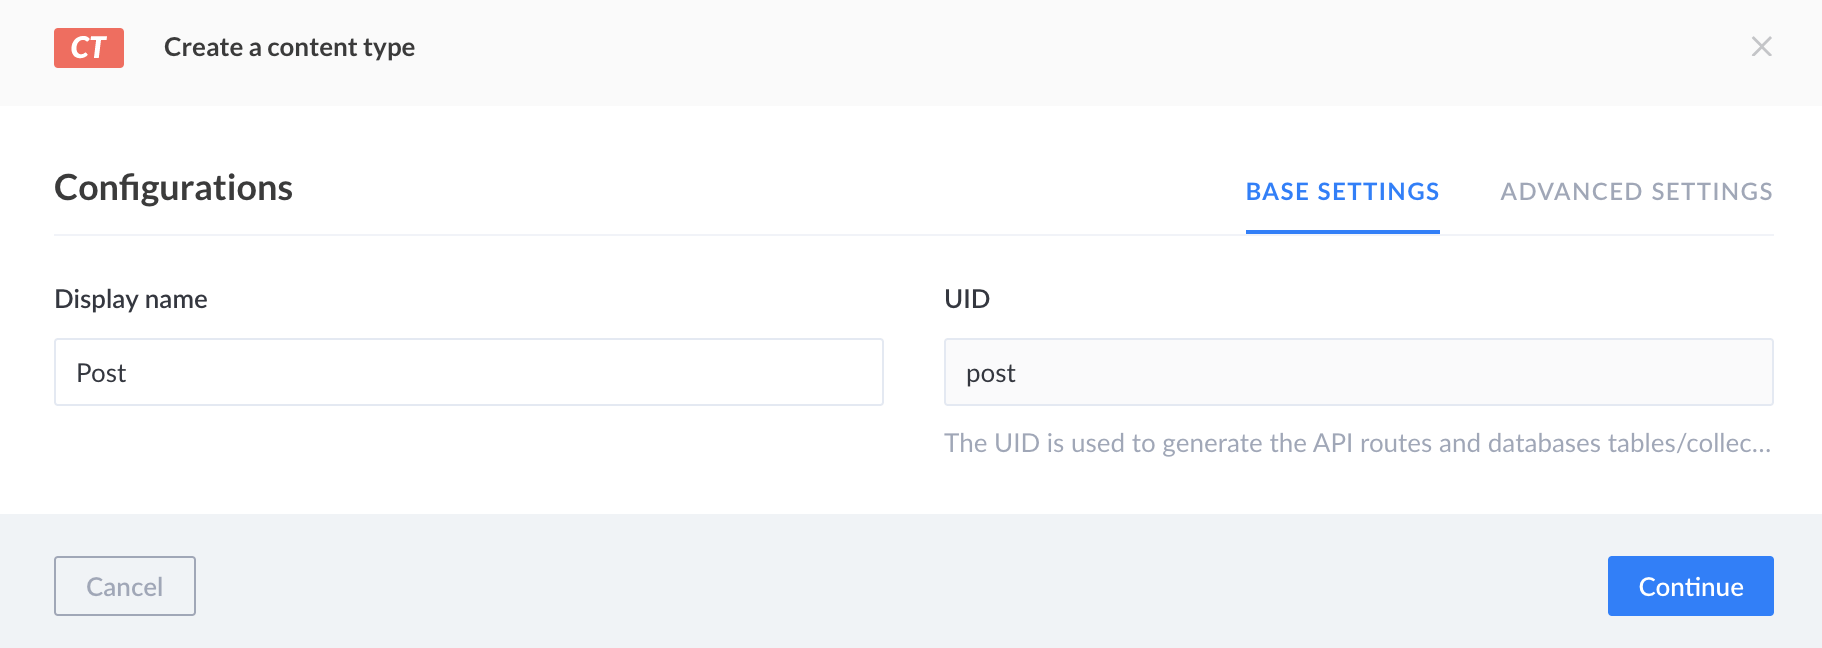
If you want to name your collection differently, you can change it in advanced settings.
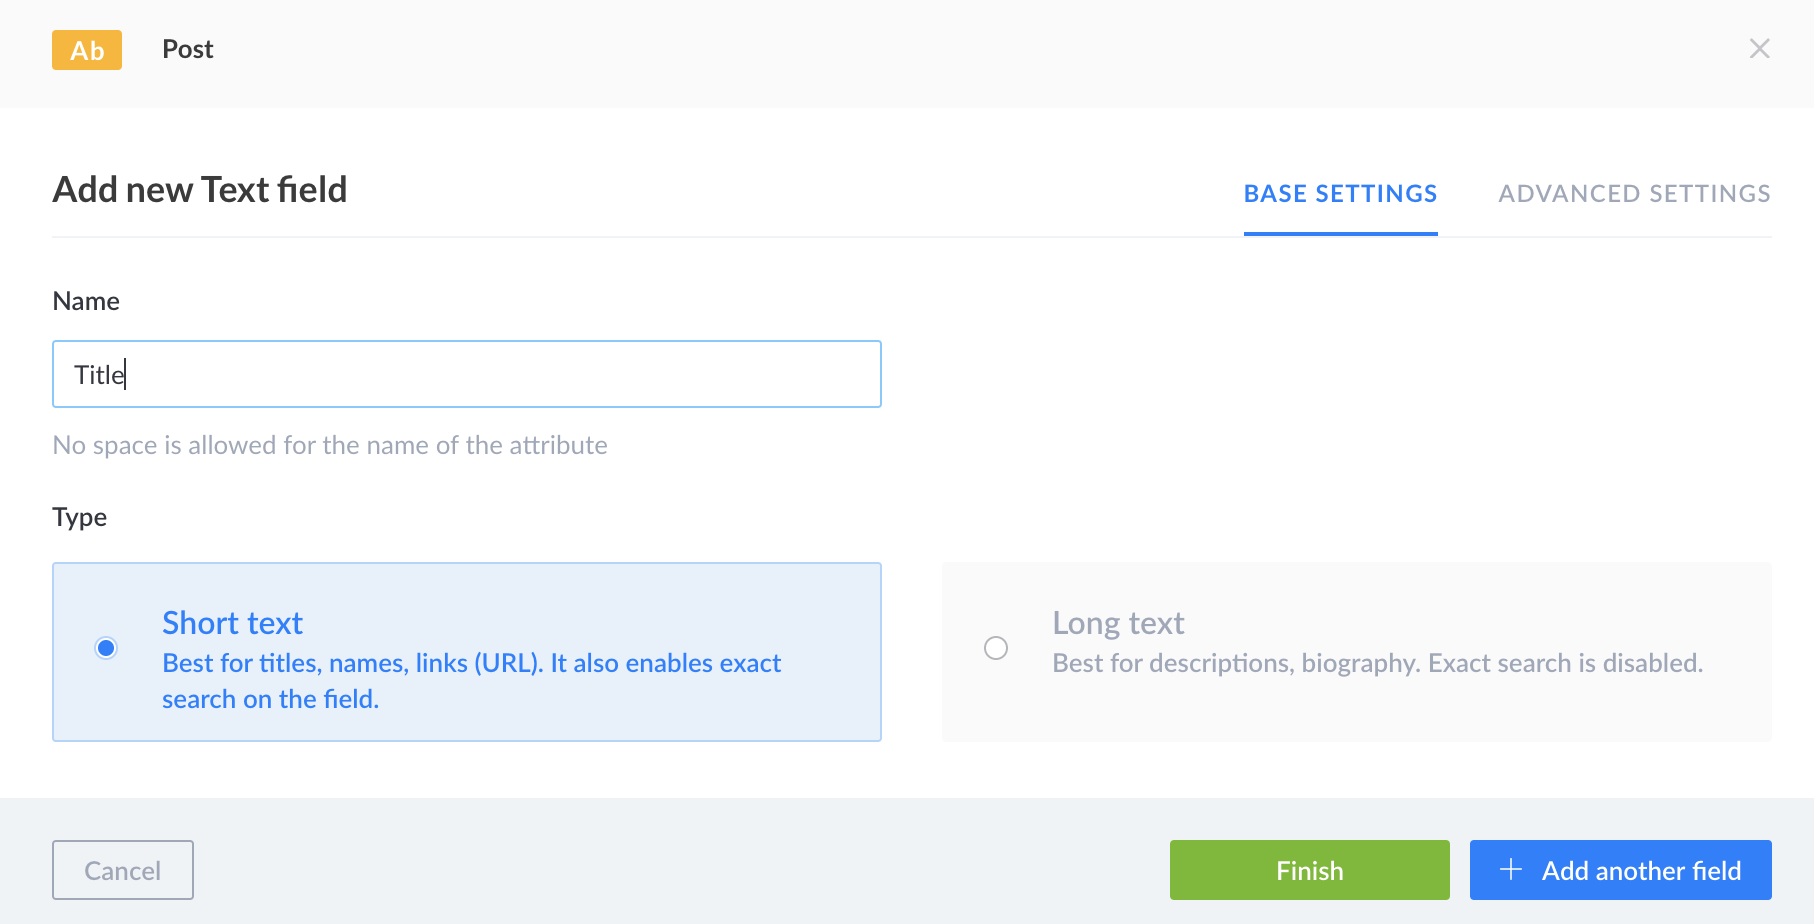
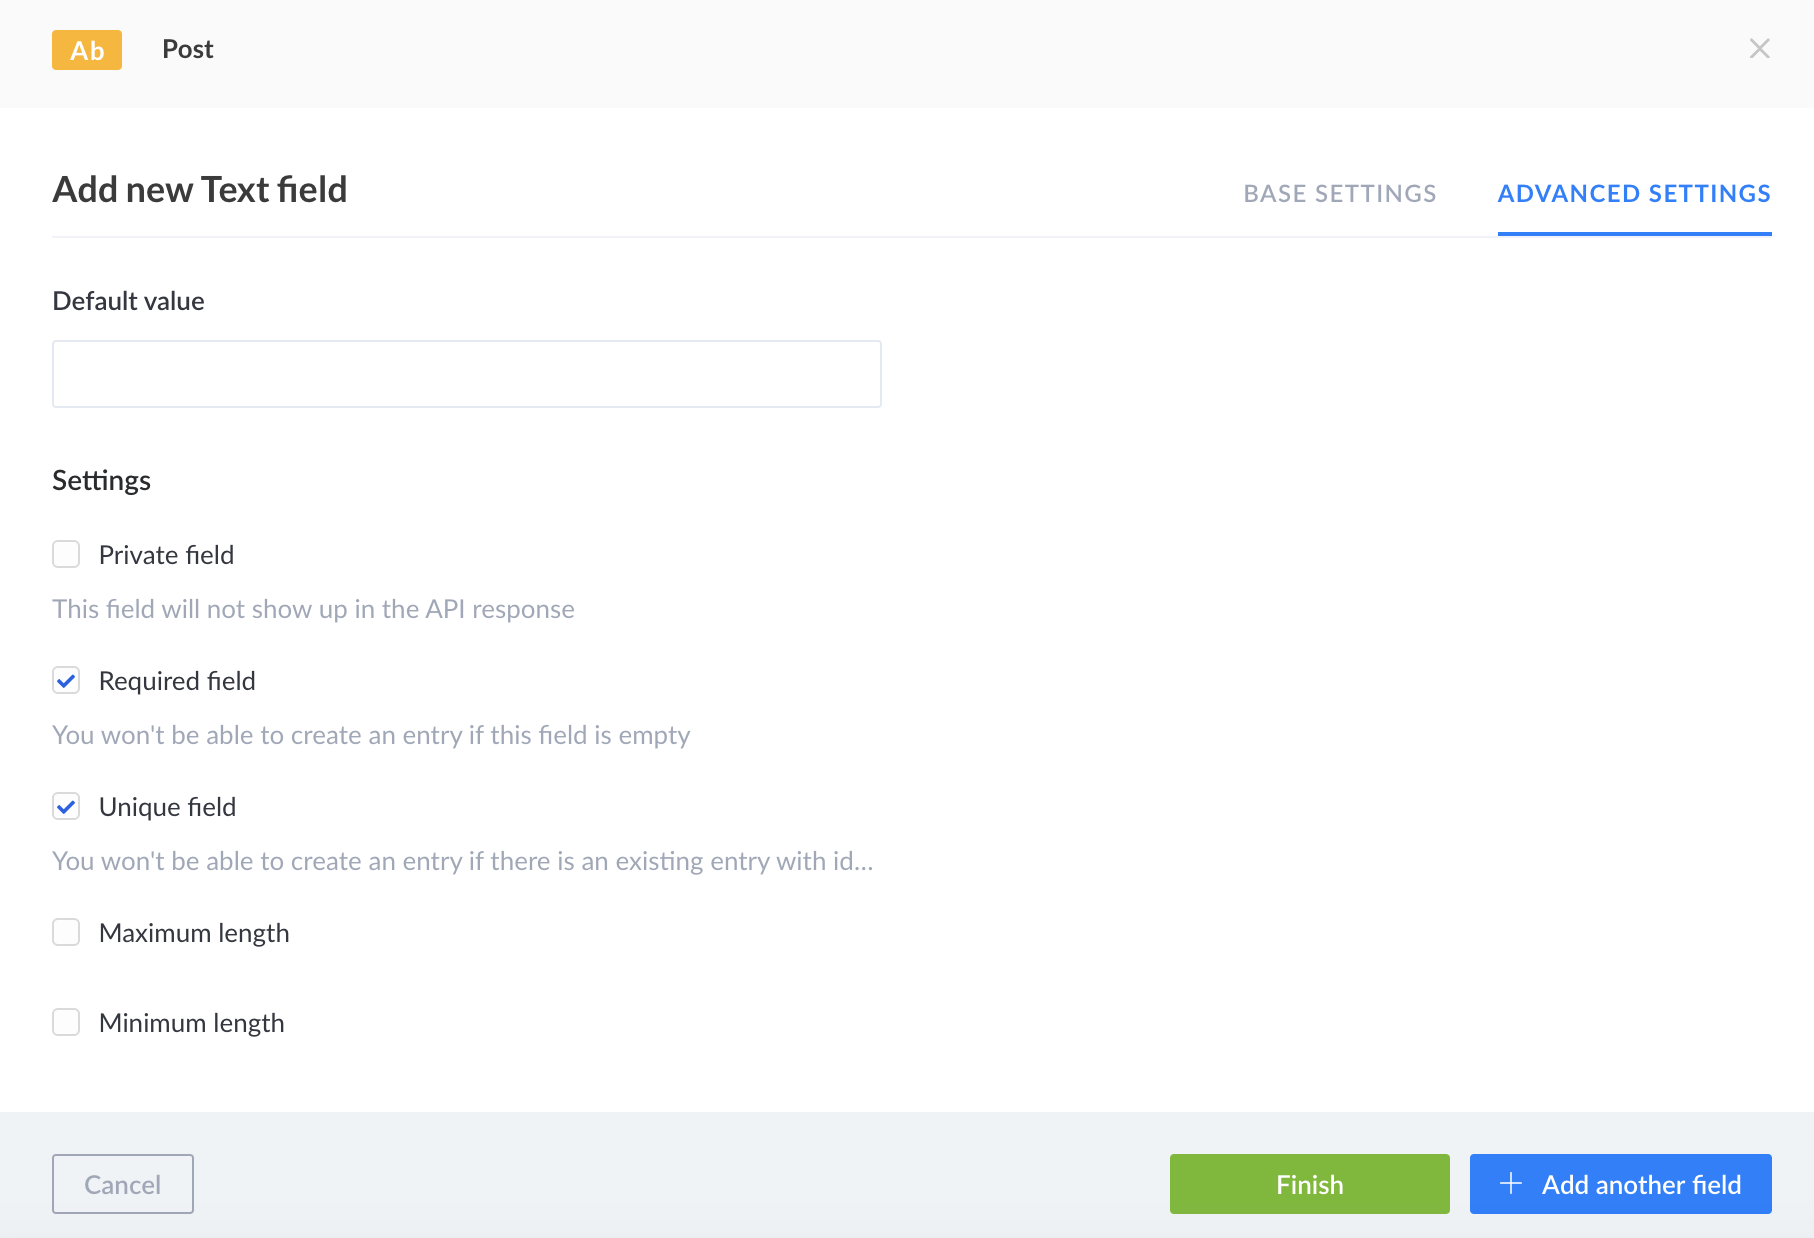
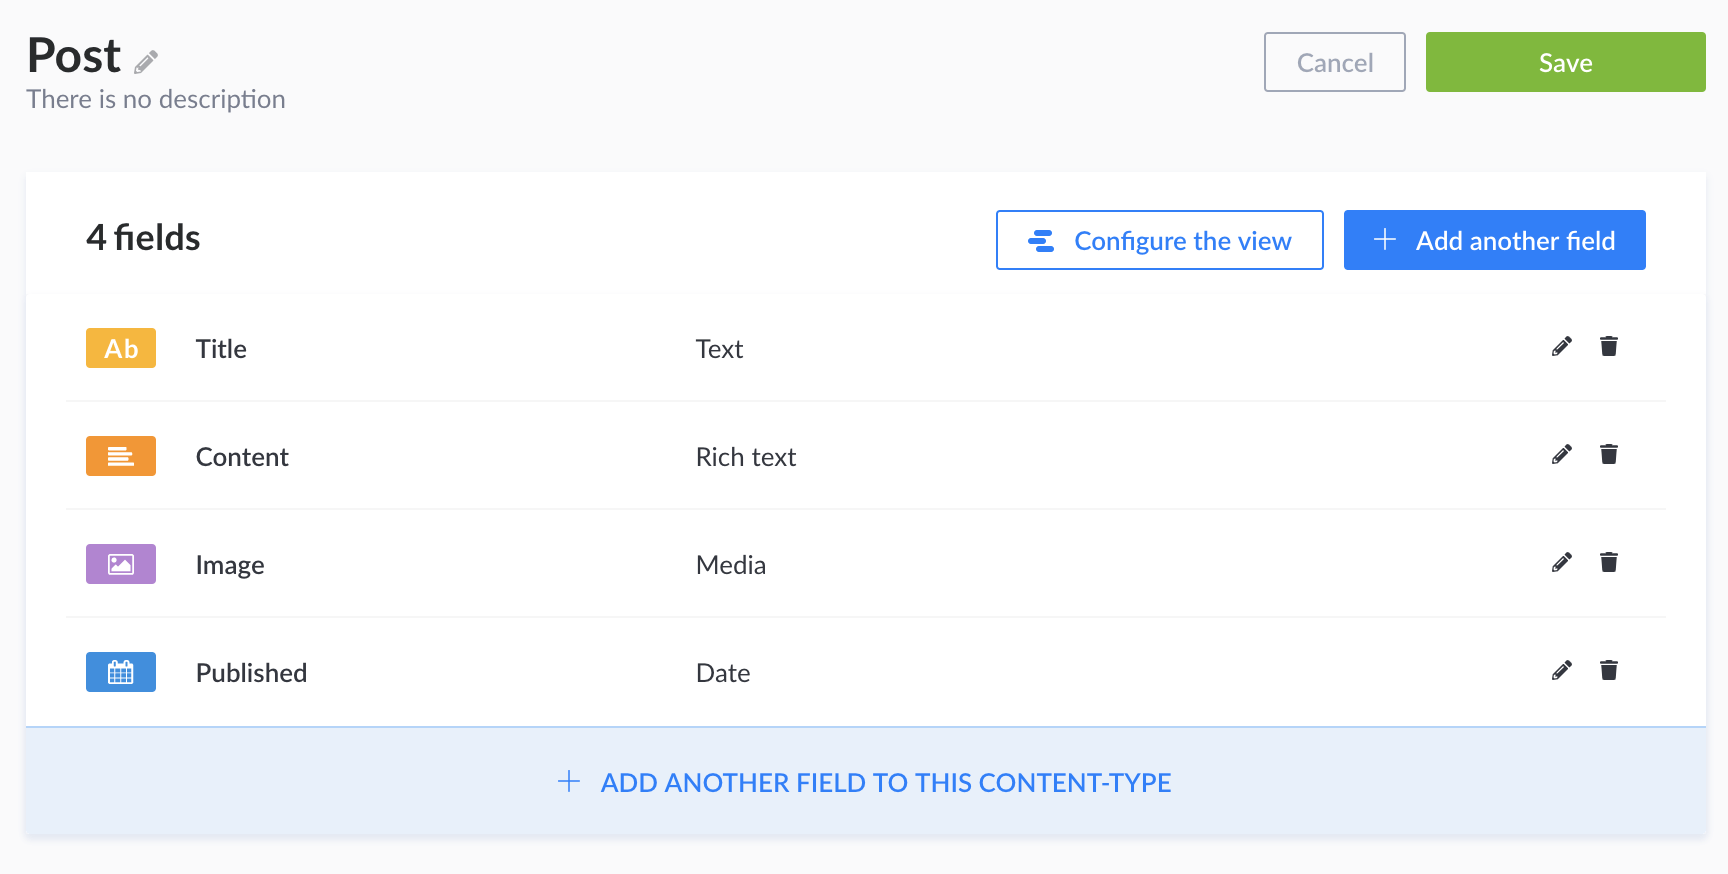
If you want to add some fields to your type, you have to step forward by clicking “continue”. The fields which will be used in a post are:
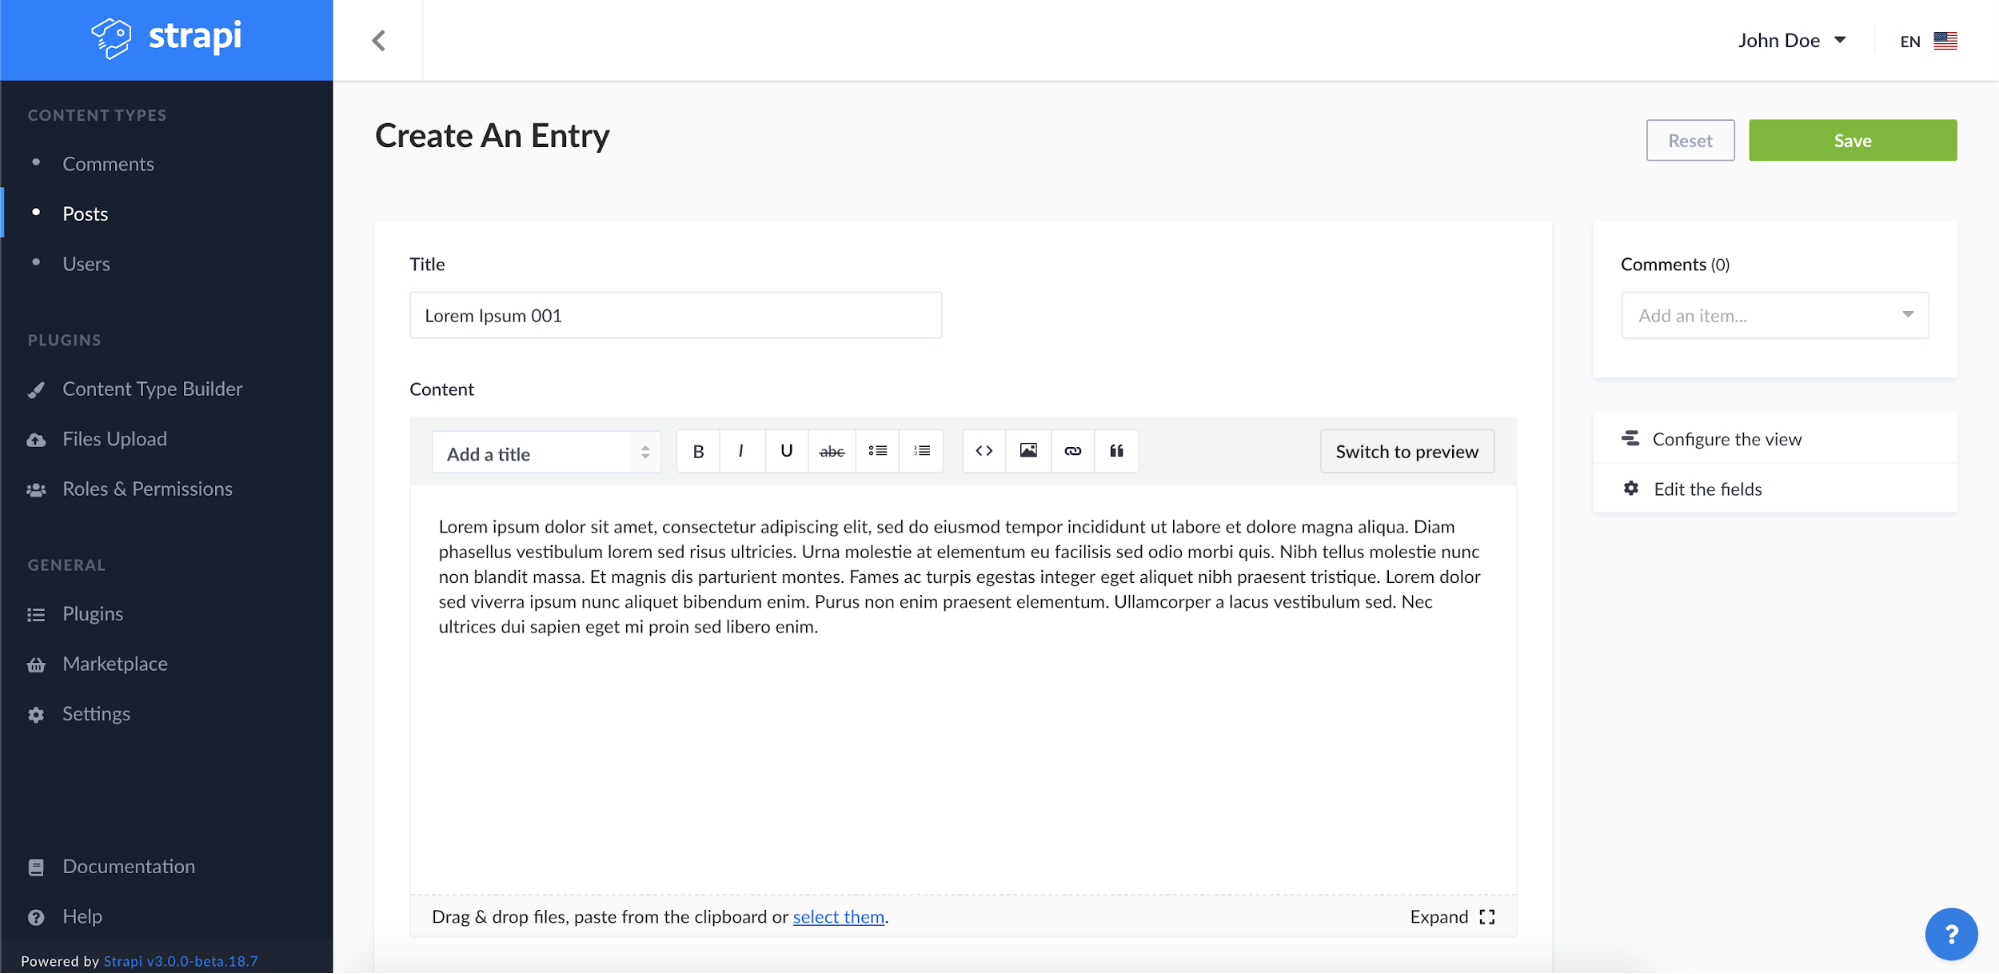
- Title — Name: title; type: text; options/settings: required, unique.
- The substance of your post — title: content, type: rich text; options/settings: required.
- Image — title: image; type: media (single media); options/settings: required.
- Publication date — title: published; type Date (Date); options/settings: required.
This is how your content type should look like eventually:
The first component
It’s necessary to create a simple component which will be used for some different content types in the future. It will be responsible for storing some data about meta tags and average read time.
When you are on a screen “content type builder”, you should click on a link “create new component”. I used the name “MetaTagsAndTime” for this component. Also, I chose the category “Custom”, created in the same place. If you have a lot of components, it’s good to categorise them, to make sure you can easily find them in the future. Then, you can choose an icon for your component. It will be also a hint for what component you will be filling in with data.
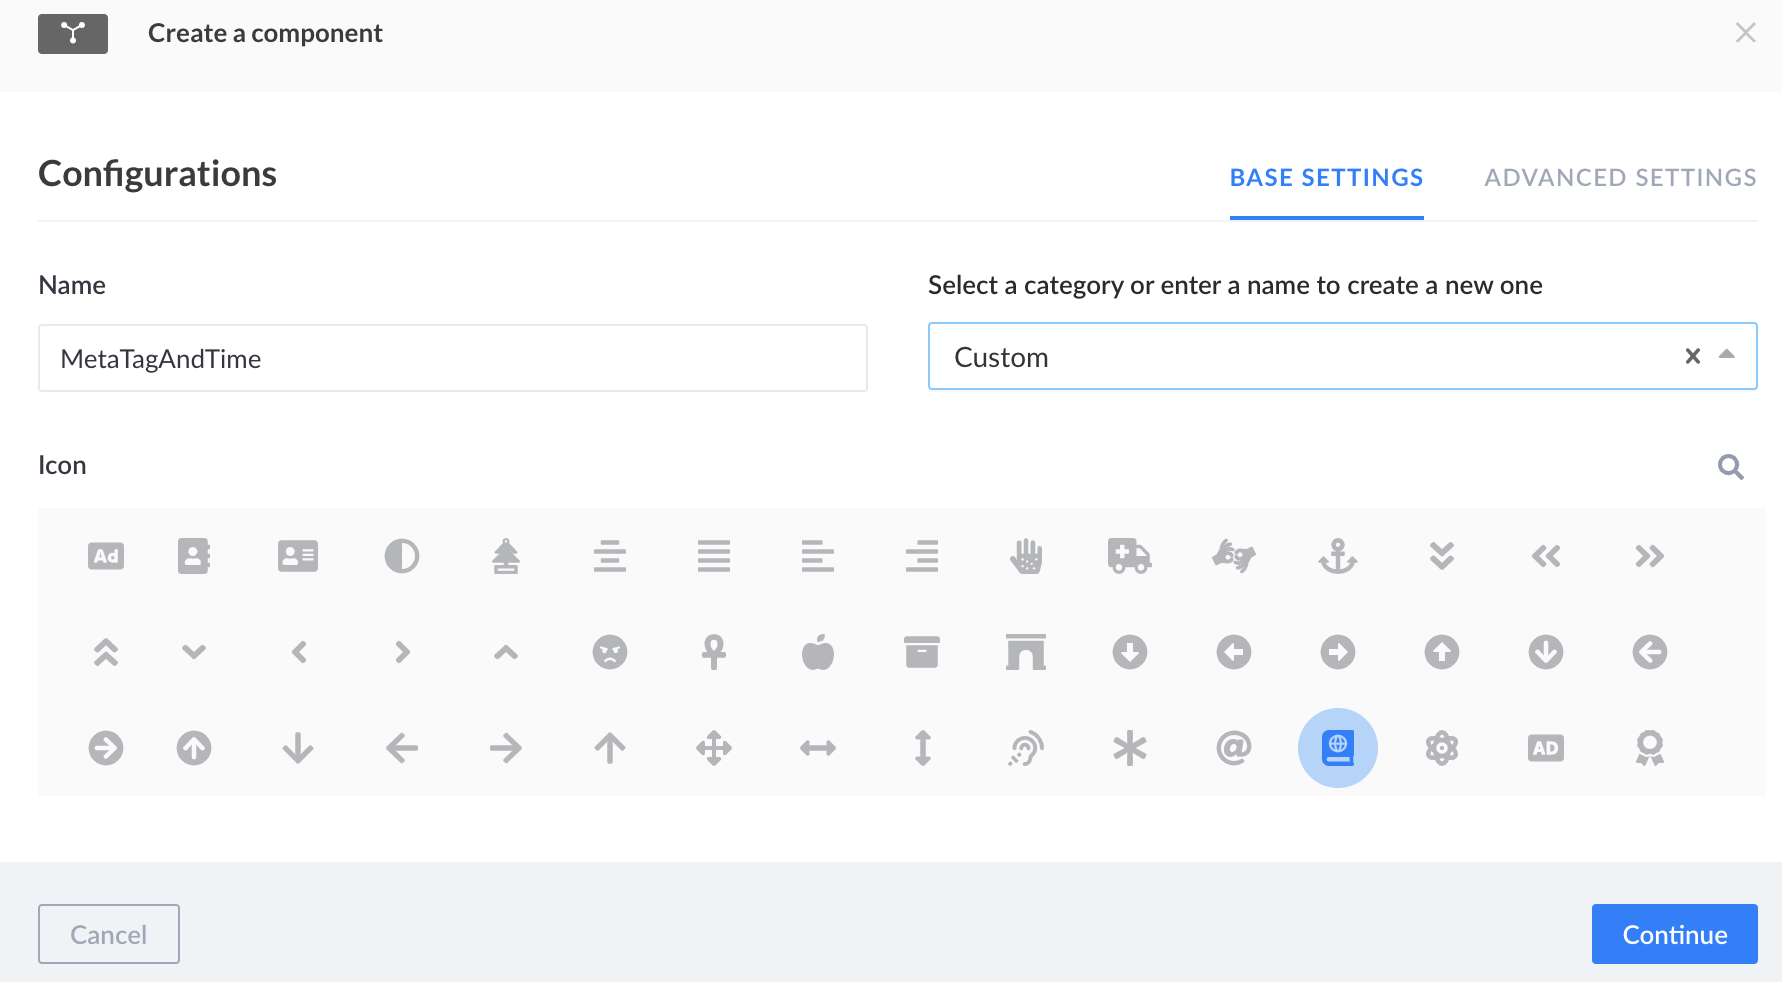
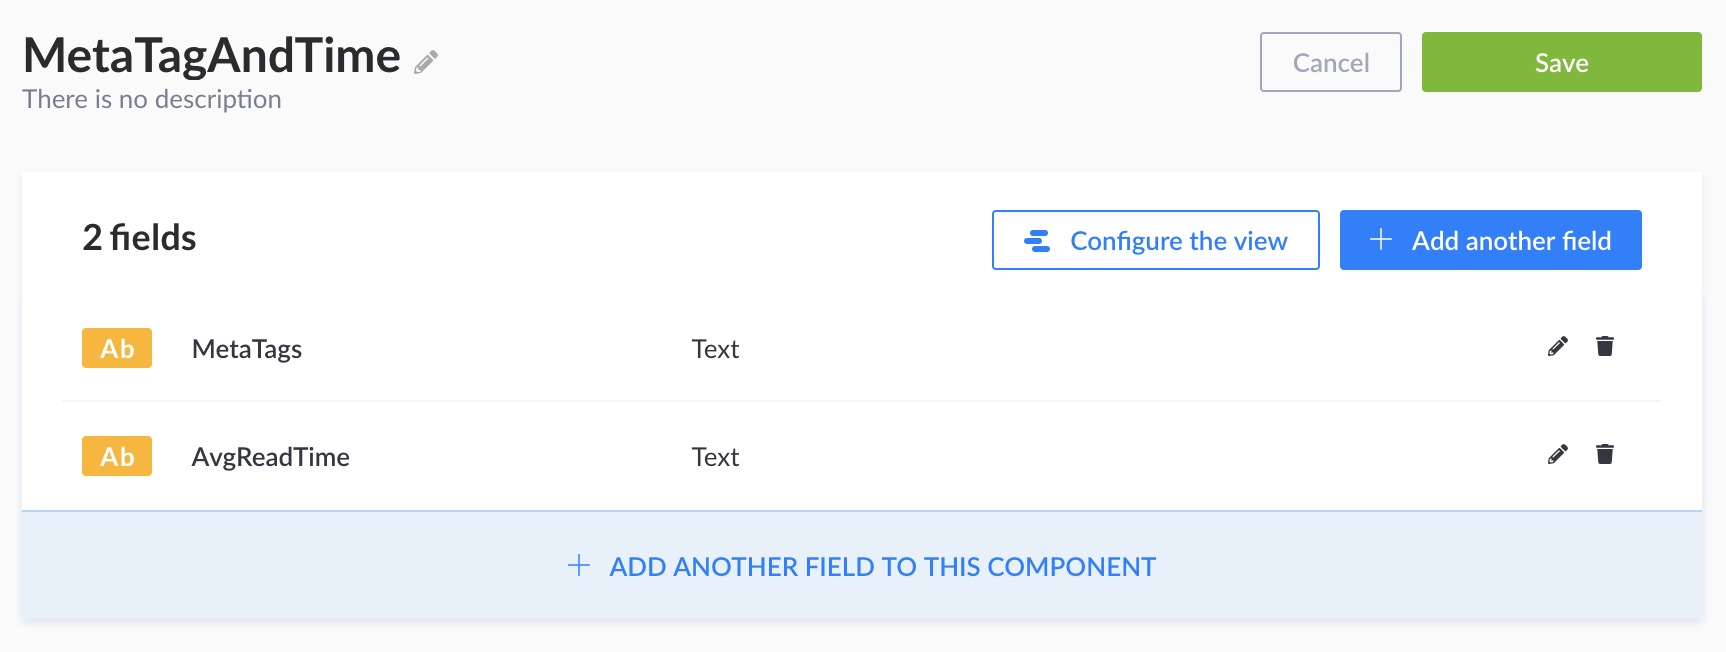
Once you click “Next”, you are moved to a screen where you can add fields, like in “Content Type”. The exemplary component contains two fields:
- Meta tags — title: MetaTags; type: Text; option/settings: required; default value: fun, cms, strapi.
- Average read time — title: AvgReadTime; type Text.
Adding the component to your post content type
To add a new component to the content type of a post, you have to choose your post in content type builder and then click the button “add another field to this content type”. Then, you choose the field “component” and the option “use an existing component”. Then, you have to select an option that this component has to be added only once. It’s because one post needs only one information about meta tags and average read time.
In some cases, you can create a component which will be responsible for adding the information (for example, if you have a restaurant website — you can inform about opening hours of your place). In this scenario, you’ll have to add content type with fields “day of the week”, “opening hour”, “closing hour” and add it to content type “restaurant”. If one place is opened from Monday to Sunday, you need to add a component for 7 times. Another place could be opened only on Saturdays and it will store one information only. That’s why you can use the option of “repeatable component” or “single component”.
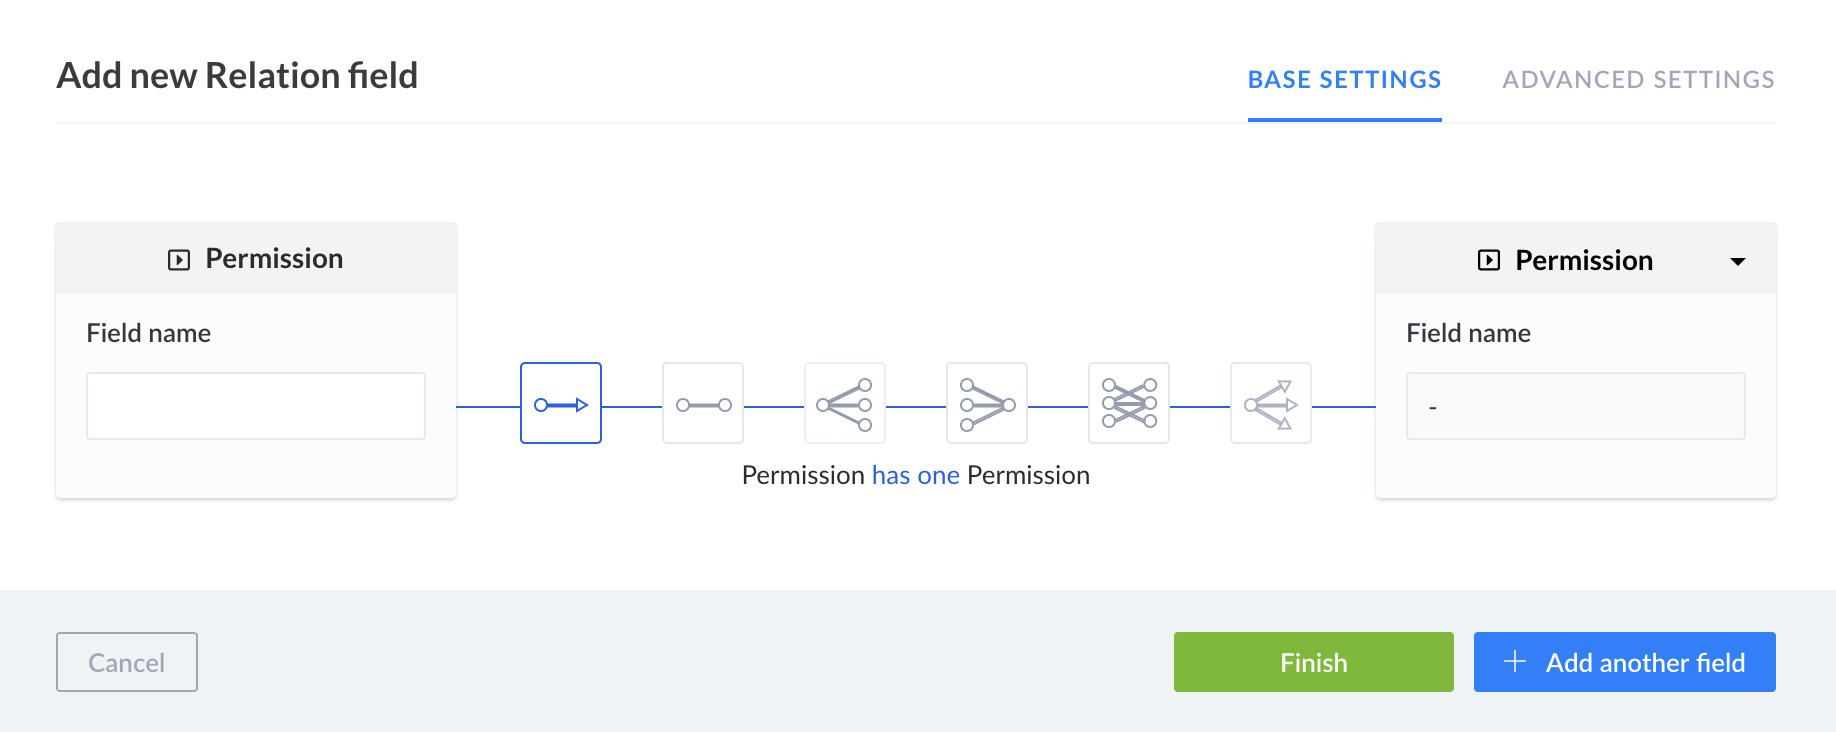
Adding content type with relation to another content type
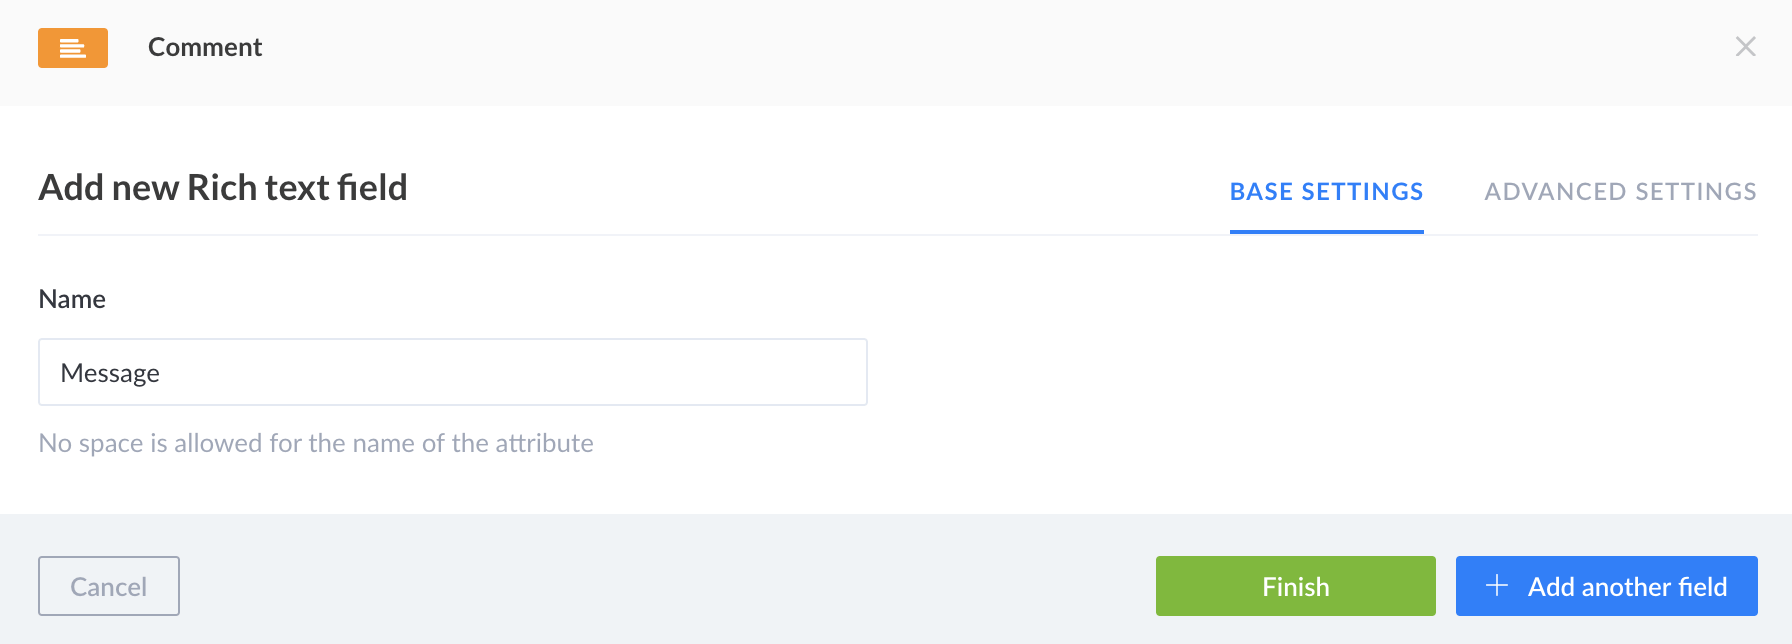
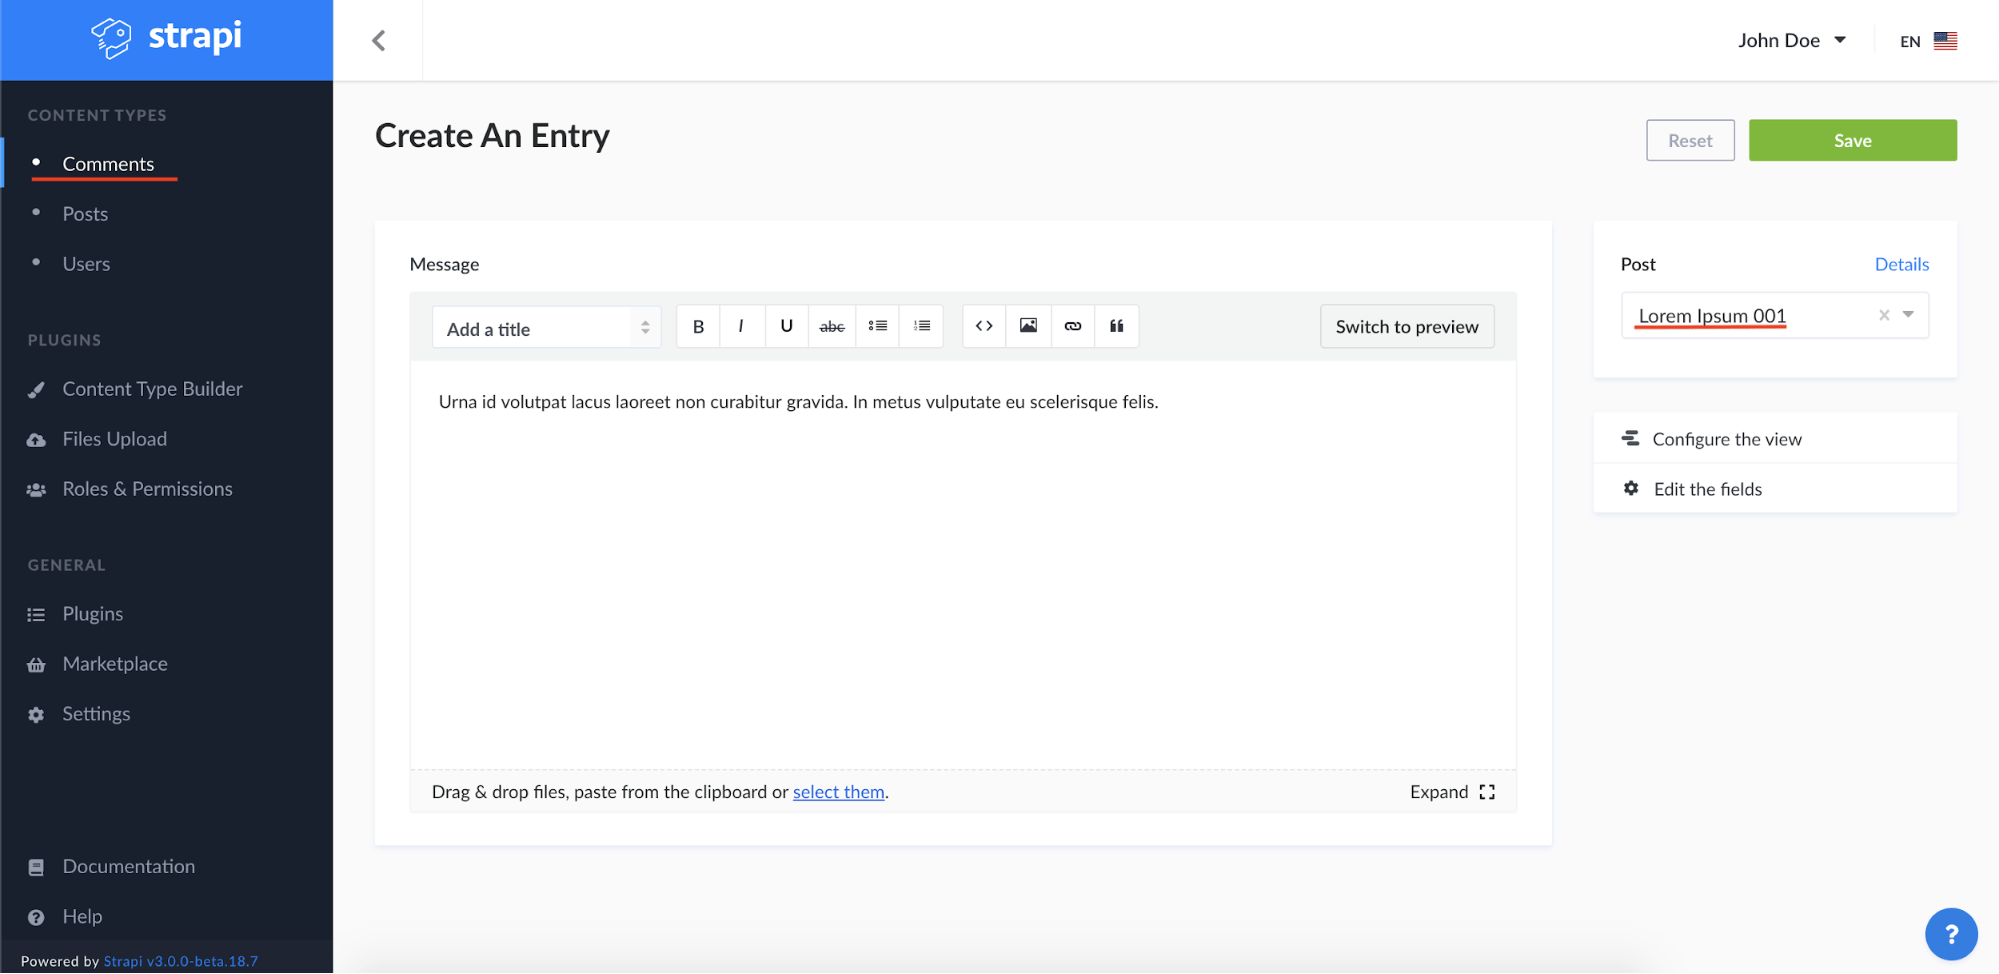
To become proficient in Strapi basics, you only need some knowledge about the relation between content types. To make it possible, you can add a simple content type “comment” which will have a relation to your post.
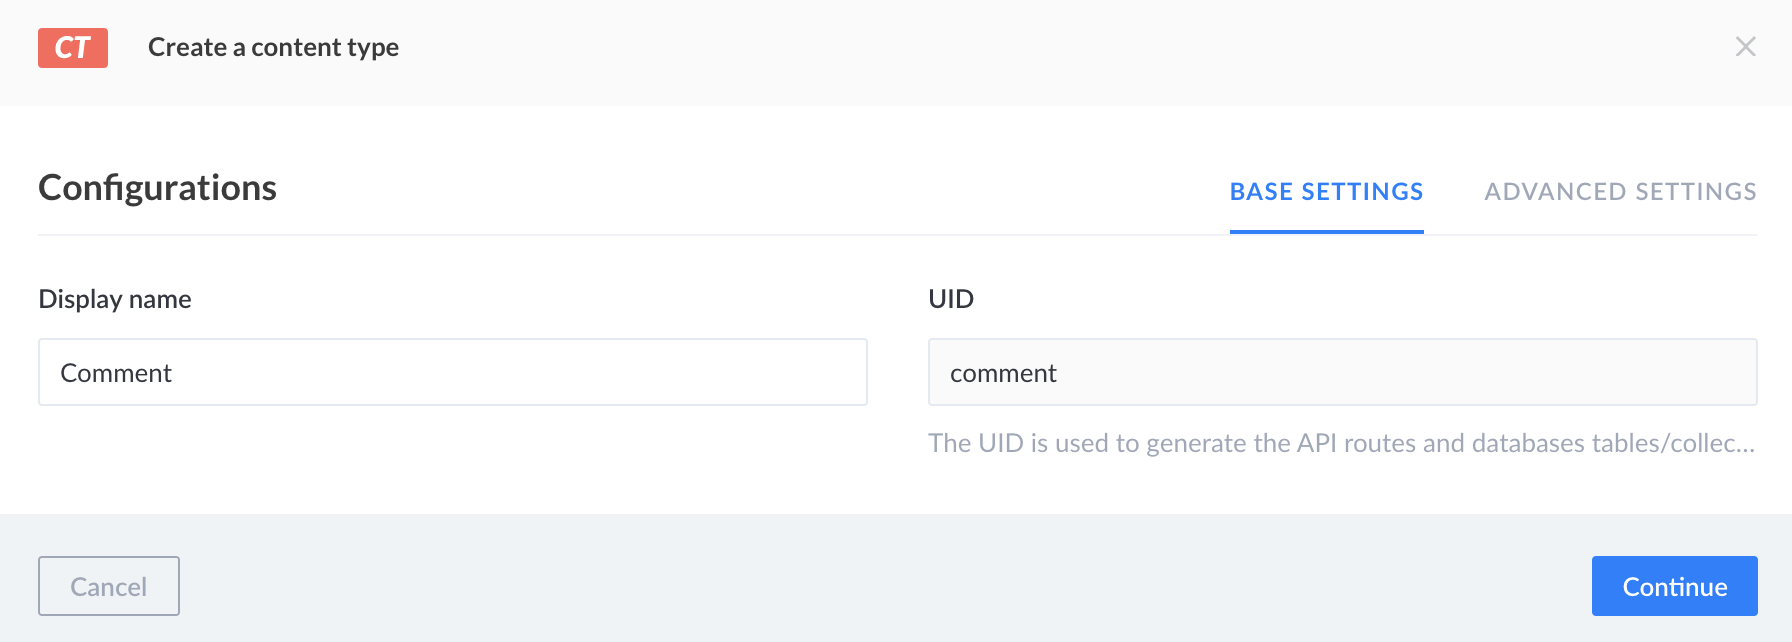
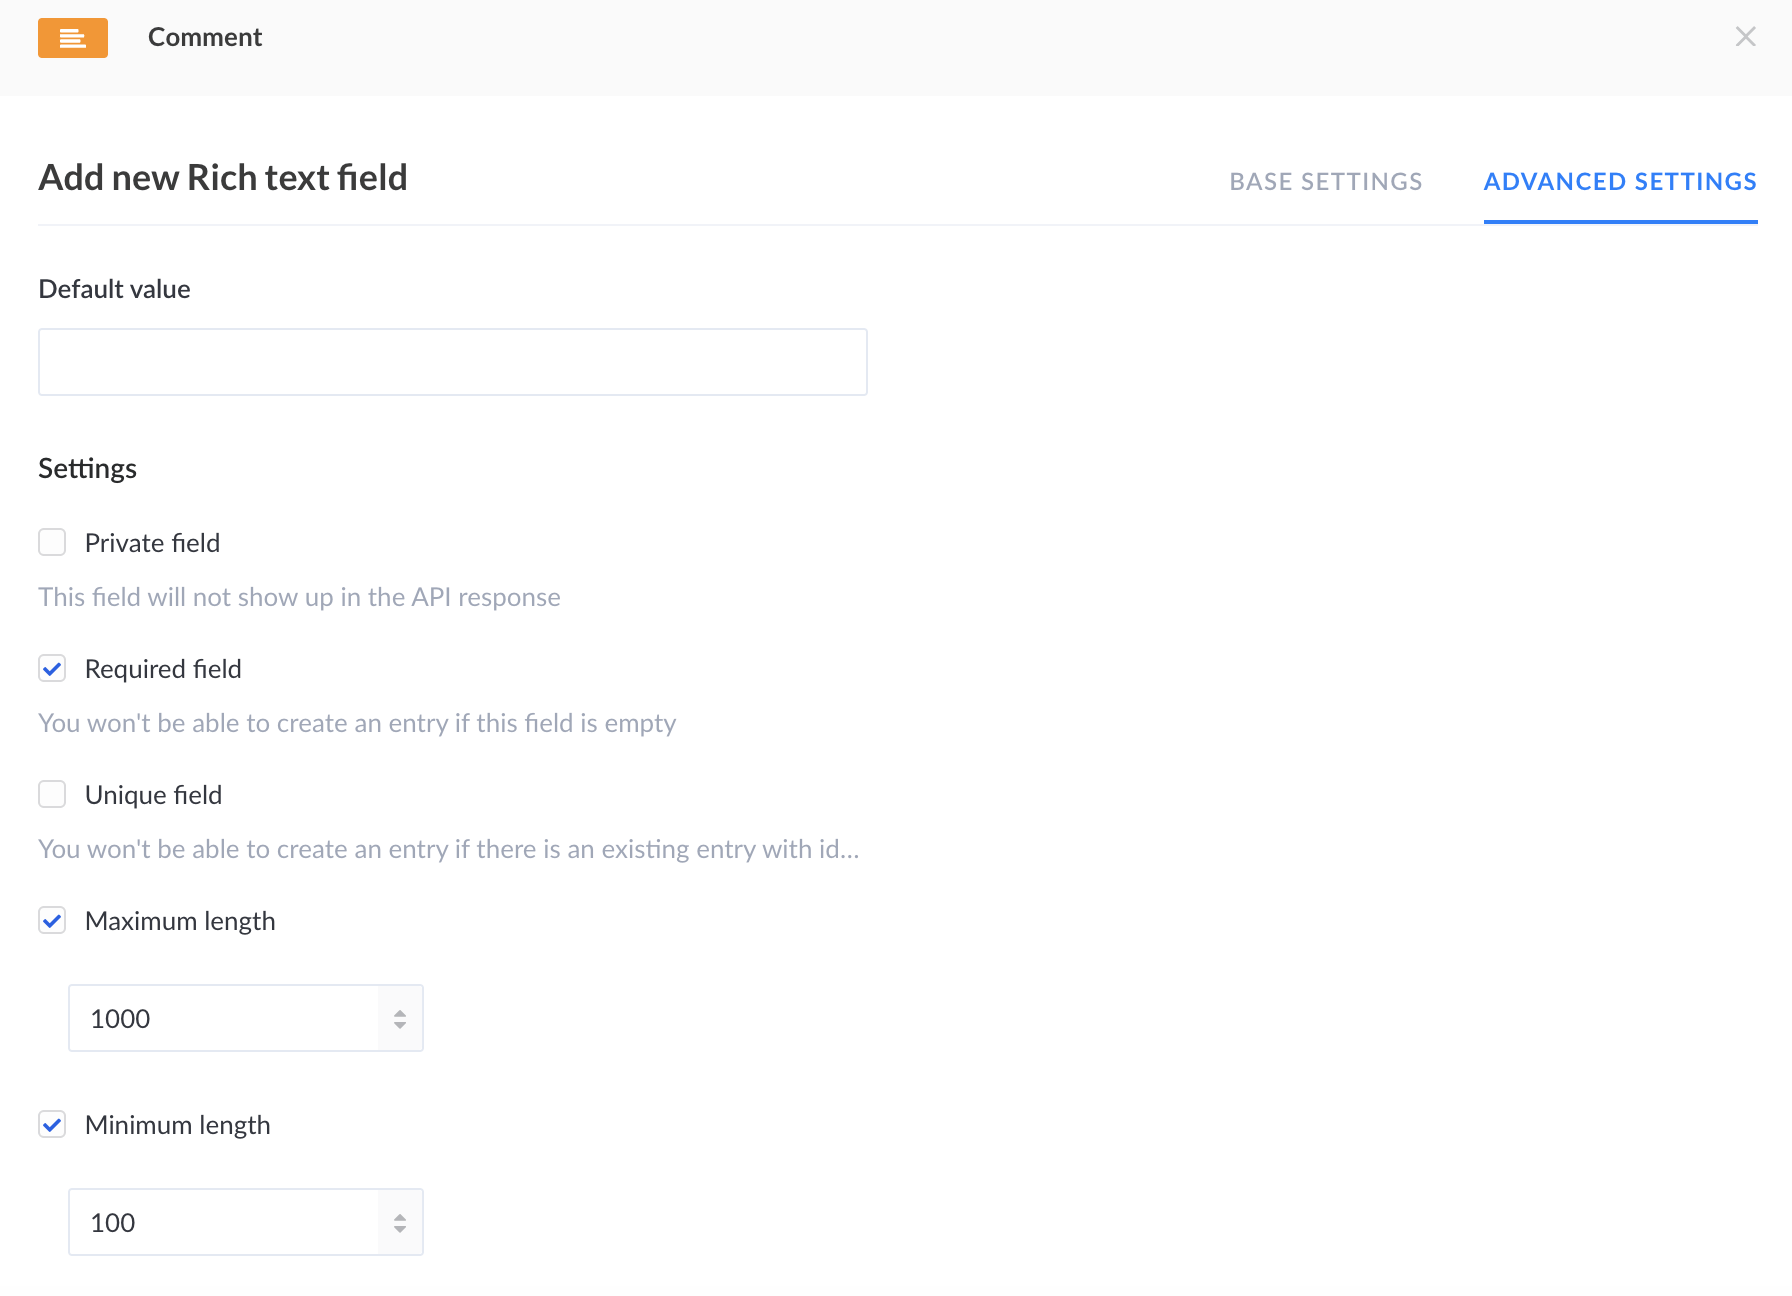
Also, you should add a “Rich” text field where you can store comments.
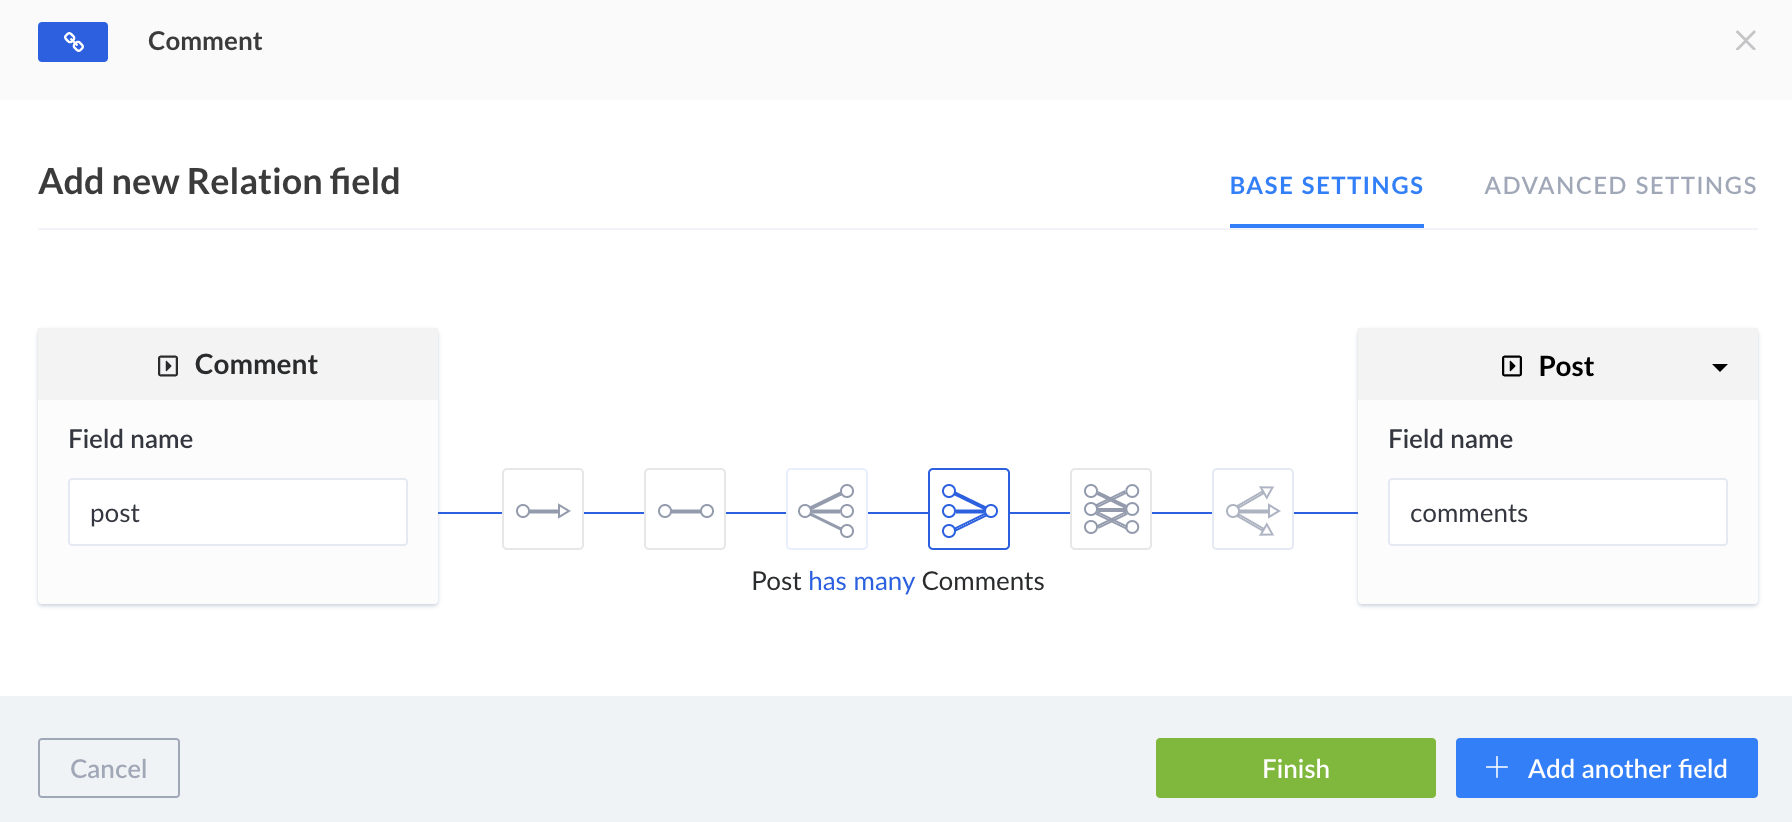
You should add a relation field between a comment and a post.
Now, your data structure is ready. You will store your information there and then you can easily manage it.
Adding some data to content types
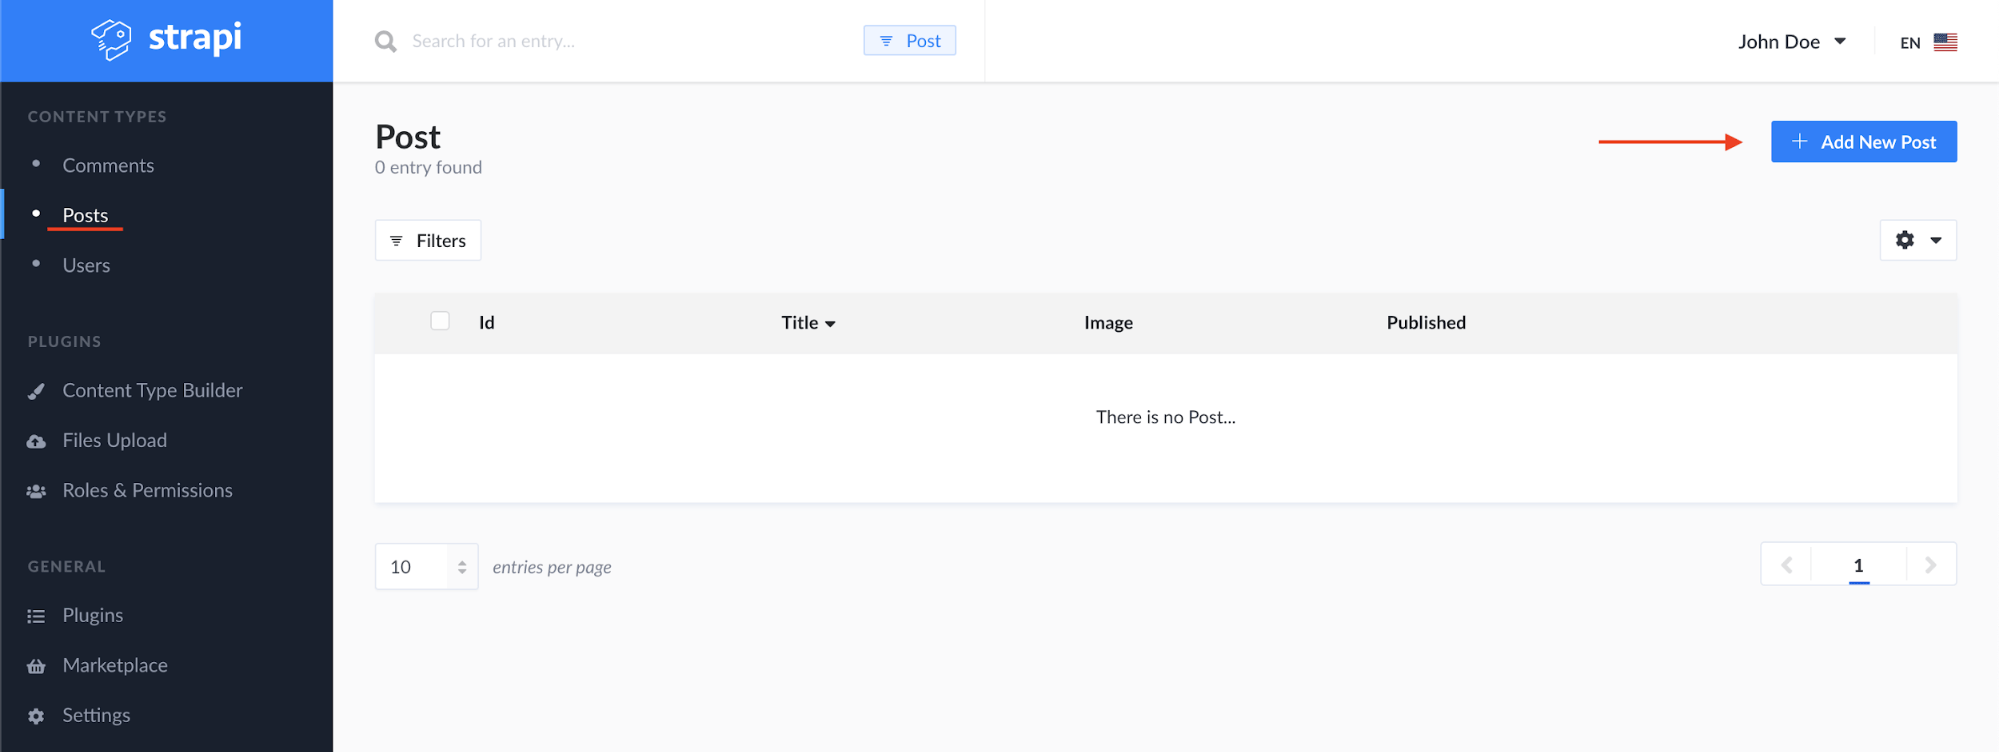
Once you have your content types ready, you can introduce some data. Let’s add a few blog posts to CMS.
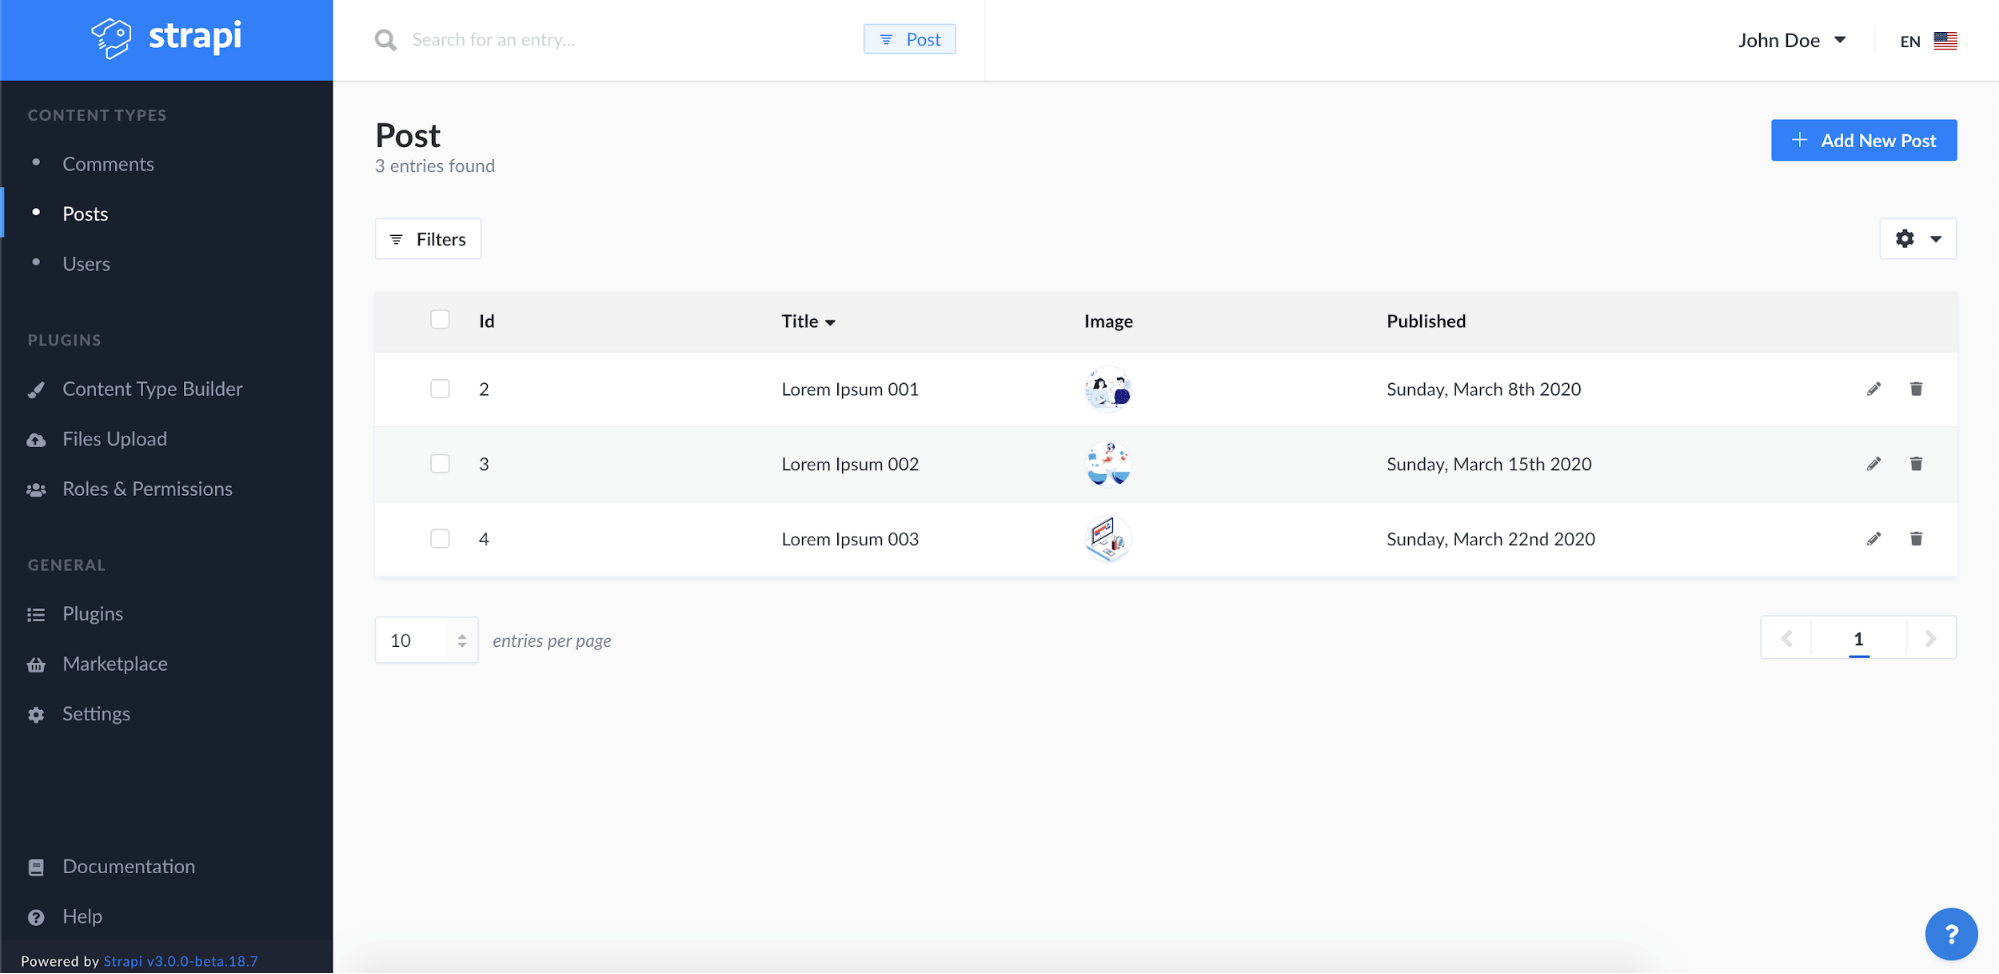
After adding three exemplary posts, you can add some comments.
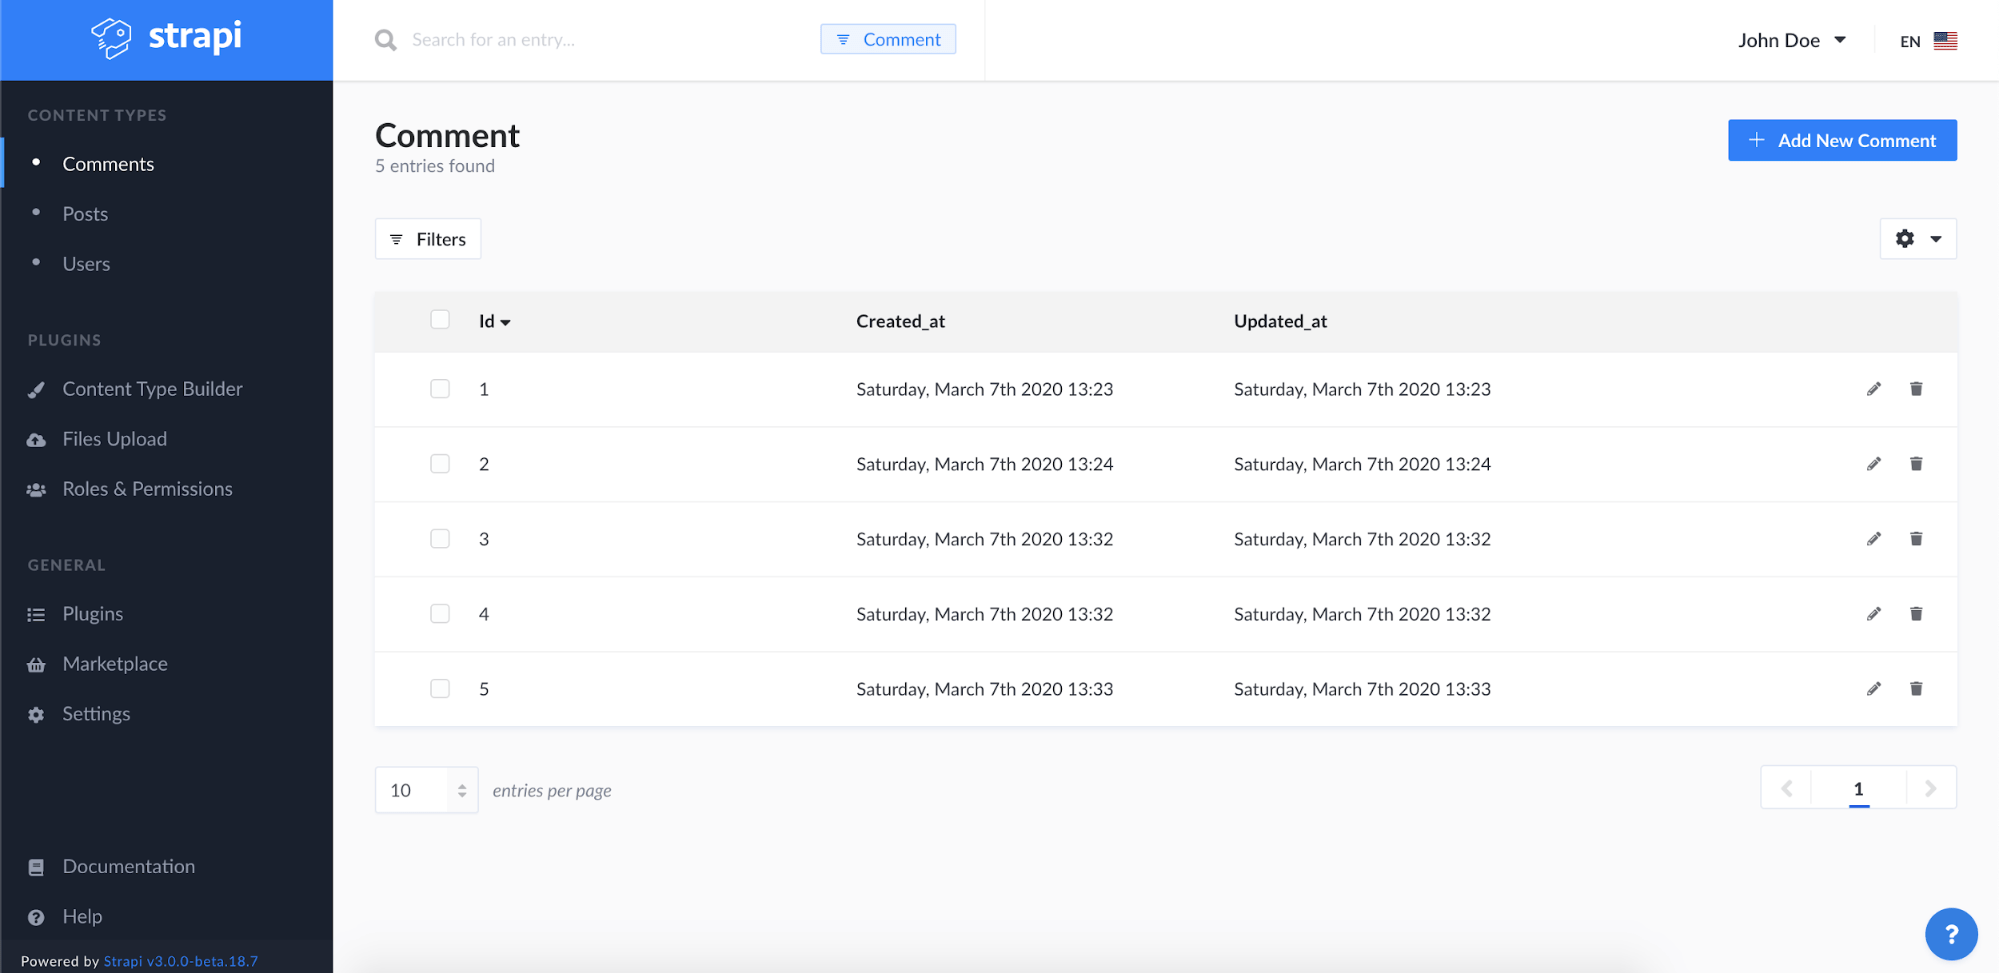
Content is added, posts and comments are stored in SQLite. How to get it externally? That’s simple. Do you remember how we named content types and Strapi automatically added a collection name in plural form? If you want to get your posts, you need to make a request to its endpoint (http://localhost:1337/posts). Once entering this link, you will get a response like this:
{"statusCode":403,"error":"Forbidden","message":"Forbidden"}

On default, Strapi set all the endpoints for resources as non-public. That’s why you can get error 403 with info about forbidden access. To make it public, you have to set it manually in the “roles & permissions” section.
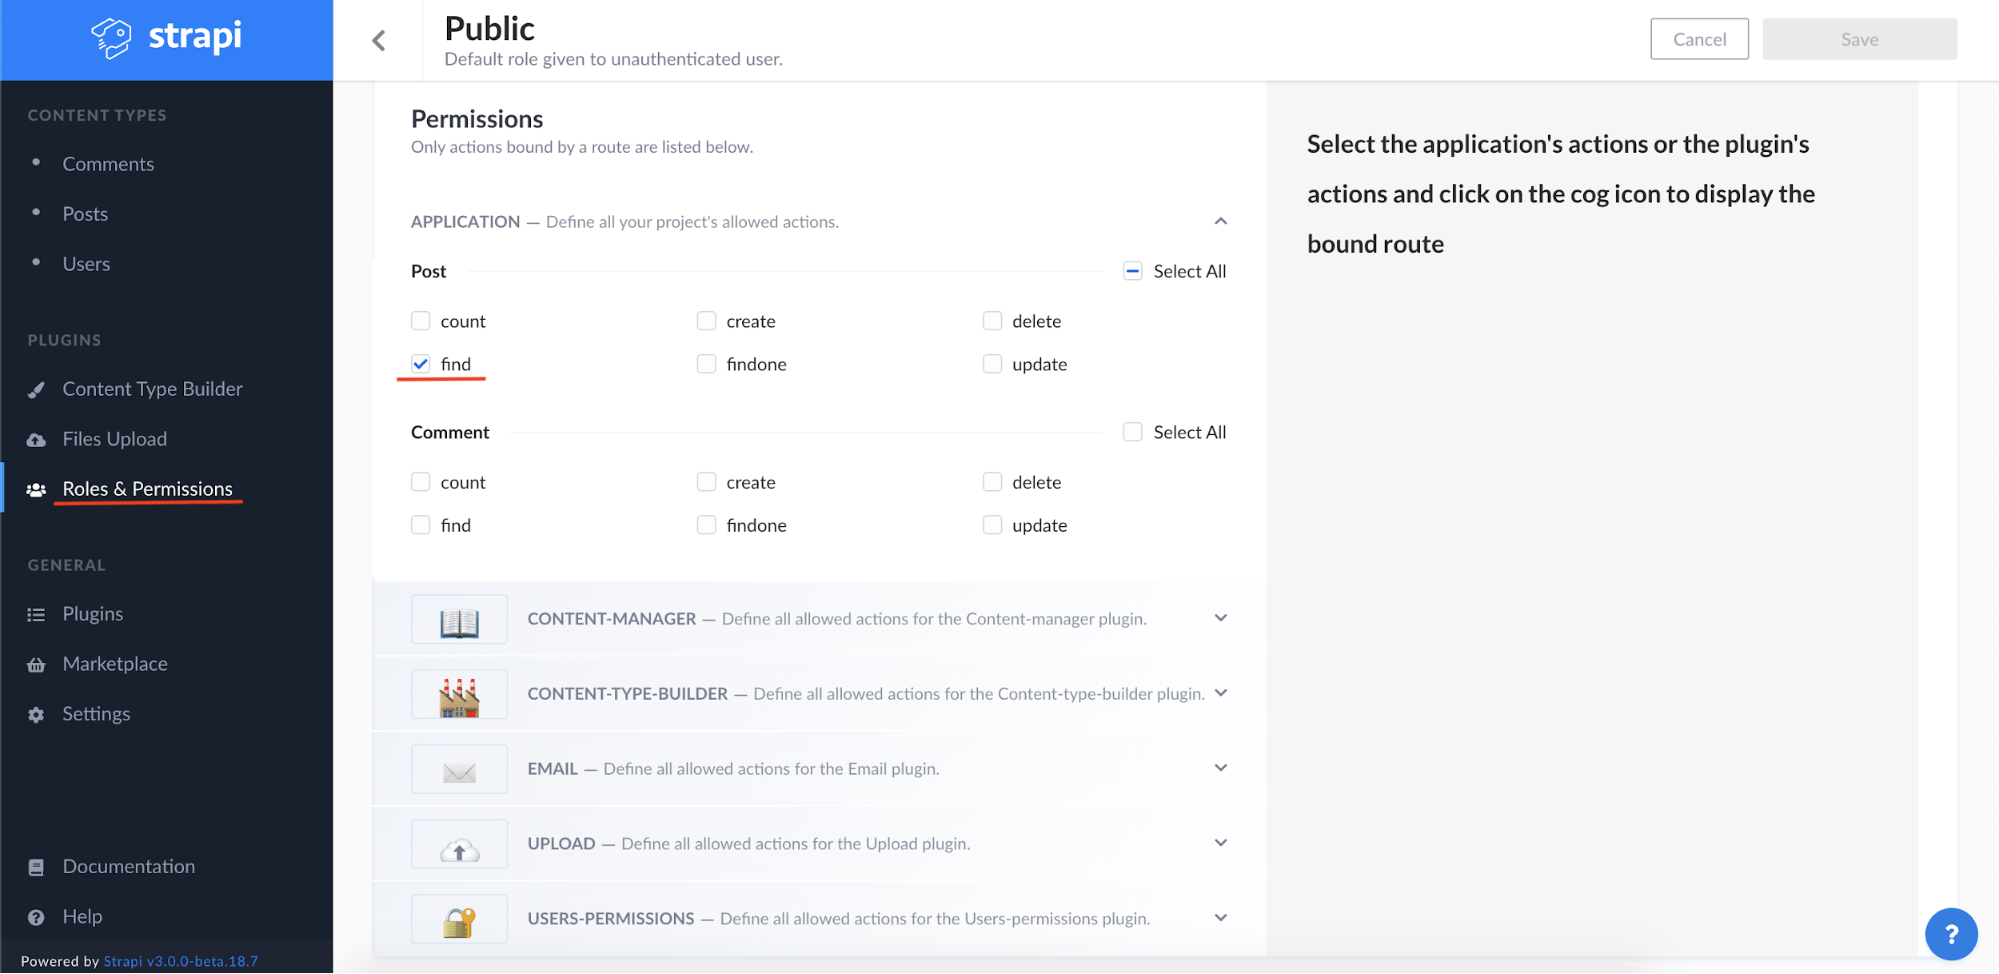
Now, you only need to make post searching public. In the future, you may be interested in adding pagination and then you will again need a public endpoint to count all the posts. Once you save all the changes in the “roles & permissions” section, you can try accessing your post endpoint (http://localhost:1337/posts) again.
Now, you should be able to get a response with a JSON object which presents all your posts.
Having access to your posts, you can display that wherever you like. You can use React, Vue, Angular or JSON. Whatever you wish. 😁
See also: How to create API in PHP with JSON-API
Conclusions
Thanks to Strapi, you can create an API and manage different content. Built-in admin panel with some functionalities let you introduce some new content and manage it.
Above, I focused on some basic Strapi functionalities. However, this peculiar Node.js headless CMS offers much more. You can manage users, add your own roles and permissions, create your own modules and add them to the admin panel.
This platform helps you focus on the structure of your content and on effective management. You don’t have to think about a framework you should use for your project. Strapi gives you everything on a plate and you only need to consider which database you want to use and how your data will be presented.
Obviously, Strapi is not the only and faultless answer to all your problems. You can face a project which you may need to build from scratch or which will have a complicated/non-typical business logic. But speaking about content management and delivering it to the users — Strapi does it all just fine.
I really like this platform. It gives access to the admin panel so I can easily manage the data and share it with the users.
I hope that this article summarises some basic functions of Strapi. Maybe next time you have a project to complete, you will consider using this, instead of writing everything from scratch. Doing so, you can focus on business logic, so… think about it!
💡 Read more: Why use Node.js? Scalability, performance and other benefits of Node.js based on famous apps
Headless CMS, microservices - there are many choices you can make when it comes to software architecture.
To learn more about microservices today, check out our State of Microservices 2020 report, which goes over topics such as Continuous Integration, micro frontends, APIs, debugging and more.

