25 July 2023
Framer Motion – the best library to build animations in a declarative way. Code samples you need for a new or already existing project


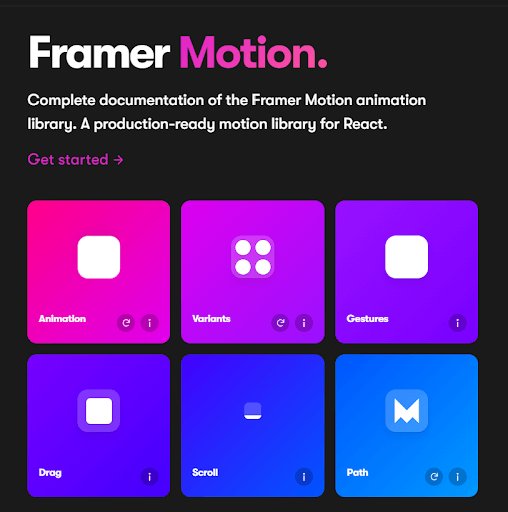
Contents:
🎶 Everybody’s usin’ a brand new tool now. We know you’ll get to like it if you give it a chance now. Come on, baby, do the Framer Motion! 🎶
Today we’ll show you why it’s better to use framer-motion than going insane with figuring out CSS + JS animations yourself. Zero code, maximum speed! Additionally, we provide you with code samples you can copy and paste for your projects.
Benefits of adding animations to your application
Improved user engagement
User-friendly and intuitive navigation of various app elements translates into better conversion. Animations give you an extra few milliseconds to load app data and curious users won’t decide to leave the screen if something appealing is happening on the screen.
Distinguished feel & unique style
Eye-catching UX/UI design will make your app stand out among similar products and create an advantage over your competition. What’s more, gesture functionalities give the feeling of smooth use of your application.
Framer Motion animation library
Framer Motion is a React library that allows you to quickly build both simple and more complex animations in a declarative way.
At The Software House, we always use proven and supported technologies that provide exquisite developer experience (DX), and most importantly, allow for rapid product development. Framer Motion met our requirements in various projects with crucial audiovisual layers. Animations implemented with this solution fit perfectly into further visual enrichment of applications. Thanks to Framer Motion’s functionalities we were able to provide not only rich animations but also speed up the general development and improve user experience and engagement.
Some cool features:
- basic animation of elements is done by the ‘motion’ component. You can think of it as a standard HTML or SVG element enhanced with animation capabilities.
- to define the input animation after mounting the component, you edit the value of the ‘animate’ field.
- implement reusable and orchestrated animation with Variants.
- by implementing gesture support, and drag and drop, you can create awesome animations that respond to user interaction.
- support for scrolling animations playback, incredibly useful to visual storytelling.
- compatibility with server-side rendering that translates into greater optimization.
Why is it better to use framer-motion than tinker with CSS + JS animations yourself?
When developers think about animations, usually the first method that pops up is pure CSS + conditional playback using JavaScript. However, this path is often bumpy when you want to implement anything remotely complex. This imperative approach to animation is hard to maintain due to the descriptive way of writing code.
In React’s (and Framer Motion’s) case, we use declarativeness — the way of writing code that represents the effect, thus easy to read and maintain.
We’ve tested many alternatives to Framer Motion but honestly, none of them provide so much flexibility and functionalities – so far it has been irreplaceable.
react-transition-group
Small bundle size, very easy to use, distinguishes animation events (“entering” | “entered” | “exiting” | “exited” | “unmounted”) that can be styled one by one. A few features make it not suitable for more complex animations – the experience is similar to making animations in CSS. Not very “reacty” – there’s no hook API, only components.
Rumor has it that in TypeScript RTG is required to define styles for each transition which can be annoying.
react-spring
Slightly larger bundle size than RTG but with more features available. Animation physics is quite accurate and can be heavily customized, e.g. adding mass to elements, or changing acceleration. No need to hurt performance with re-renders, Framer Motion keeps these re-renders to an absolute minimum.
As far as hooks are concerned, react-spring requires wrapping its special animated elements with hooks that define animation types. That increases the learning curve and requires more knowledge to understand which type is the most appropriate for a given animation.
Framer Motion allows you to use useSpring to implement “spring” animations.
GSAP (GreenSock Animation Platform)
A popular library for animation design, mainly for sequential animations, i.e. placed on a timeline. A very good animation performance is perfect for storytelling.
The big downside is a high learning curve. The imperative nature of this solution instead of describing the results you want to achieve, shows you the steps only. What is more, GSAP has a custom license which means the library is not free for all commercial projects. Check the license guidelines to learn more.
CSS
No bundle size, pure CSS animation.
Downsides? It requires you to describe all the animation steps (one by one!). Animating anything is cumbersome and takes a lot of time. As it’s pure CSS, it’s not possible to change the DOM during the animation. Finally, to create an animation for the input element in Viewport, you must additionally use React.
If a tech project needs to be fast, easy to maintain, and offer the most support for animations, for us it’s Framer Motion or nothing.
Adding Framer Motion to a new or existing project
Animated stepper implementation
In this example, we will create a simple stepper to cover the basic concepts of Framer Motion animation. We will use the following:
- variants
- AnimatePresence component
- motion components
Firstly, let’s create a separate <Stepper /> component.
You should define its specific step number and state value for the current step.
We will use <AnimatePresence /> component to animate the mounting of our checkmark. This component is quite magical – it only needs initial and animate properties for any of its children (of any depth) to start working! 🪄
Define variants and checkmark transitions
Having that out of the way, let us define variants and transitions for the checkmark.
pathLength property for variants will animate SVG in “drawing” fashion – it uses a trick where you change the path from a solid line to dashed, with gaps big enough to hide an element, and then change its value, so it simulates the drawing effect. Luckily you need not bother with complicated values – Framer Motion deals with them for you!
Next up, we set variants for motion.div wrapper for managing overall colors on different stepper statuses. In this example, we will define three statuses:
- Inactive, for steppers with
stepvalue greater thancurrentStep. - Current, for steppers with
stepvalue equal tocurrentStep. - Checked, for steppers with
stepvalue lower thancurrentStep.
getStatus is our helper function to store the status value in constant and then pass it directly to the animate property on the motion.div component.
What’s left is to wrap everything in React and render it on your page.
And that’s it! You are ready to cruise with your neat stepper. 😎
You can define those properties in two ways:
1. Pass the object directly to the property, e.g.
2. Pass the object of Variants, and then pass only the variant name to the property, e.g.
Personally, we prefer the second option because, in the long run, it’s way more readable and reusable (but both are okay to use!).
Gestures feature in Framer motion (e.g. pull down to refresh)
The gestures module is especially useful for mobile apps (pan and drag gestures), but it also comes with hover and focus gestures that shine on desktop versions.
Here we will implement a “pull to fetch” feature, useful for refreshing data on mobile apps. As for the Framer Motion library, we will use:
useSpringanduseTransform hooksfor calculating animated values,dragand drag-related properties on motion component,useAnimationfor launching animations for our spinner.
First and foremost, we need to set up animation variables. The heart of all animations is useSpring, then we set additional variables with useTransform.
It’s used for calculating Y position when scrolling. Stiffness and damping properties are for smoothing things out. Ratio 10:1 makes it buttery smooth, without unnecessary bounce, but you can play with those values and set them to your heart’s desire.
We use useSpring instead of the curiously often-recommended online useMotionValue. useSpring smoothly calculates the animation with beautiful effects, even if you force these changes with other functions (you’ll see it below in the code snippet). Forcing changes with useMotionValue causes ignoring animations along the way, which makes tiles choppy and jumpy
useTransform hooks are also great for animation values handling. We will use them for animating our spinner.
About the props:
- the first value is for setting “watcher” to chosen value.
- the second value is our minmax threshold to watch on that value.
So in both of our transforms, we watch for changes in scrollY between 0 and 30 pixels. You can modify it to reach your desired effects. - the third value is the minmax threshold for our final value, based on the second parameter.
assuming our scrollY has a value of 0, then loaderY value is -48. At scrollY value 30, loaderY is 0.
After that, let’s set standalone animations for our spinner that don’t depend on the current value of scrollY.
The useAnimation hook is quite straightforward – it’s used for manipulating animations and assigning them to components.
The animationVariants variable is our set of animation variants, possible to launch by using .start() method of useAnimation return. startLoading and endLoading are just names for our variants. They are fully customizable, so you can call them whatever you want, but remember, you will need to use those different names when calling the .start() method.
loadingAnimationandanimationVariantsvariables need to be assigned to the component you want to animate. If you don’t assign one of them to a component, animations won’t trigger.
Next, we will need to set the onDragEnd function, to handle animations and refetch after pulling.
useSpring returns a class instance of MotionValue. It’s automatically handled when passed to framer motion components, but in this case, we will need to get and set some data to it manually.
In the if statement we check if the y value is equal to or greater than the value we set for our transforms, so our animation will be consistent. Then on true, we animate loading, run our refetch functions, and after fetching data, we animate everything back.
We have almost everything ready, it’s time to set drag properties for our component. In this example, we will only use dragConstraints and dragElastic but you can modify those freely.
WithdragConstraints our element knows to respect set boundaries. For top and bottom set to 0, by default elements will return to their default position but they will be dragable outside it. It’s a desirable effect for dragging to the bottom but not really for dragging to the top. That’s where the dragElastic property comes in handy. We can modify the power of drag outside the constraints, where 0 is no drag at all and 1 is the max drag power.
If dragElastic is an object, then undefined directions will automatically be set to 0.
Okay, only one thing left – creating components and putting everything together
Drawer implementation
A drawer or sidebar menu is a common request in web apps, mobile and desktop ones, with Framer Motion you can achieve it easily. To create Drawer functionality we have used the following framer-motion features:
- Variants,
AnimatePresence,useCycle,initial,animate,exitproperties of the motion component.
To implement mount/unmount animation of the Drawer component we used the AnimatePresence component from Framer Motion that runs animation for every child with a unique key with initial, animate, and exit properties declared like in the example below:
initial– initial animation state,animate– a state that is present when a component is being mounted,exit– state applied when unmounting component.motion.divandmotion.ais a directive that enriches regular html tags or React Components with motion behavior as described in the introduction.
JSX presents a Drawer component around the drawer aside section that can be mounted and unmounted with an animation.
For inner drawer animations, we used Variants to animate a list of drawer items. To define variants you need to declare two states, one for enter state and the other for exit. We used variants rather than initial/exit/animate to orchestrate animation for children by assigning the same open, closed names for variants.
Staggering children animation is a nice functionality. We assigned the same variant names to both div and <a> elements, so the anchor element animation is orchestrated to fire after the div element is visible, and the next child of div will be delayed 0.2s after the previous one.
The last step is just using this component on our page, coalescing it with state management (like in the code example below) and we are done.
For switching between open and closed states we used the super cool utility `useCycle` that allows you to cycle between values. In our case, we need false and true which signifies if the drawer is open.
As you can see it is pretty straightforward to achieve this drawer effect.
Transitions between pages (AnimatePresence, Child animations, Routing)
Transitions between pages enrich the application with a unique feel and make the user engaged instead being bored with dull loading screens or even worse, empty pages.
Framer motion allows us to easily create transitions between pages by using AnimatePresence in the custom TransitionEffect component.
The next step is to use this TransitionEffect component in our _app.tsx that wraps every Next.js page to provide the same animation for every page.
We have created a complex transition effect just to play a little bit with possibilities but you can animate opacity, x-axis, etc. for a smoother application flow than instant page change.
As you can see, we have used similar functionalities, e.g variants – they are flexible, allowing us to play orchestrated animations like scaleUp, out, scaleDown, center. That gives us a lot of freedom regarding the implementation of accurate animation.
Last but not least – useReducedMotion hook detects if the user prefers reduced motion or even no animations at all.
We should consider this an accessibility issue because some users suffer from various disabilities such as epilepsy, and flashy animations may trigger them. Our buddy, Marcin Gajda, wrote a very useful article on practical improvements for animation accessibility. Make sure to give it a go!
Framer motion capabilities connected with Next.js routing made our Transitions in page look super cool, you can check out and play with the code below.
Framer Motion benefits
Just to sum up everything we learned today:
- Implementing interactive and animated components increases user engagement.
- Animations give more time to load the data without boring or irritating your users.
- With custom animations, your app becomes unique and stands out from your competitors.
- Framer Motion is the undisputed winner when it comes to animation performance.
- Your application will achieve a great Lighthouse score.
- Thanks to global helper functions, the solution can easily disable or reduce animations for users who prefer apps without moving elements.
- Accessibility-friendly for people with various disabilities that require our help to browse the web without being triggered by intrusive animations. Our workmate, Marcin Gajda, wrote a piece dedicated to improvements in animation accessibility. Highly recommend!
- Framer Motion provides an excellent developer experience that speeds coding and frees up a lot of developers’ time to focus on other priority tasks.
- User satisfaction and distinguished style can get your app famous by winning design trophies like Awwwards.
Zero code, maximum speed. framer-motion can do much more than this!
Framer Motion didn’t pay us for endorsement but we like this solution so much that we’ll tell you about some extra awesome features anyway. Maybe you’ll find some extra arguments to convince your shareholders that animations are THE thing now.
Layout animations
Allow to animate using CSS layout variables, e.g. align-items: flex-end → flex-start, that under the hood are handled with transforms, visibly boosting performance.
Drag animations
Widely understood drag animations: velocity support, dragging while respecting the parent element so it doesn’t go beyond the borders, spring effect, and more.
Utility hooks for animations
Globally animating selectors or selected elements with useAnimate, assigning drag control for animated elements with useDragControls, and detecting whether a given element is in the viewport. The latter is well-optimized and doesn’t push per-scroll renders.
Group animations
Creating group animations and shifts to animate transitions across the entire grid.
We’ve used this for my own project for rendering a calendar with focusable days to show details. We can confidently say that the results were pretty amazing.
3D animations
You can connect to React Three Fiber to make 3D animations with framer-motion logic. We have already described this process in the Rendering 3D in React made easy with react-three-fiber article.
Accessibility
At The Software House, we ensure that the software we release is designed for all users. Framer Motion accessibility guide shows handling animations concerning the user’s accessibility preferences set in the browser.
Hire a team that feels like yours
No matter if you start a new or transform an already existing project, we will find business-appropriate and future-proof solutions. Click on the button below, describe your problem, and we will get back for free consultations!
