21 May 2020
Flutter tutorial: How I learned to use this framework


If you’ve ever thought about developing one mobile app which will work on the most popular mobile operating systems – Android and iOS, most probably you considered using React Native. It’s one of the most common solutions for hybrid app development. Created by Facebook, battle-tested by dozens of mobile developers since 2015. But have you heard about Google’s Flutter? If you didn’t – let me introduce you to a straightforward Flutter tutorial based on my own experience.
So, what is Flutter? How long does it take to learn Flutter?
In short – Flutter is an open-source UI software development kit created by Google and its community. You can use it to develop applications for Android, iOS, or macOS with Windows and Linux compatibility on the horizon. And how long does it take to learn Flutter? Well, it depends – as it always happens with learning new things. In my case, it took just a few days. Talking about my experience, I decided to present you with a peculiar Flutter tutorial by showing you how I learned to use this framework.
Before I step into the tutorial part, let’s bring some important facts about Google’s Flutter.
- You can use it to write apps for mobile, web, and desktop. In terms of mobile development – Google Flutter runs on Android Jelly Bean (v16, 4.1.x or newer) and iOS 8 or newer.
- Flutter has a single code base for the aforementioned platforms. From a business point of view, it’s very important. It can help you save money. How? Let’s take a mobile app. If you need to develop an application that can be run on the most popular mobile operating systems, you need at least three people. One Android developer, one iOS developer, and a software tester. If you decide to build a hybrid app using Flutter – you only need one developer plus a tester and you can get an app that will work on both operating systems.
- It is an open-source framework developed by Google. The company created Flutter and it’s free to use. Moreover, everyone can contribute. The source can be found on GitHub.
- Dart is the main Flutter language. It’s a modern, client-optimized programming language developed by Google. In short – it has some similarities with Java or C++. That’s why it’s easily adaptable for a wide range of developers who know these languages.
- Flutter uses an ahead-of-time (AOT) compiler. It compiles source code to the native platform. Thanks to that, you don’t need to worry about performance on your devices. Apps run fast and smoothly.
- It has a so-called “hot reload” feature. It makes your app reload in just a few milliseconds!
How to install the Flutter environment?
It depends on the operating system you use. I recommend checking out the official Flutter install website. It contains a complete guide on how to set up this framework. Please note that it needs some effort on your end. But hey! You have to do this only once. Don’t give up. 💪
Setting up favorite Integrated Development Environment (IDE)
Many IDEs support Flutter and Dart. Being an Android developer myself, I’d rather recommend Android Studio or IntelliJ. You can download and install it from the official Android website. Once you have it, you should install the Flutter plugin. It will require you to install the Dart plugin too. The process is shown on the short video below.
Setting up a sandbox for a Flutter project
The best method to learn a new technology is to try some code snippets from its documentation or tutorials. But first you need to set up your own sandbox project. It’s very simple. On the “Welcome to Android Studio” screen, you should select “Start a new Flutter project” and go through the following steps.
Let’s make some code!
So, now you have established a Flutter environment with a sandbox project. It contains a sample application that counts button clicks. This playground project is a place where you spend the most time with copying code snippets and doing some modifications. Simply joggling with your own ideas. Below, I will show you how to do it.
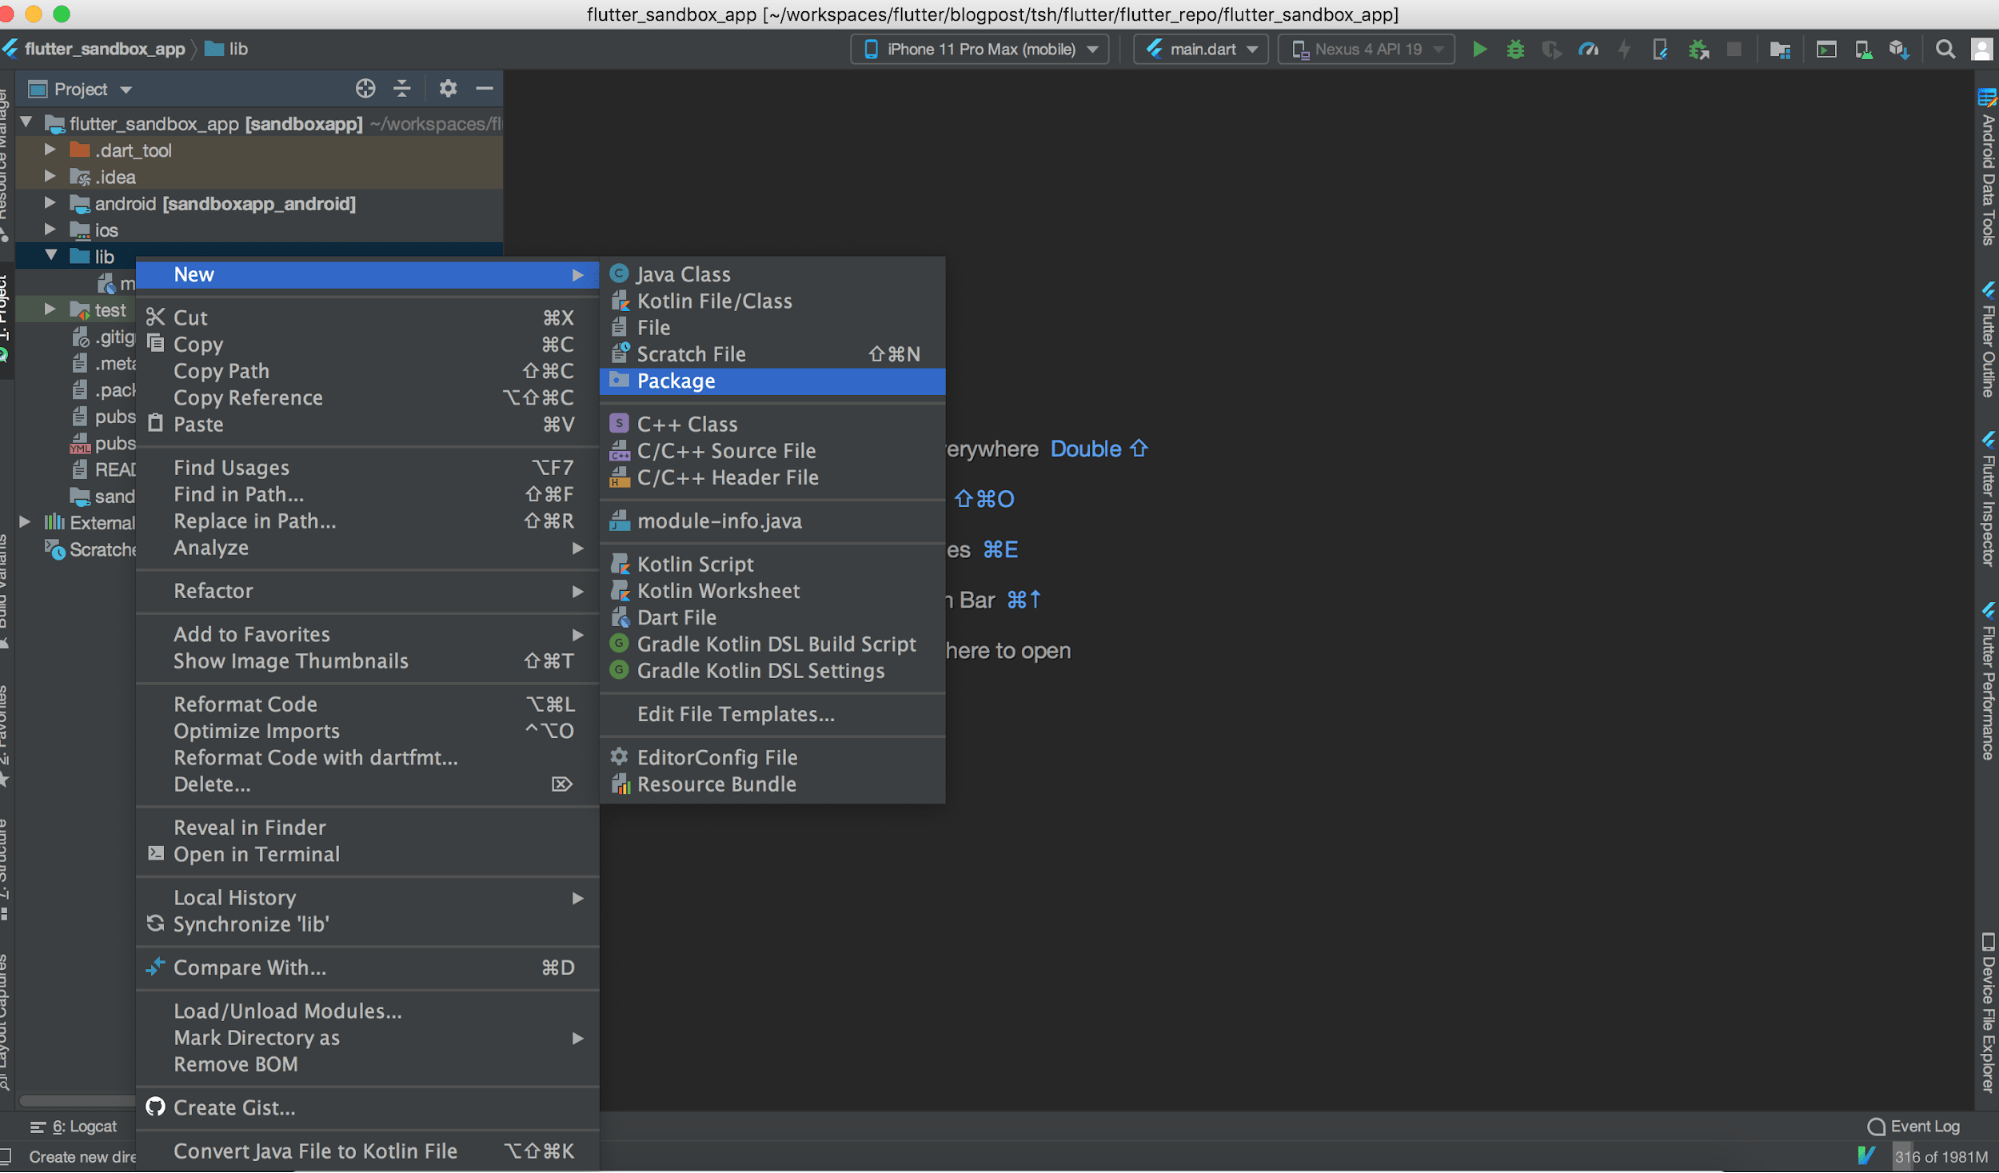
Let’s say that you want to learn how Container widget works. First, make sure to create a package tree. Then, select “New” from the context menu and choose “Package” (as presented on the screenshot below).
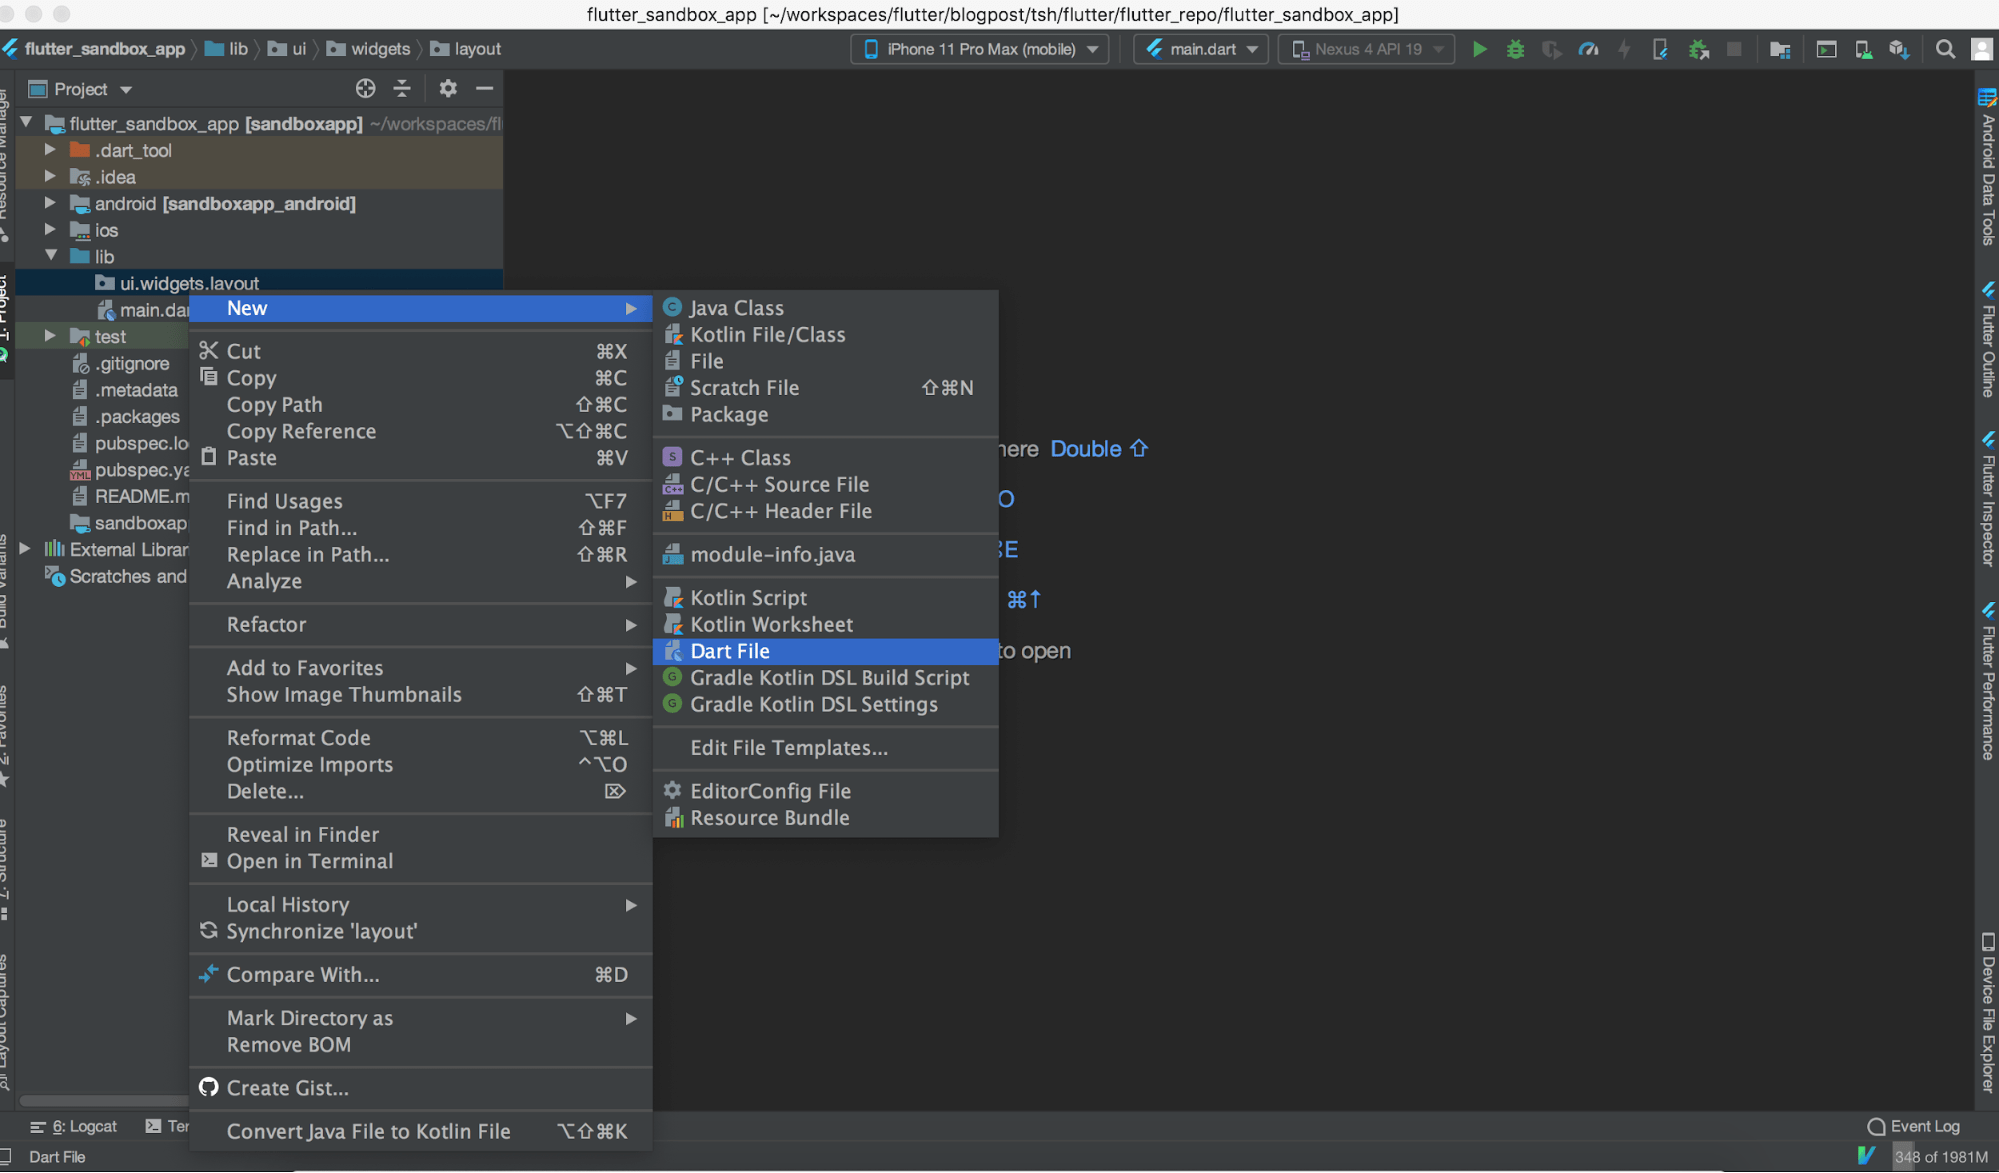
Then, type ui.widgets.layout.
After that, create my_container.dart file by selecting “Dart File” from the context menu as presented below.
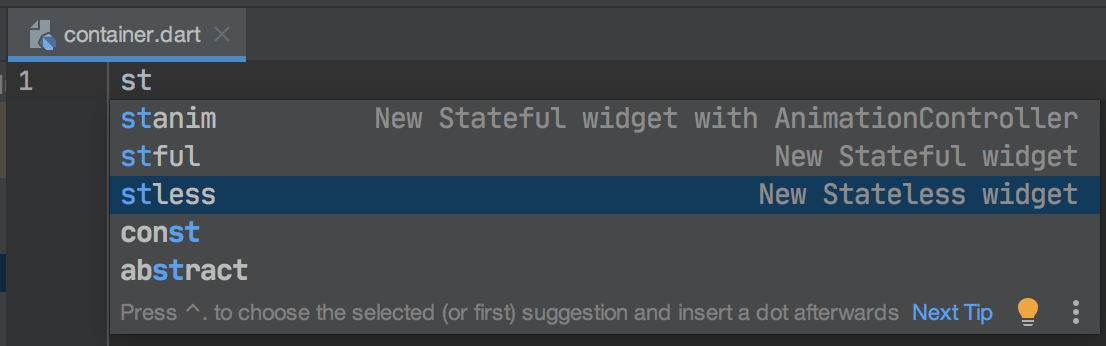
Now, you can create a MyContainer stateless widget. In Android Studio, you can use a handy abbreviation. Start typing stless, then just click enter.
Resolve imports. Press the Alt+Enter shortcut and accept the import tip.
Now, you can copy-paste a code snippet from the Container class documentation example into the build method. Resolve imports again.
Then, you should add the main method (as it’s presented below).
Now, your code should look like in the example below.
All right. You are pretty close to run your first Flutter code! To do it, you need to add a new configuration.
Wanna see React Native in action?
Creating a new Flutter configuration
Choose Edit Configurations.

Then, select Flutter.
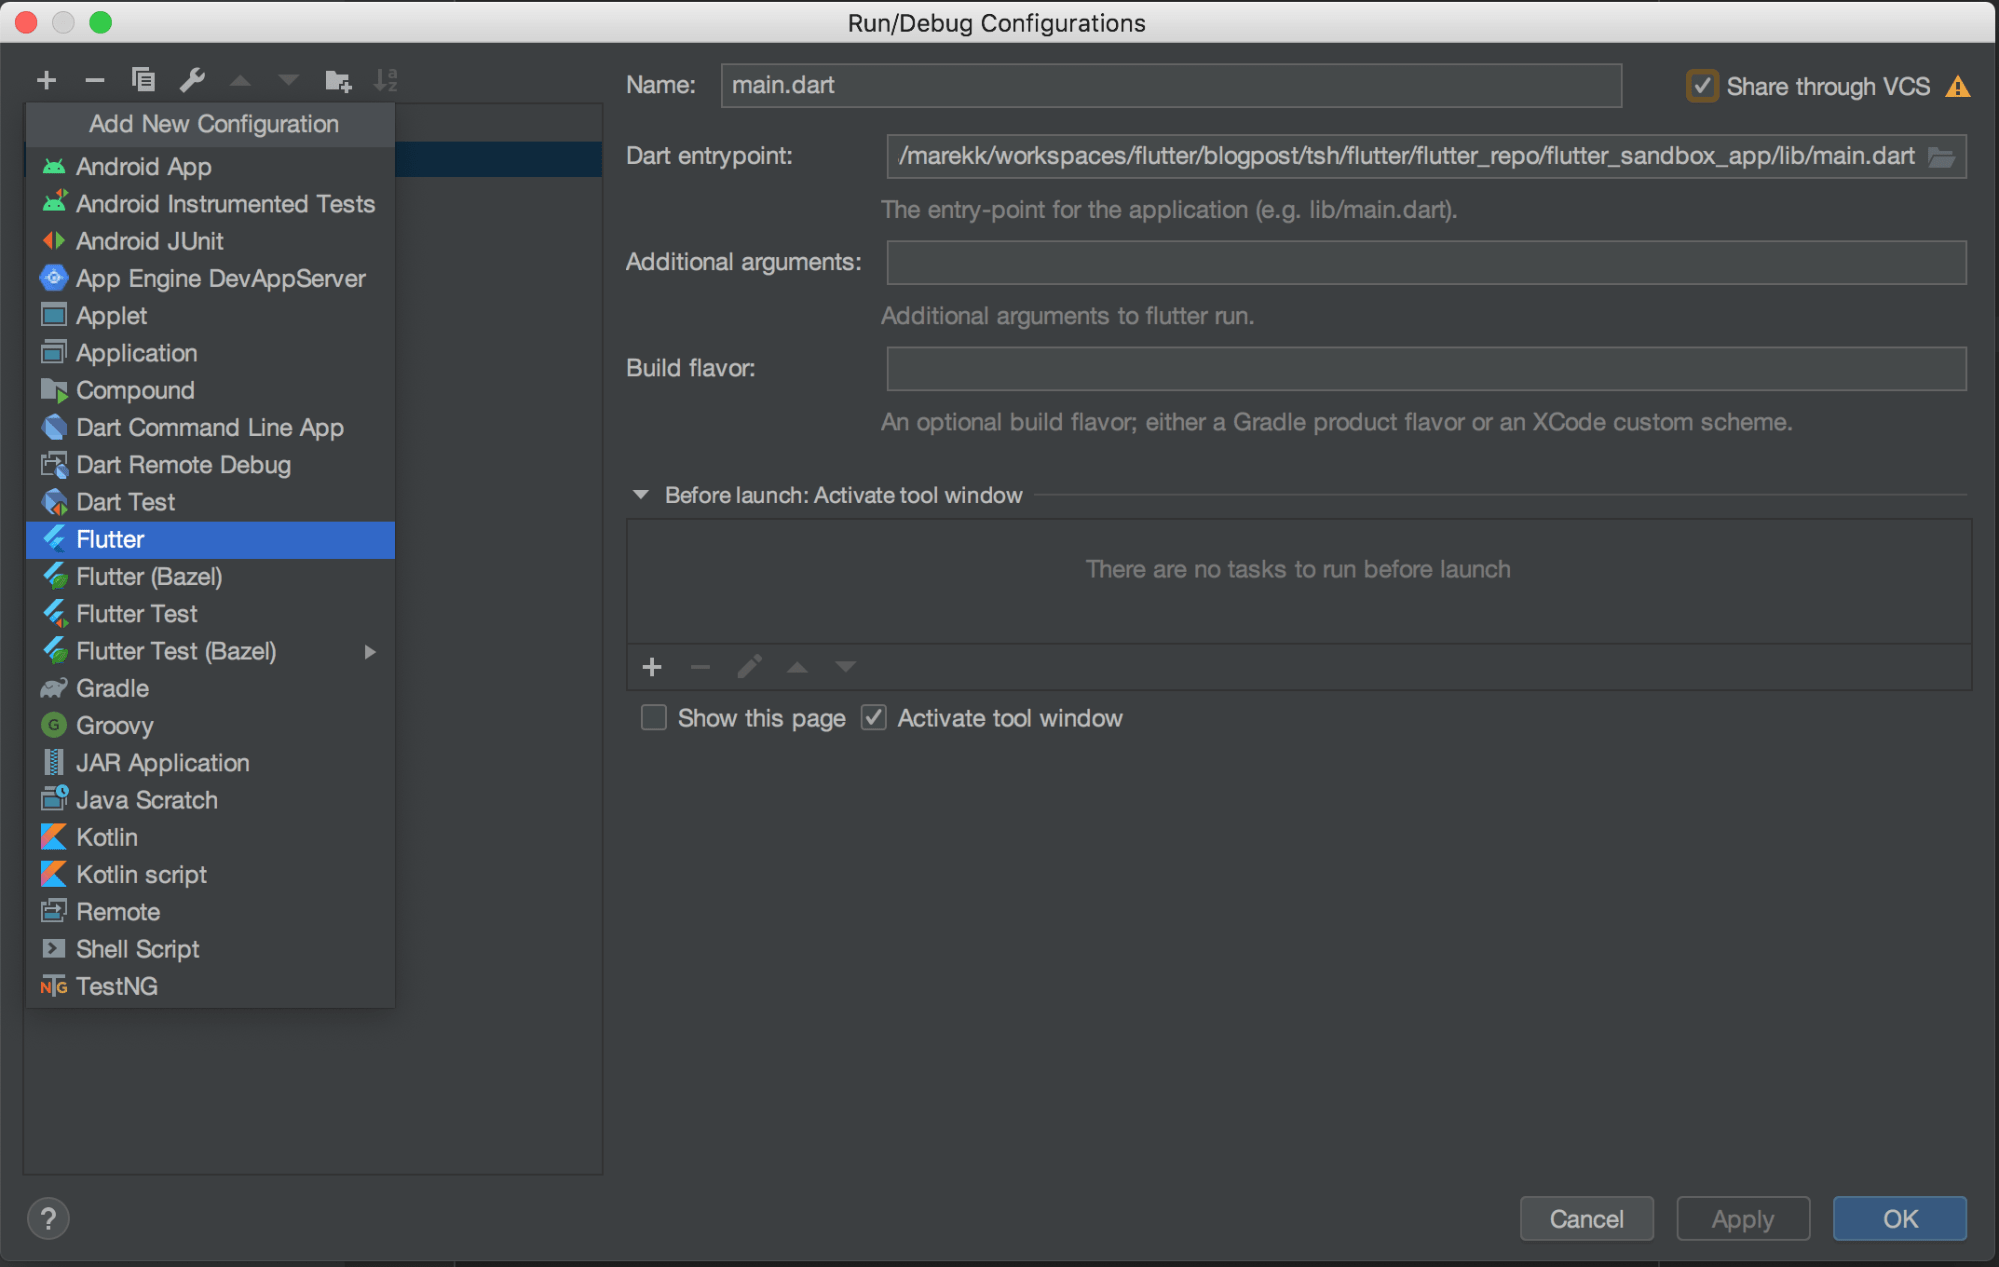
Now, you need to add the configuration name (e.g. the same as the Dart Filename) and add the Dart entrypoint – my_container.dart file.
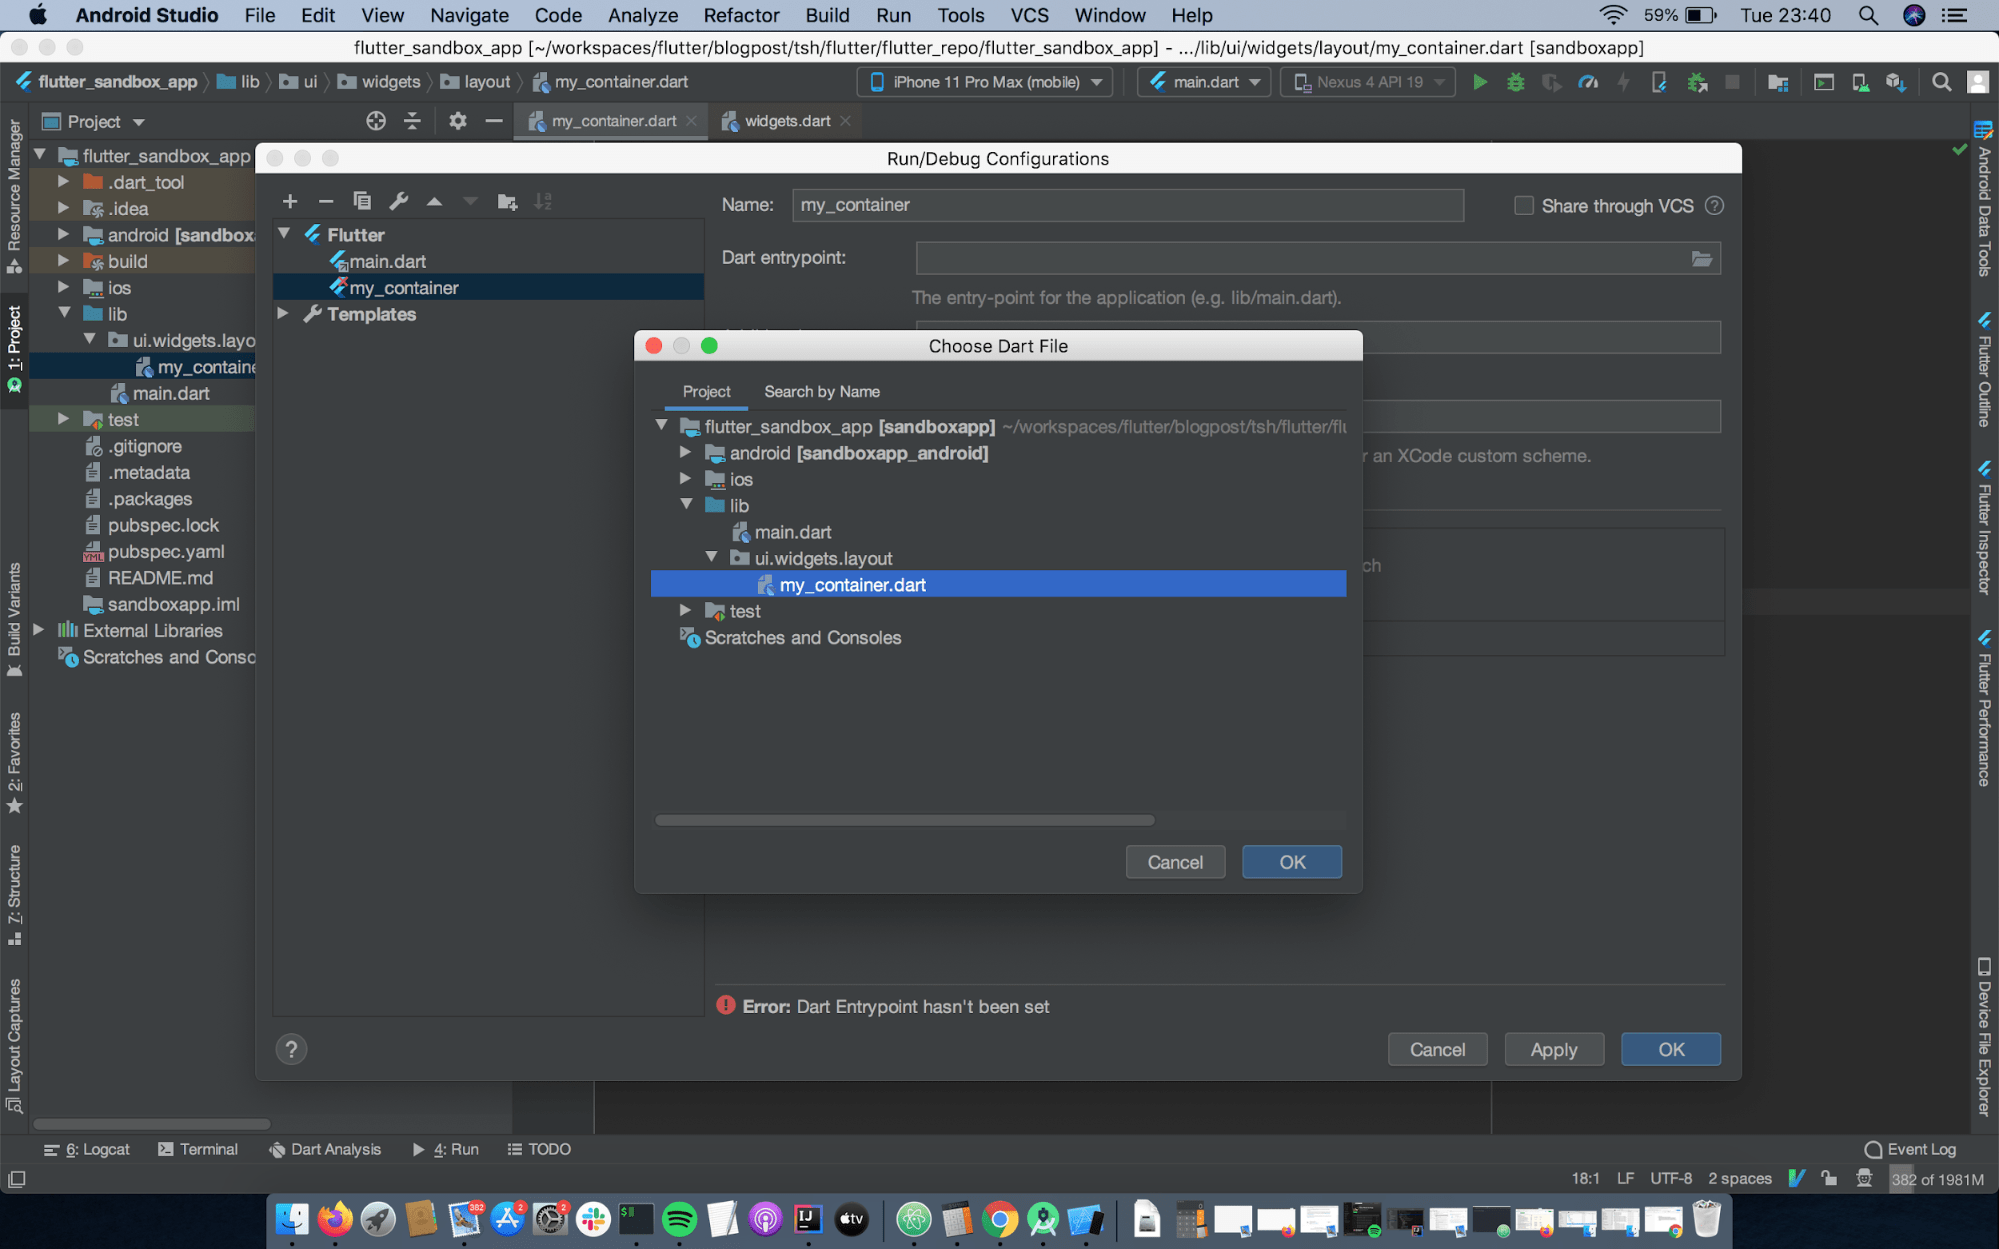
Now you should click OK and Apply.
Running the code
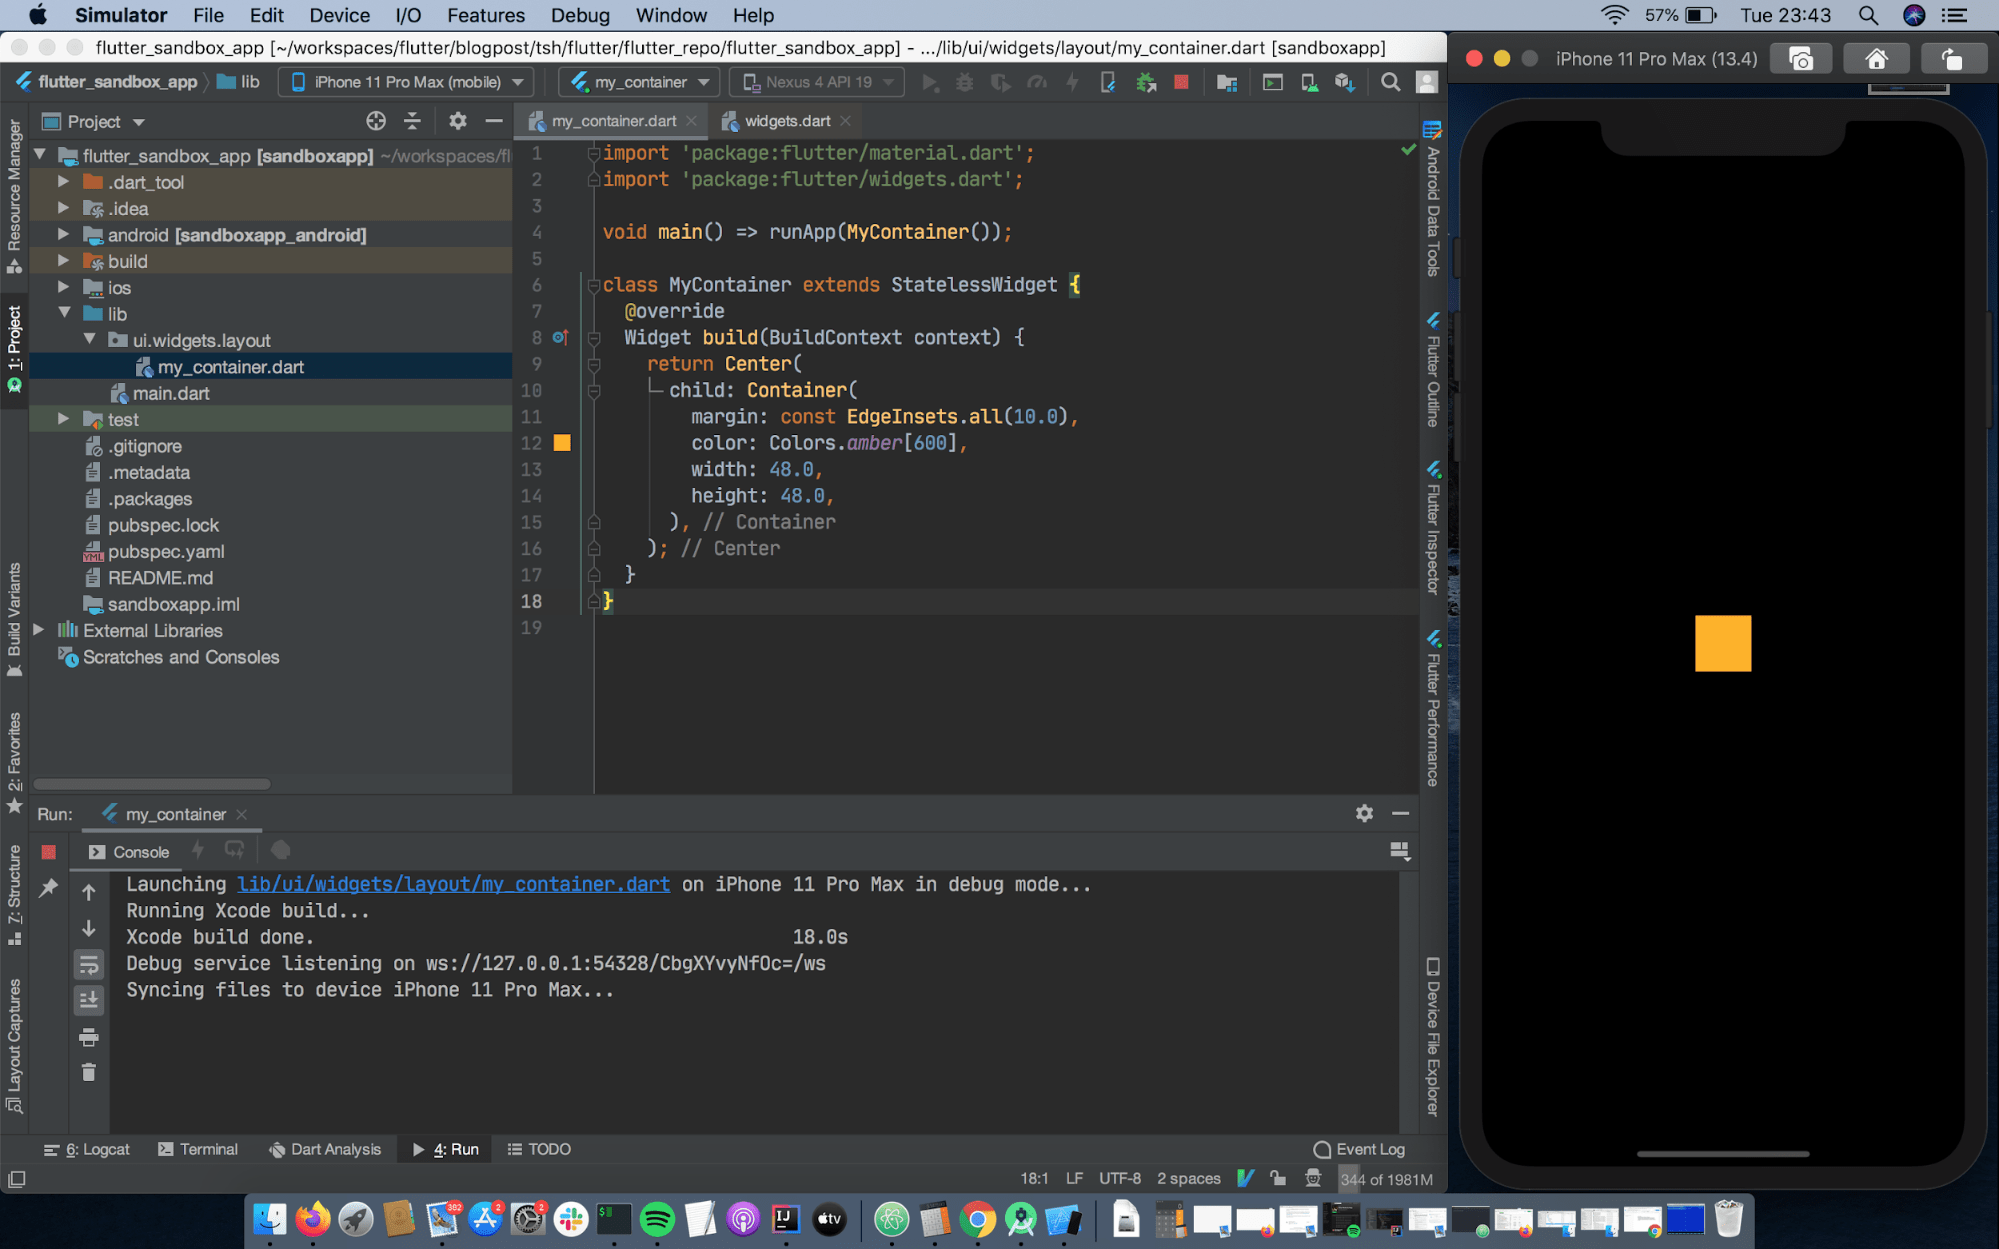
Now, it’s time to run the code. You need to choose the device you want to run the code on. I chose the iOS Simulator.

After that, just click Play and have fun!
Flutter app improvements
As you can see, this simple app doesn’t look like a normal app. It has no AppBar or title. Even the background is black.
My suggestion would be to create the class BaseAppWidget. It contains all you need to set up a basic app quickly.
Let’s create a package ui.common, then base_app.dart. After that, create a BaseAppWidget stateless widget with three constructor parameters: title, message and child.
titleis an app title string with default “Example” valuemessageis an optional string that describes what an app does. It appears when a child is not delivered.child–BaseAppWidgetwrap this widget. It can benull.
Below, you can see how the whole file looks.
Now, you can use the widget you created in my_container.dart. You should wrap MyContainer class with BaseAppWidget as presented below.
So, your code should look like in the example below.
Finally, run it on the iOS simulator again.
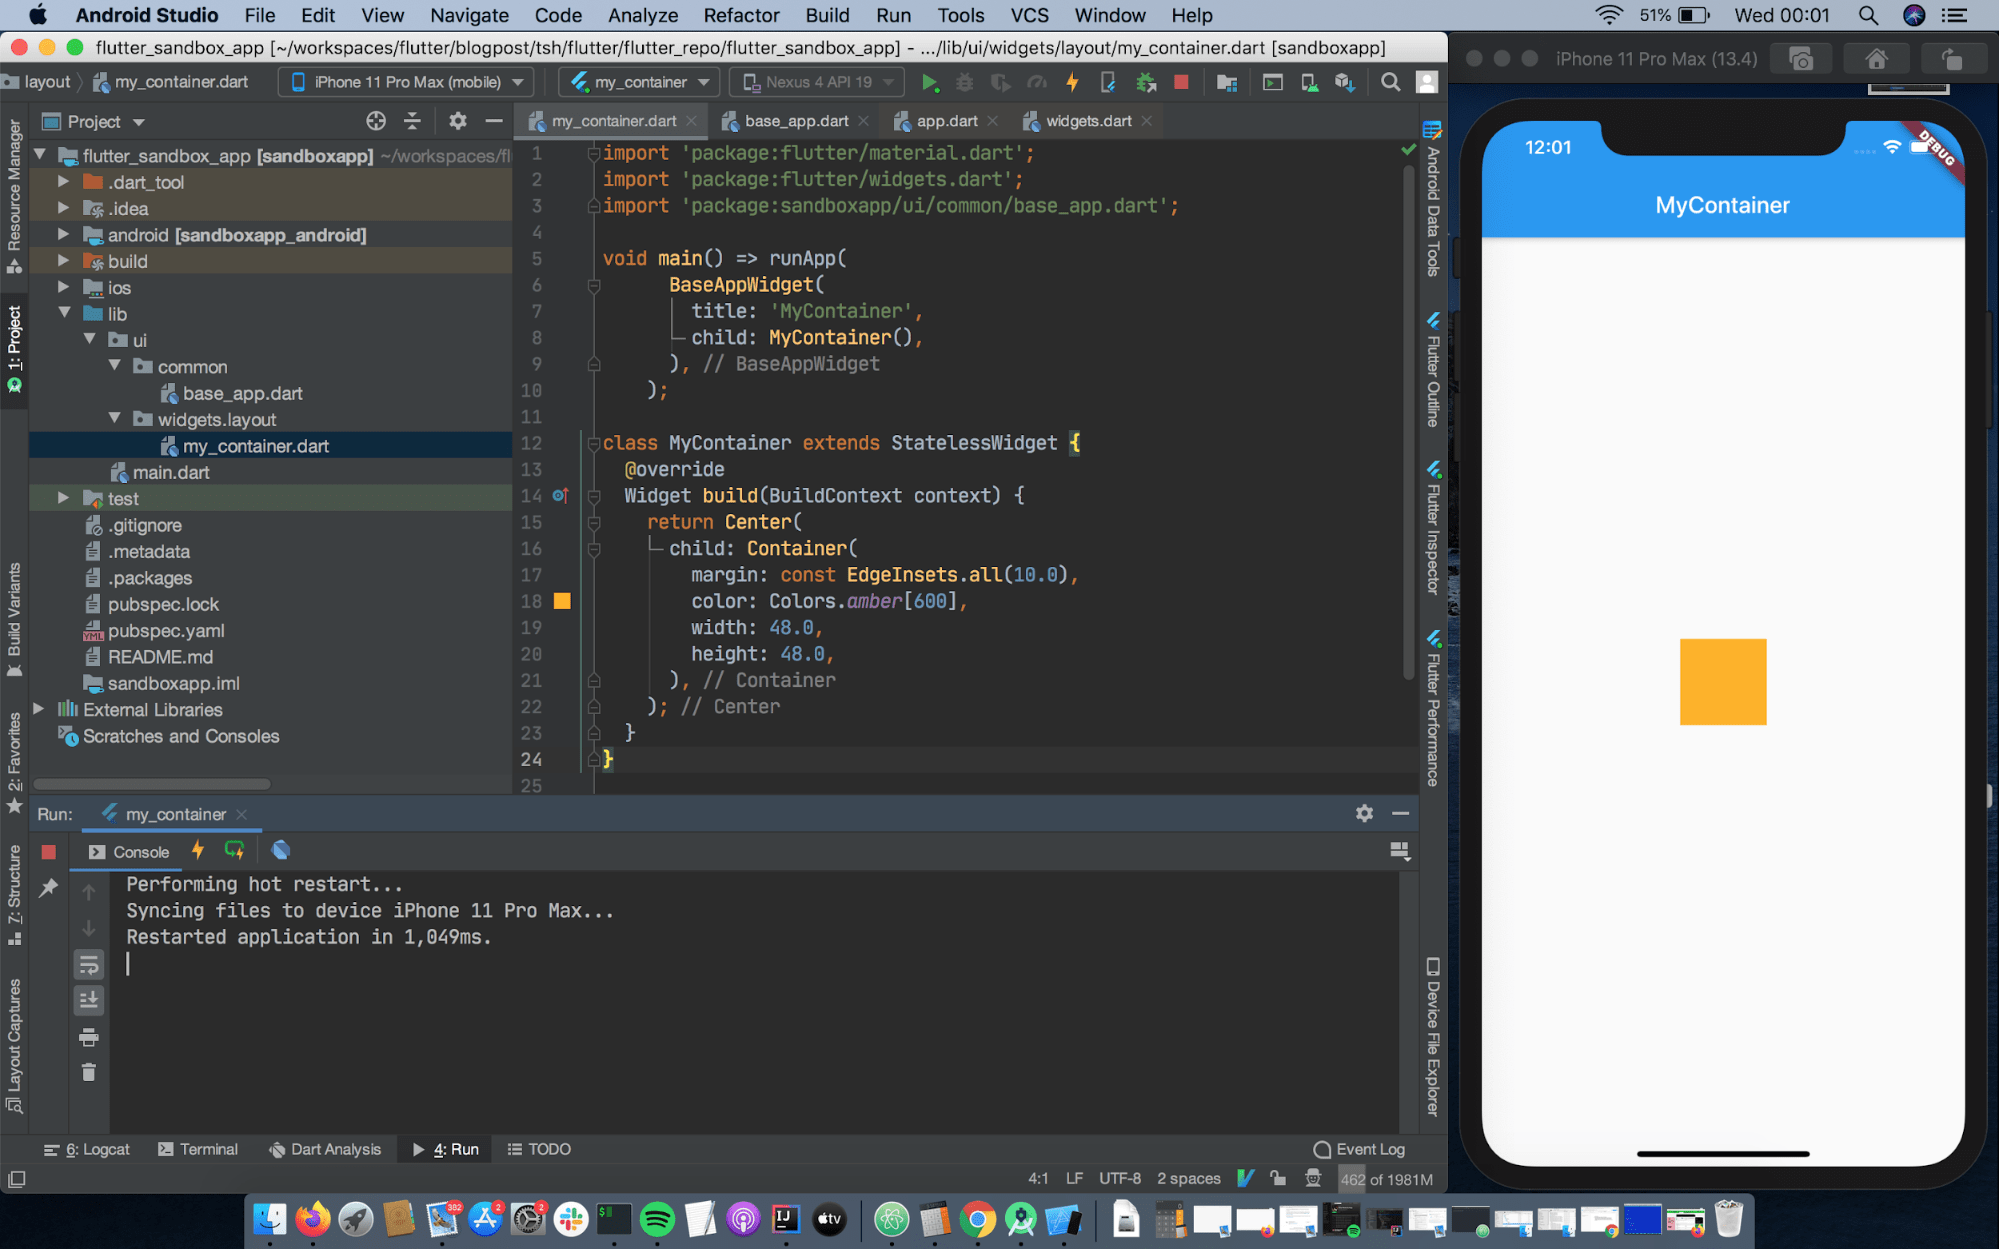
This time, the app looks like a normal app, right? 🙂
Summary
Summing up, Flutter is a powerful UI toolkit powered by Dart – the language with a friendly syntax. You can create one code base and run it on the most popular mobile operating systems: Android and iOS. But first, you need to do some exercise. You should practice improving your skills. My goal for this Flutter tutorial was to show you how I learned using this framework.
Now, you know how to configure Android Studio. I presented you with my way of getting to know Flutter. You can now create your own playground projects, creating a file with a code snippet you want to examine. Then you can add the main method, create a launch configuration and run it on the chosen device or emulator. Good luck and have fun! 🙂
Interested in more practical Flutter resources?

