13 April 2022
The best prototyping tools are more or less the same. Pick ones that fit your project and team
Prototyping is that element of the design process where your software product “comes to life” and sees its future users for the very first time. Using prototyping tools creates a great opportunity to test certain features and the general feel of the application before developers put their hands on the keyboard to code. It’s a step you mustn’t omit. I’ve been creating software prototypes for years, and I’m here to tell you that, from my experience, the best prototyping tools are those that fit your projects.
Is prototyping apps part of the UX or UI process? Experts divided, as usual
Team User Interface
The evergreen question with no set answer. Some argue that prototyping apps is the last phase in UI when all the designed elements “come together”. Then it’s off to test the results on IT’s friendly lab rats Pinkys and Brains, a.k.a. the future users. Thanks to this, you create immersion and the user can feel as if they were actually using a working application.
HINT! What may seem like a good idea to the UI/UX designers and development team, might not necessarily seem attractive to the end-users. Remember, that user requirements and expectations related to your app have to be researched before anything else in the design process. The data collected during the discovery phase will be initially verified during the prototyping phase by customer feedback.
My coworkers, Magdalena and Małgorzata, have already written brilliant articles on the design discovery phase, and I highly recommend it
Team User Experience
On the other hand, there are prophets of revealed truth that prototyping doesn’t refer to the application as a whole but to specific functionality that’s worth testing at the mockup stage. This way, you’re making sure that the assumptions make sense, aren’t too complicated, and will be properly perceived by end-users.
Personally, I think of app prototyping as the User Experience phase, due to the simple fact that UX shows how applications (or individual functions) WORK, and UI how it’s supposed to LOOK LIKE. You can read more about this in our article: “What’s the difference between UX and UI design in software development?”
You can read more about this in our article:
I’ve noticed that the downside of this approach is the relative lack of realism in the presented solution. This may cause users to have problems with providing you with reliable feedback. You should take into account that 90% of users participating in testing digital products are regular folk who may not comprehend the concept of mockups (and they don’t have to). So even if they test a high-fidelity prototype based on mockups, they may feel lost and confused about what to do with it, since there are no colors, no text, no graphics. This will have a big impact on final conclusions.
Therefore, I believe that you will obtain the most valuable feedback only with prototypes built with ready UI because it gives more immersion to the entire testing process.
Anyway, no one said that the UX and UI phases cannot be intertwined. “All roads lead to Rome”, and in fact, both lead to the same thing: obtaining feedback, verifying assumptions, and launching the most valuable product that will attract end-users.
What web prototype components do I need to prepare before testing?
A well-prepared prototype requires several things:
- one and clearly specified user path. If you want to test adding a product to the cart and checking out, you shouldn’t provide additional options that will blur the experience (e.g. entering a promo code). Otherwise, you will distract the user’s attention, and we know it can be very fragile and difficult to maintain.
- the tested feature shouldn’t be too advanced. Same reason as above – beginner users may be too overwhelmed. It’s better to break complicated features into smaller testing sessions.
- a detailed brief. A thorough description precisely defining what users will focus on, what is the test assumptions and what conclusions are expected.
- no micro-interactions. Unless you want to specifically test those, micro-interactions (e.g. attractive transitions between screens) often distract people who will struggle to focus on anything else.
- appropriate environment. If you test a mobile app, it’s best to do it on a smartphone, not emulators in the browser window. Similarly, the desktop version shouldn’t be tested on a little phone screen. Made me shudder at the very thought…
Prototype design seems like a lot of work. Do I really need to create prototypes?
There’s no better and more effective way for user testing than introducing prototyping in your UX design process. This way you’ll reach your potential users way before the app is released.
However if for some incomprehensible reason the prototyping stage is omitted in the design process, you expose yourself to a high risk that the final product will be a flop. I’ve noticed that people tend to be scared to create interactive prototypes and want to bypass this stage altogether because they do not fully understand the idea behind prototyping software.
To illustrate this better, I’ll share an anecdote from my past (unsuccessful!) job. A few years ago, while working on one software project (for pure decency, I won’t mention the product’s name) I fought a long battle to convince decision-makers that Figma is a much better prototyping tool than Photoshop. Luckily, the deciding argument was that Figma was still a free prototyping tool at the time. When I spoke about the need to test solutions as prototypes before releasing them to minimize the risk of failure, they didn’t seem to understand but they nodded their heads with approval so I got to work.
When I showed them the prototype of a straightforward “add offer” module, I received encouraging oohing and ahhing. And then a question “the app looks great, when are we going on production with it”? Unaware, I explained that it was just a prototype that still needs to be tested for potential pain points. They still didn’t understand what I was talking about – they could click, use drag and drop functionality, fill in the inputs, save and send offers.
When the shareholders finally understood what was in front of them, I got told off for wasting time on prototyping because developers will have to do it all again afterward. Needless to say, I decided that there was nothing for me there, I packed my bags and moved on. Later I learned that the application wasn’t, to put it very lightly, a hit.
So, do I need some kind of prototyping tool?
Yes, and no.
In the design process, there are two types of prototypes – low fidelity and high fidelity.
Low fidelity prototype
In this article, I focus on high fidelity interactive prototypes only, but I’ll outline the low-fidelity option in a few words.
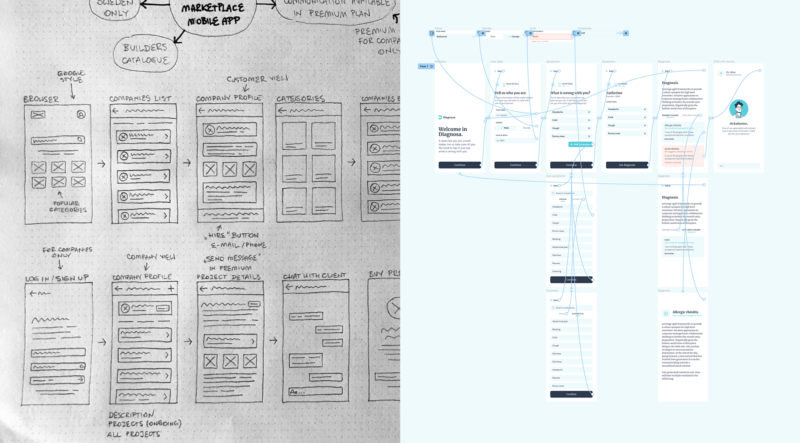
It’s a mock-up method (probably the simplest creative process) that can be done by anyone who can handle a pencil and a sheet of paper. You can quickly sketch ideas, and verify them with successive iterations. You don’t have to be a product designer, you don’t need any drawing skills. The only design tool is your imagination.
The obvious disadvantage is the total lack of realism. There’s no dynamic content but simple screen layouts. This prototype won’t reflect the experience of using the completed product, like pressing buttons, swiping between screens, and the general “feel” of the app. This has a significant impact on the quality of collected feedback, it won’t be as detailed as it would be with fully interactive prototypes.
High fidelity prototype
If you wanna get the mythical “WOW effect”, show people something that actually resembles a complete application. In the case of high fidelity prototypes, the design team provides a mock-up of an almost-real digital product. The visual overview is easier to digest by user testing. People like playing with interactive mockups because they can click, swipe, press, which is very immersive. People will have much more to say about (not) intuitive interface, navigation, and the general performance of the app. Hence, the feedback will be way more credible and valuable for developers.
Interactive prototypes are way cooler. What are the best prototyping tools that will help me create them?
The market is flooded with all kinds of prototyping tools. I’m not even exaggerating, there are so many it’s confusing. In my opinion, some of the best app prototyping tools are:
- Figma,
- Webflow,
- InVision
- Studio,
- Framer,
- Adobe XD,
- Axure,
- Origami Studio,
- Justinmind,
- Sketch,
- Fluid UI,
- Marvel,
- Proto.io,
- Principle,
- Balsamiq,
- UXPin,
- Protopie,
- Mockflow.
Overwhelming choice, I know. But how to pick the most suitable prototyping tool for your software project? The simple answer is – one that suits you best.
Thing is, all the aforementioned prototyping tools for UI/UX (and the ones I forgot to mention) offer more or less the same functionalities but in different forms. Some are strictly intended as prototyping tools, while others are equipped with extensive prototyping modules (but it’s not their primary function), e.g. Marvel is a rapid prototyping tool, while Sketch is an app where you create a project that can be optionally “prototyped”.
Some prototyping tools like Webflow make it possible not only to create a clickable prototype but also to host and release it online. Other app prototyping tools like Figma, InVision, or Framer allow to quickly and intuitively collect feedback from users via comments. I’m not sure if all solutions on the market have those features but the best prototyping tools definitely should.
Figma allows you to create a prototype, collect feedback but you won’t be able to save a file in a video format, which could be an issue for technically illiterate users. In turn, with Principle, you’ll save your project in video format but unfortunately, you won’t be able to collect any feedback. Then you’ve got Axure that’s so rich in functionalities that it easily overtakes any other prototyping tool.
It’s best to analyze your needs and choose the tools that overlap. The choice also depends on your learning curve and financial situation (paid subscription vs completely free prototyping tool) whether you decide to master them all or focus on just two or three most popular prototyping tools. Personally, I opt for the latter.
Instead of creating yet another article listing advantages and disadvantages of the best prototyping software, I’ve filtered them and narrowed them down to only those prototyping tools I’ve been personally using long-term. And I’m not talking about downloading a free trial, watching a few tutorials on YouTube, and ditching that prototyping tool after a week because it’s meh.
I’ve got over 14 years of product design experience, and I’ve worked on countless software projects (both iOS and Android apps) that required a powerful prototyping tool for data-driven prototypes in real projects for real companies.
I deliberately don’t use the term “mastered” because in the current tech landscape new updates and collaboration features are released with the speed of light. For example, Figma has an option for user-generated plugins so anybody can create and share their add-on anytime. It’s just impossible time-wise to proficiently master too many prototyping tools at once.
Marvel completely surprised me after it was taken over by Disney. WAIT, WHAT…?
Marvel was my very first contact with digital product prototyping. In the beginning, I didn’t know what it was or how I’ll benefit from using it. I researched a bit and found out that Marvel interactive prototypes create a specific flow or user path and check with the “real-time feedback” option if it’s understandable by users. The testers provided their opinions, and I was able to react immediately and eliminate all pain points.
Marvel worked marvels when I worked for an English software company that designed and implemented a system for private school students to book meetings with their professors. Thanks to extensive feedback from both parties, we transformed quite a complex system into a foolproof, intuitive, and easy-to-use application.
I’ve worked, and will continue to use Marvel for this one main reason – gathering real-time feedback from your target audience is easy peasy. This prototyping tool allows you to build interactive prototypes and very quickly test your ideas with users.
Marvel is filled with various additional features like development handoffs which are cool for usability and suitability reasons.
The only downside I can think of is the lack of seamless integration with Figma, which is my main design tool. So I have to manually save my designs and then import them as pictures to Marvel. I really hope the creators will fix this soon.
Otherwise, I am calm about the direction in which Marvel is developing and intend to continue using it.
Clearer vision with InVision
I have the dubious pleasure of being so old that I remember InVision’s beginnings. I even had the opportunity to cooperate with InVision’s founder and CEO, Clark Valberg, on a logotype for a small New York web development association. Unfortunately, the name escapes me, and the logotype is lost in the depths of the old DVD archive. Those were the times when it was just a prototyping-only tool.
I tested InVision and it generally had all the positive and negative features previously available in Marvel. So why did I switch? Extremely prosaic reason – more and more agencies that I worked with at the time started to use it, so it was reasonable to improve the efficiency of work and communication with different teams.
One of my biggest projects in InVision was for a Toronto-based company producing custom packaging. I’ve created and tested an online panel for people needing to get in touch with customer service. Additionally, around that time, InVision introduced mock-up options, which I also used in the same project. But I’ll explain that in more detail in my upcoming article about wireframing.
I primarily appreciated InVision because, despite the galloping market forcing them to develop new functions, the creators never lost sight of their core feature to create prototypes.
So we’ve got Freehand (something resembling Miro or FigJam), Studio (advanced animations), DSM (design systems), but the robust functionality of InVision is still interactive prototypes.
Meeting Sketch after moving to macOS
Sketch was the first-ever prototyping desktop app I installed after I abandoned Windows for macOS ( it’s only available for Apple products).
You may ask: Alek, but isn’t Sketch a design tool? That’s right, and I’ll even say more – the prototyping module in Sketch is probably the greatest failure in the history of designkind. Having said that, this is where my sentiment comes in because Sketch was the first to show me the possibility of combining designed screens into a working whole. What’s more, Sketch as an app for designing user interfaces made an impression on me, especially since I finally could create prototypes without exporting screenshots to external tools.
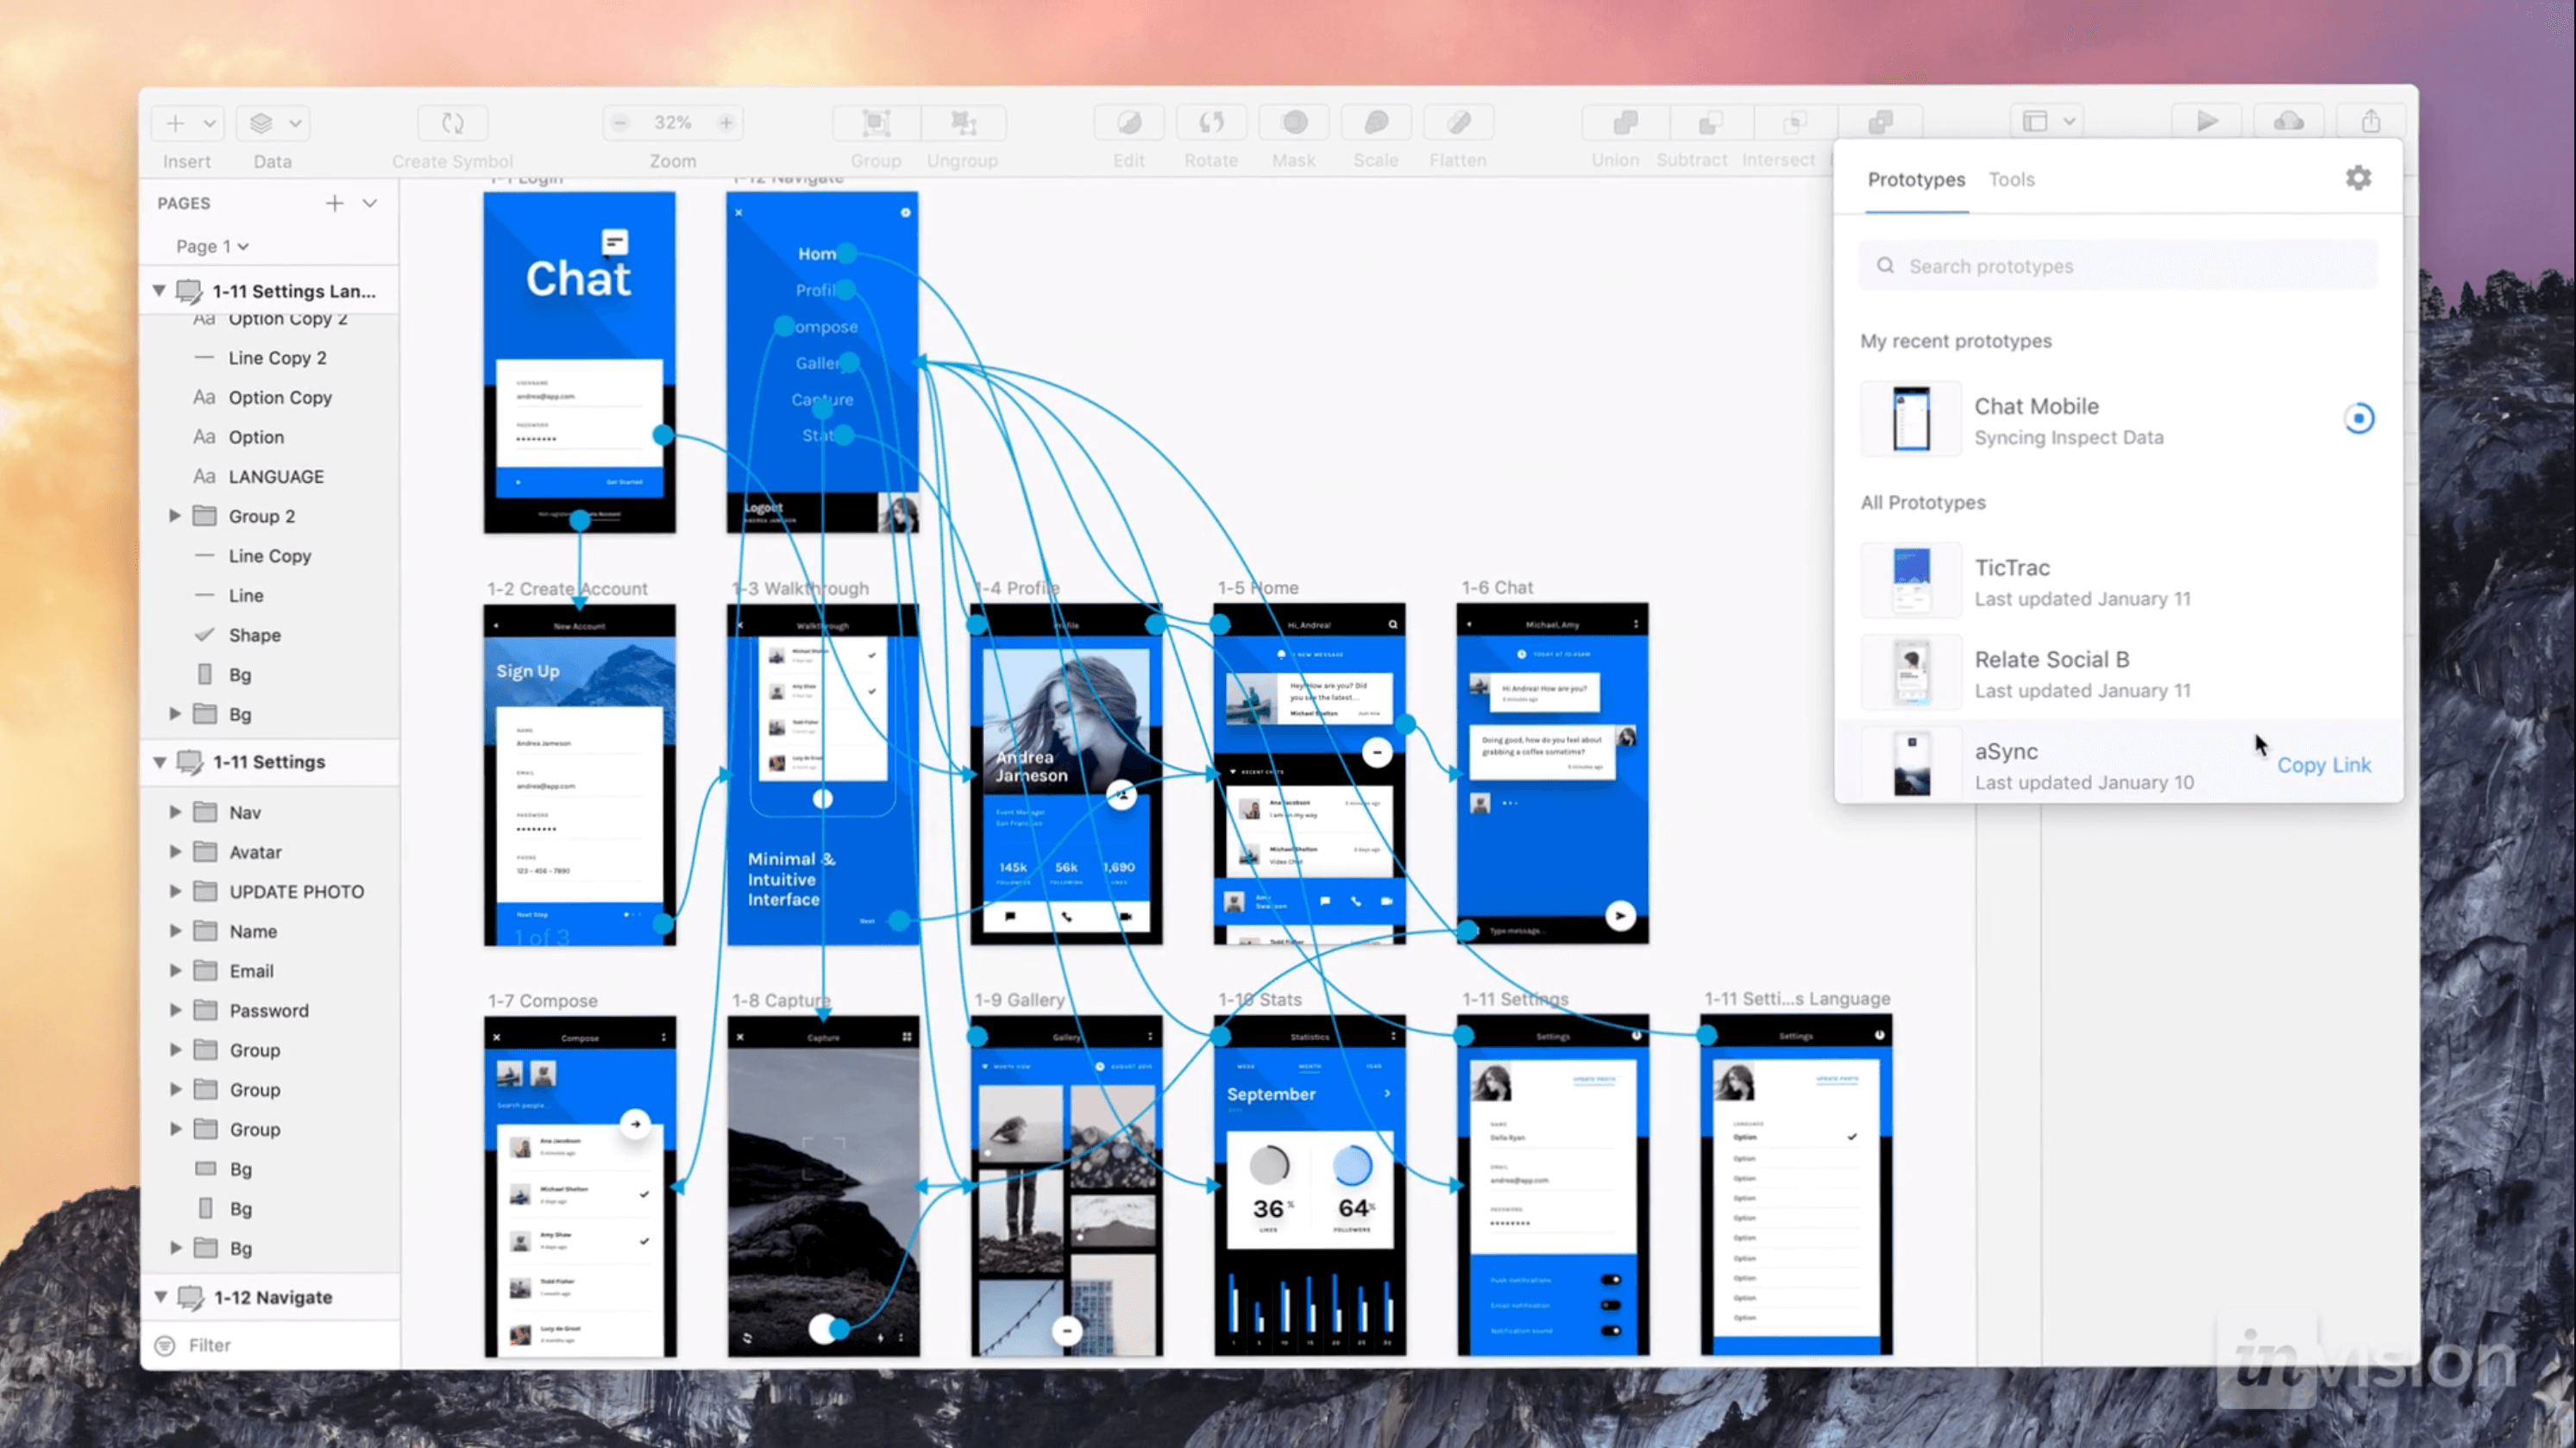
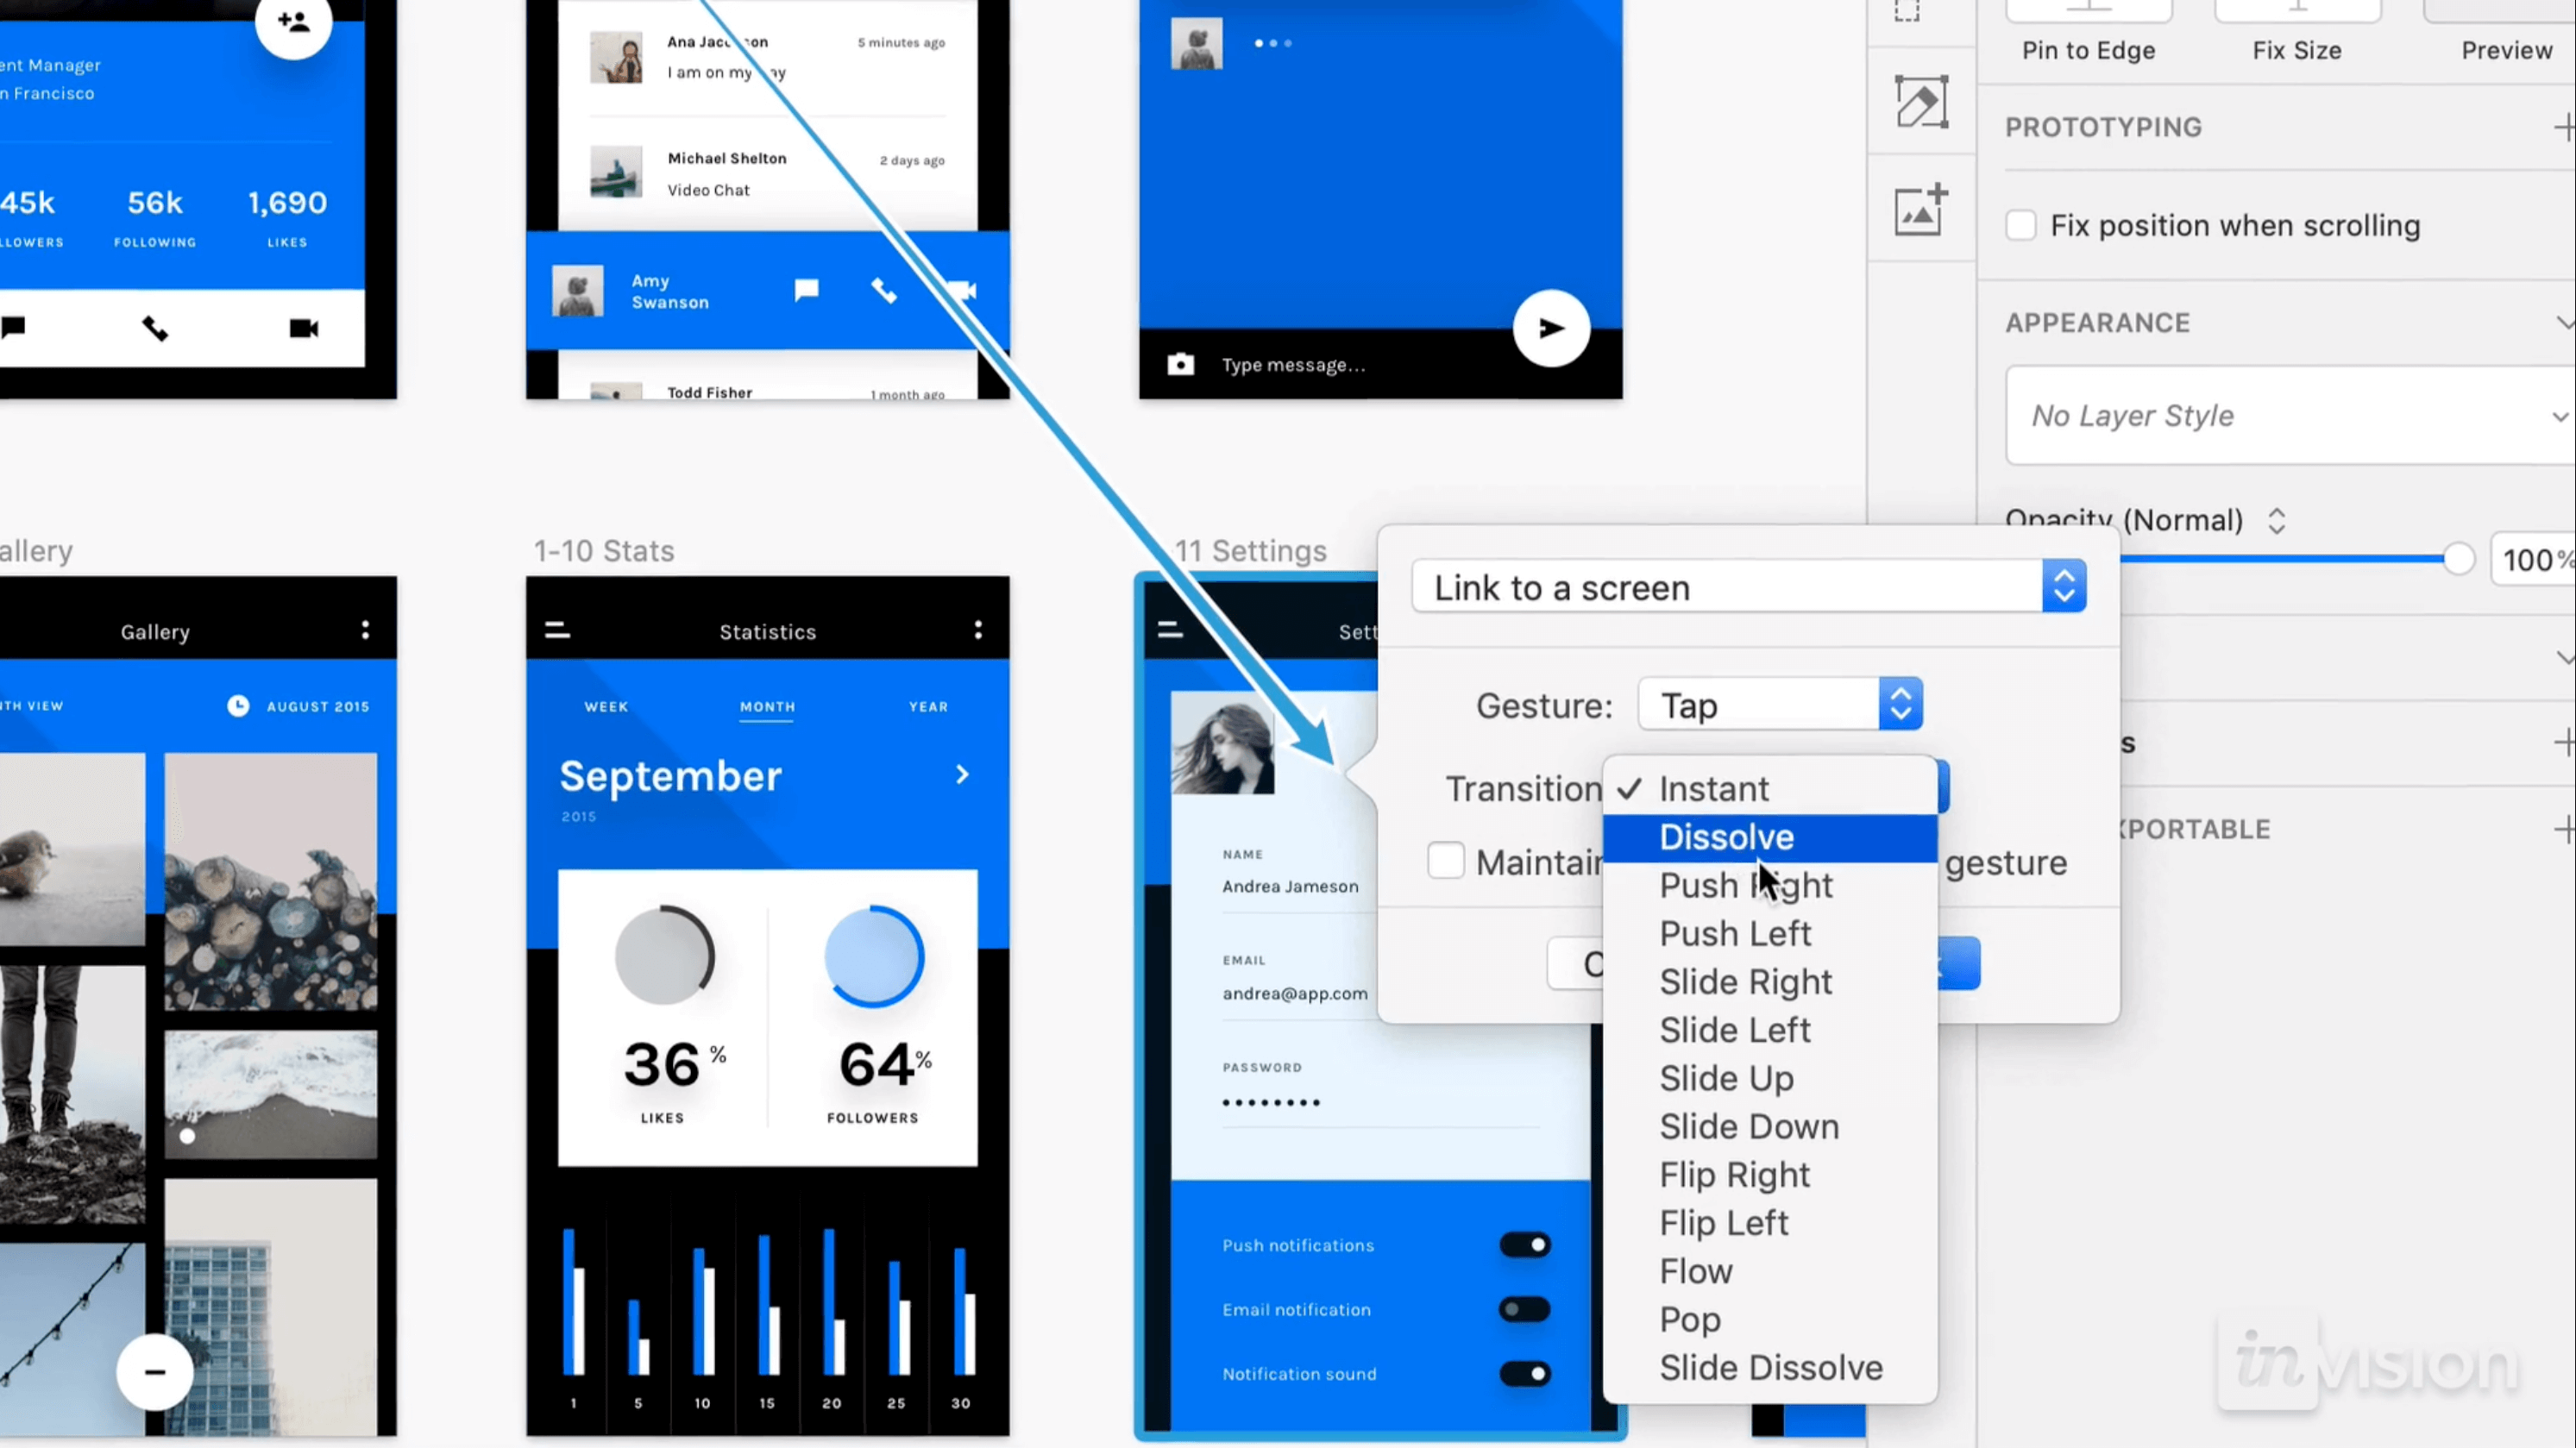
Unfortunately, my excitement was a bit exaggerated because after deeper analysis it turned out that this prototyping module is quite poor (even today). There was no control over the dynamics of transitions between screens, animation length, or its acceleration/deceleration. As a result, prototypes were quite poor, clunky, and had horrible UX, so it was better to use a different prototyping tool in the first place. The people from InVision probably shared this thought and released a plug-in called Craft, which means that prototyping in Sketch was no longer a torment.
Craft is interesting not only as a business idea but also as a boost it gave Sketch. This plugin introduced two possibilities:
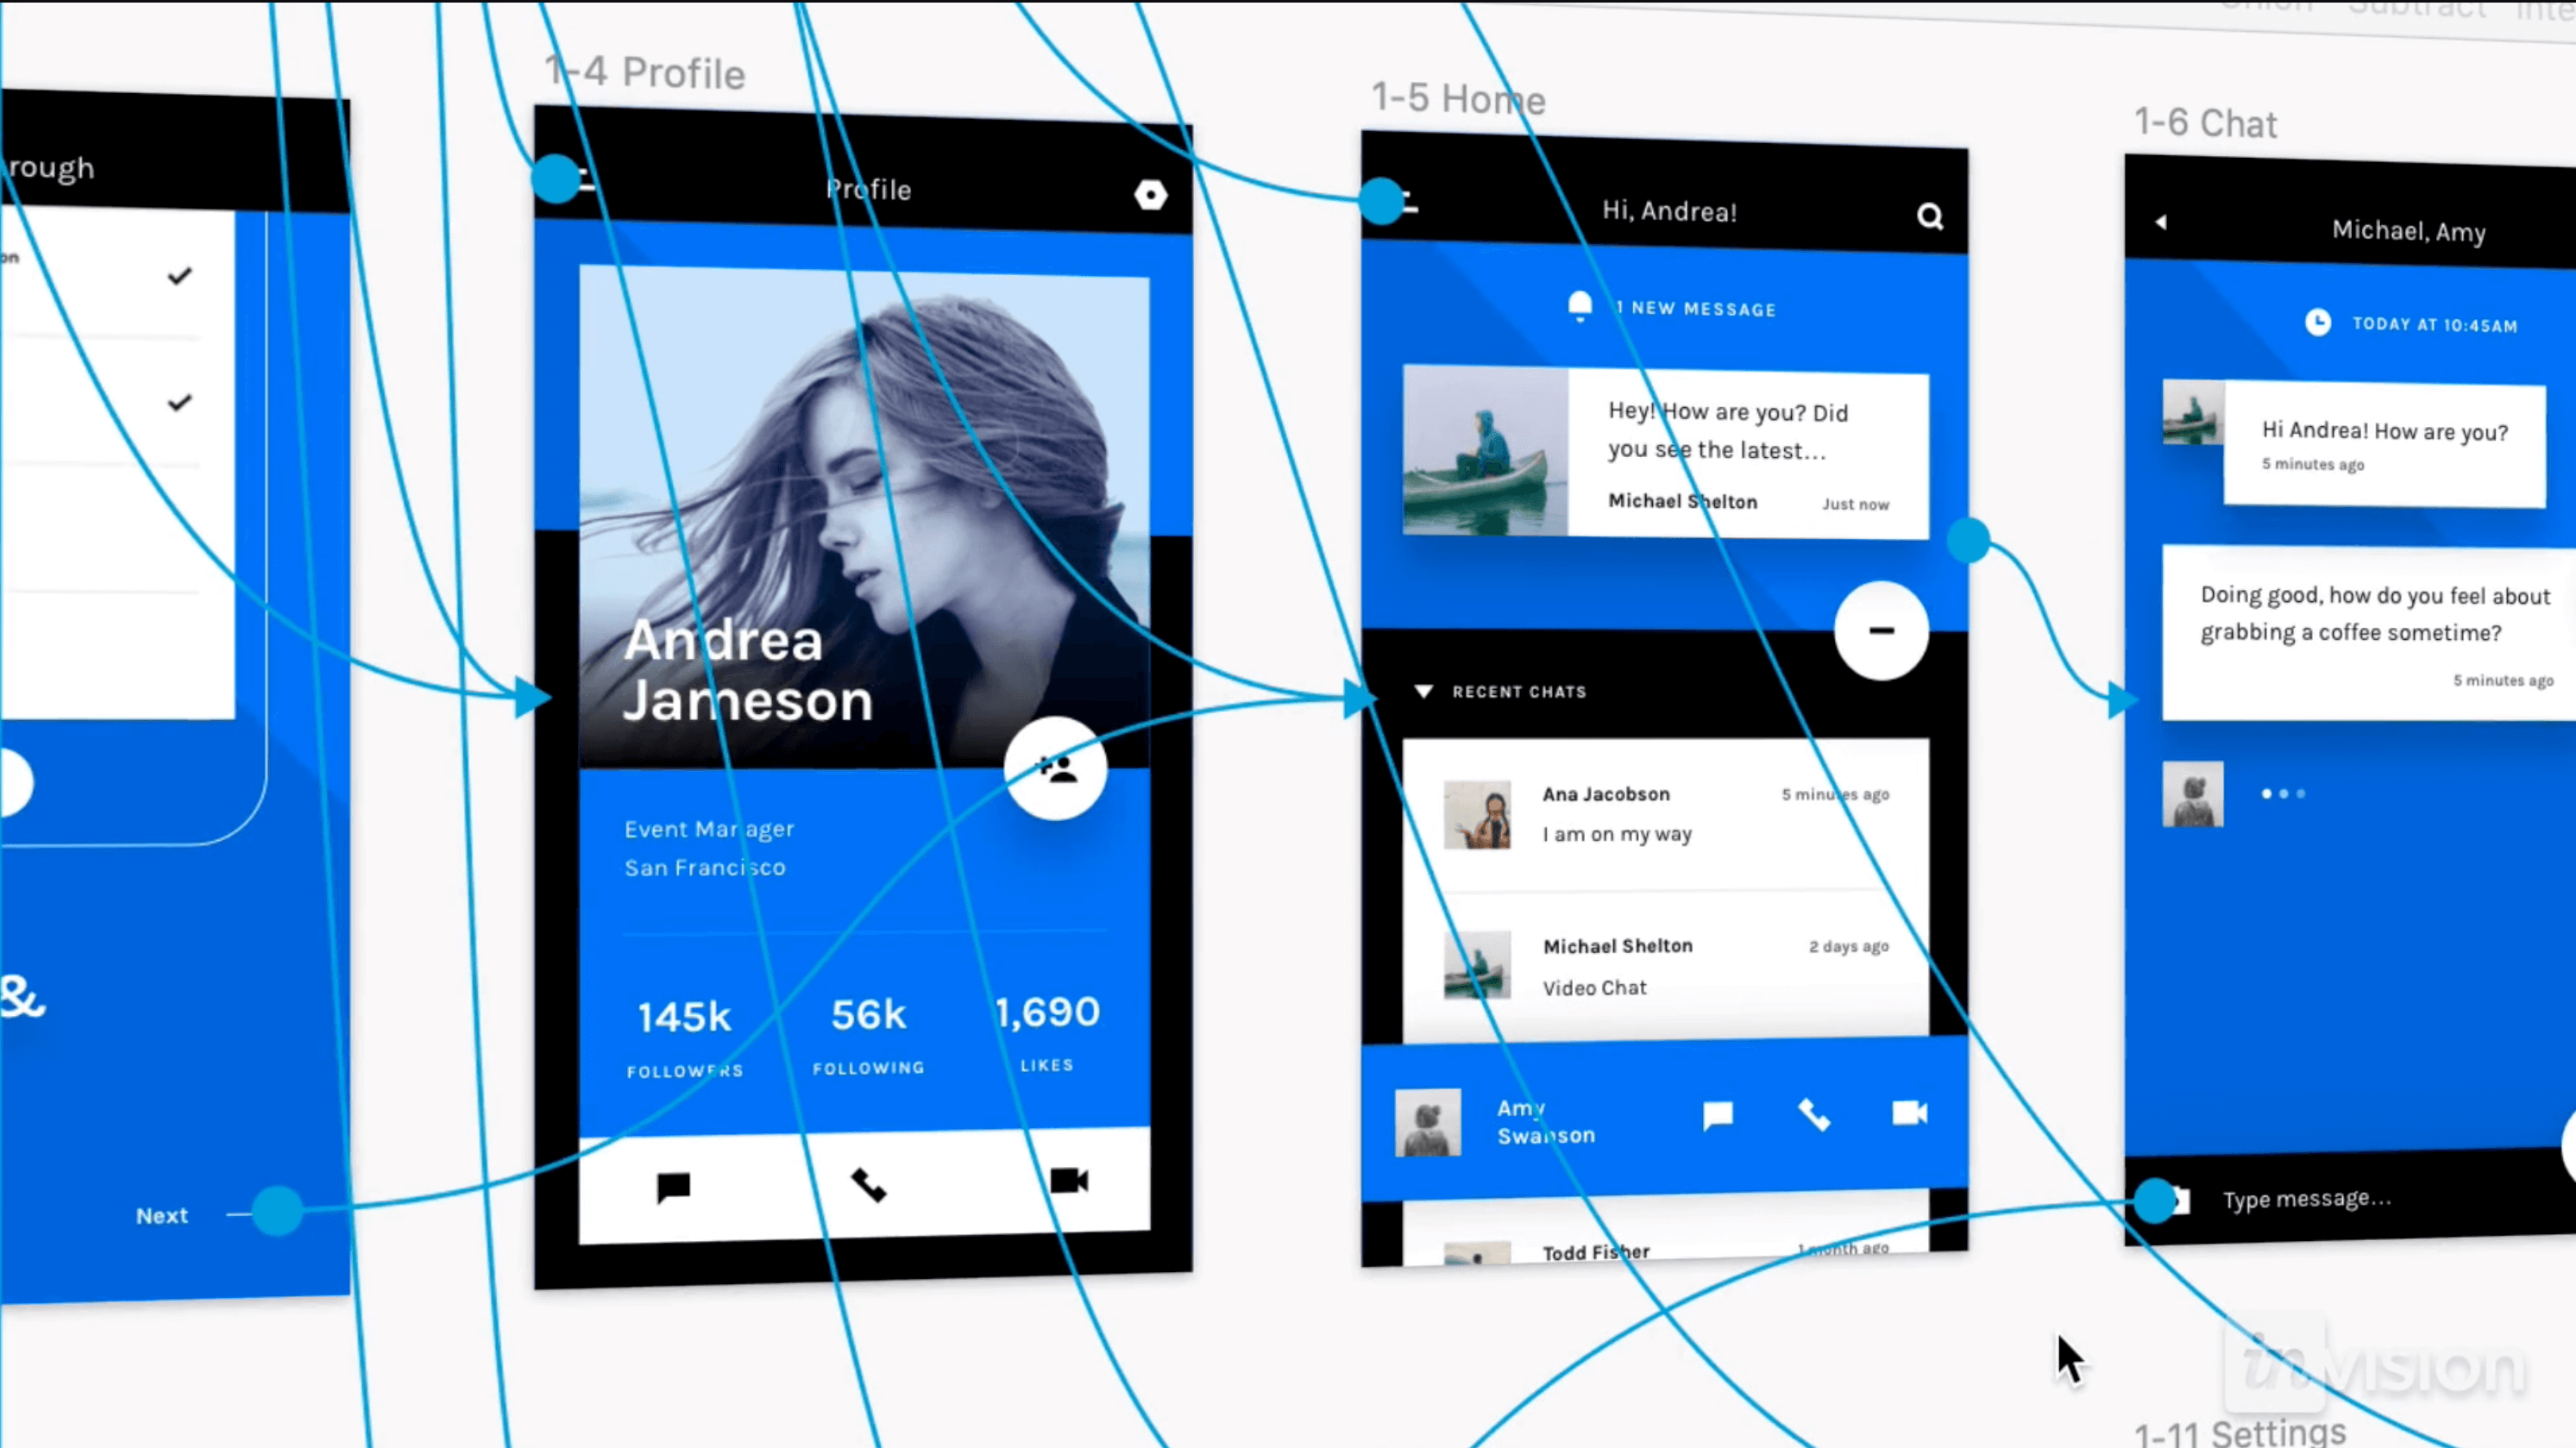
- Quick export of designed screens to InVision, where you can prototype them.
- Ability to control the transitions between individual screens, their length, and dynamics, and to add micro-interactions like hovers on buttons, display modals, and many more.
The latter captivated me and kept me with Sketch for longer because those enrichments meant prototyping without the need to export views to external prototyping tools.
…and then I met Principle
Ugly, crude, and with a medieval interface. And yet my favorite!
Principle is just straight to the point, limiting the functions to those strictly needed for advanced prototyping. I love that it gives you much greater control over the dynamics of animation in prototypes. Just look at the example below:
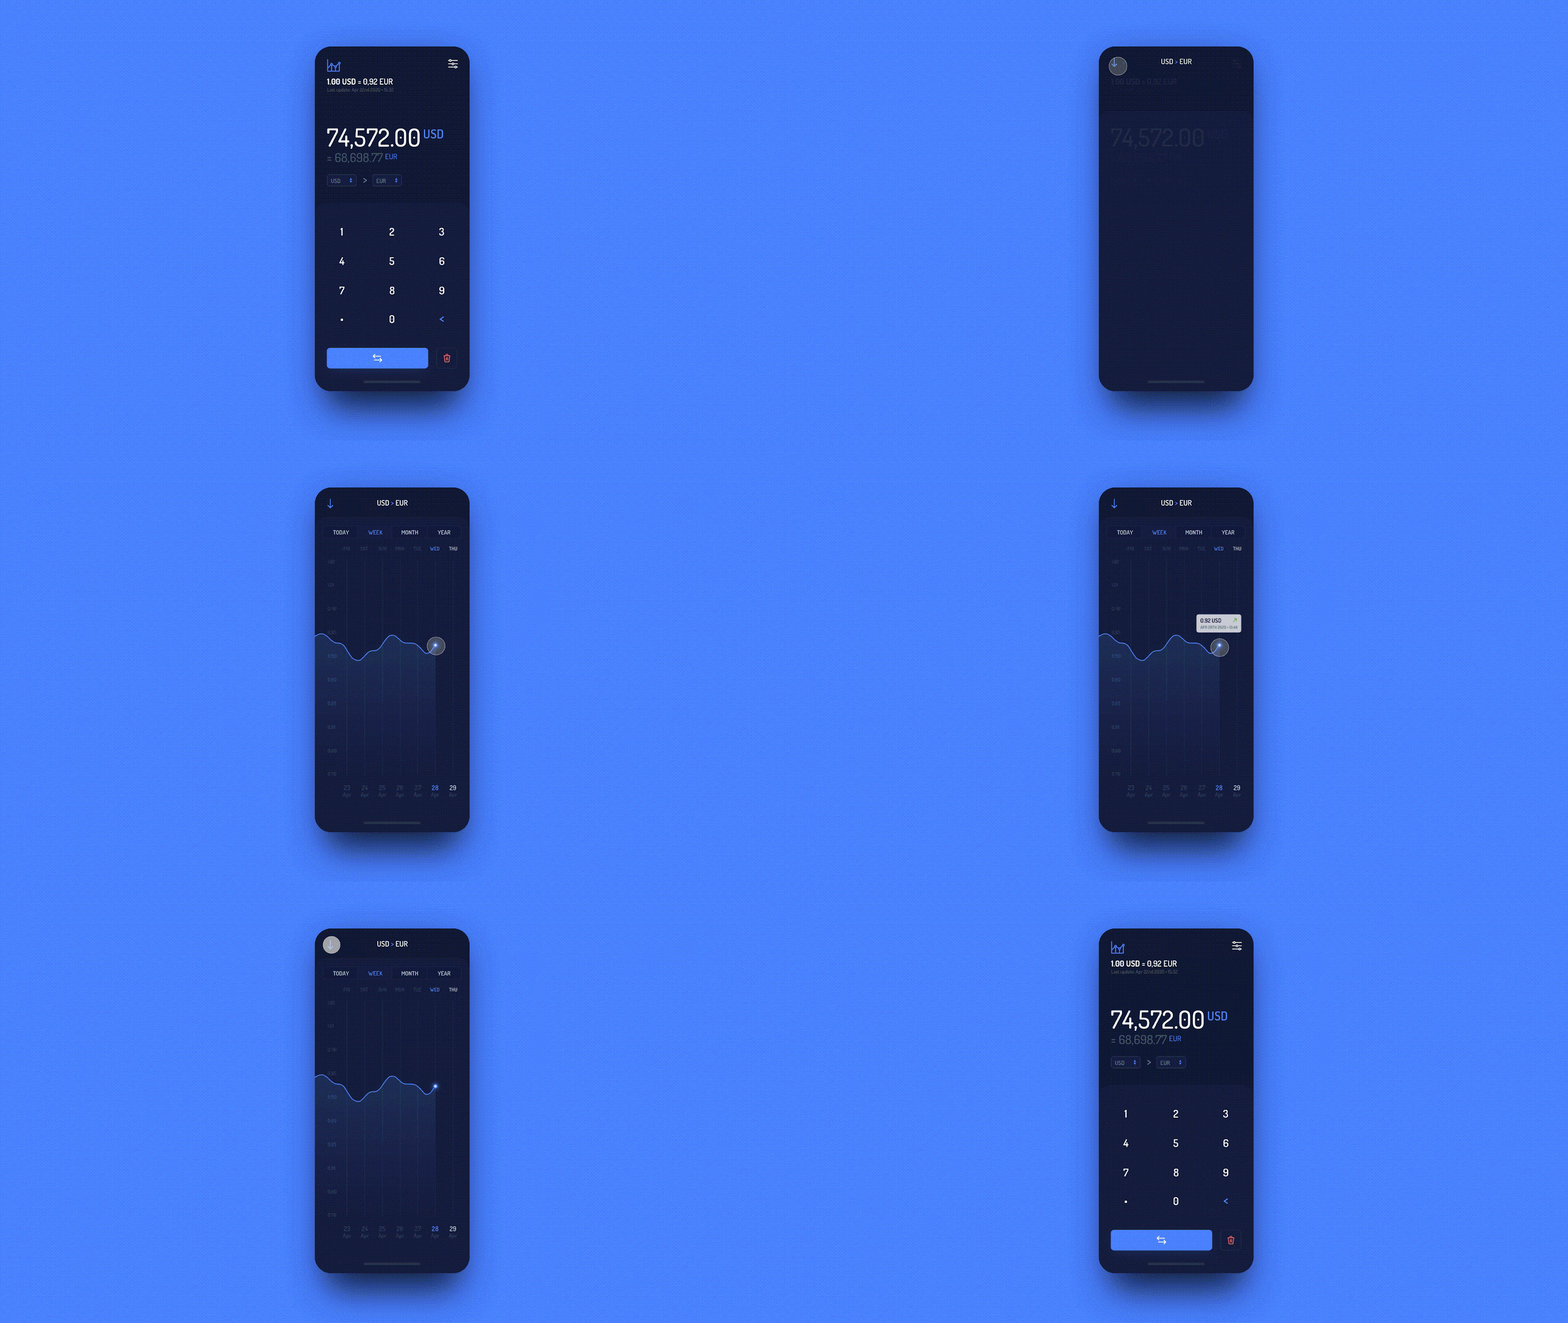
Depending on your needs, you can prepare really cool prototypes as a preview to your users and customers:
- interactive and clickable mobile prototypes that users test via dedicated mobile apps (so-called mirrors),
- videos in .mp4 or .gif format with a demonstration how a given functionality will look like on mobile devices.
This way you can show your testing groups how the application works and prevent questions like “where do I click?”, “what should I do here”, “how do I create an account”. You’ll save a lot of time, and the level of user frustration won’t shoot into the stratosphere.
Quite often I use Principle to prototype a function or micro-interactions for developers. This way they can see how something is supposed to work, and I save time on explaining stuff in detail (and probably drawing a lot of doodles). In my opinion, there’s no better way than those functional prototypes to show frontend developers what exactly the product designer meant.
Finally, one of my favorite options. You can force a UI or a simple mockup in Principle but why suffer if you can import files from Sketch or Figma in a few clicks. Magic!
Bonus round with Figma
How could we forget about Figma? This tool has been perfectly tailored to work on the “design > prototype > test” loop.
The constantly developed prototyping module allows you to quickly prepare unlimited prototypes of a specific function and test it in user-friendly conditions. Usually in a browser window, or using a mirror available as a web app or mobile app.
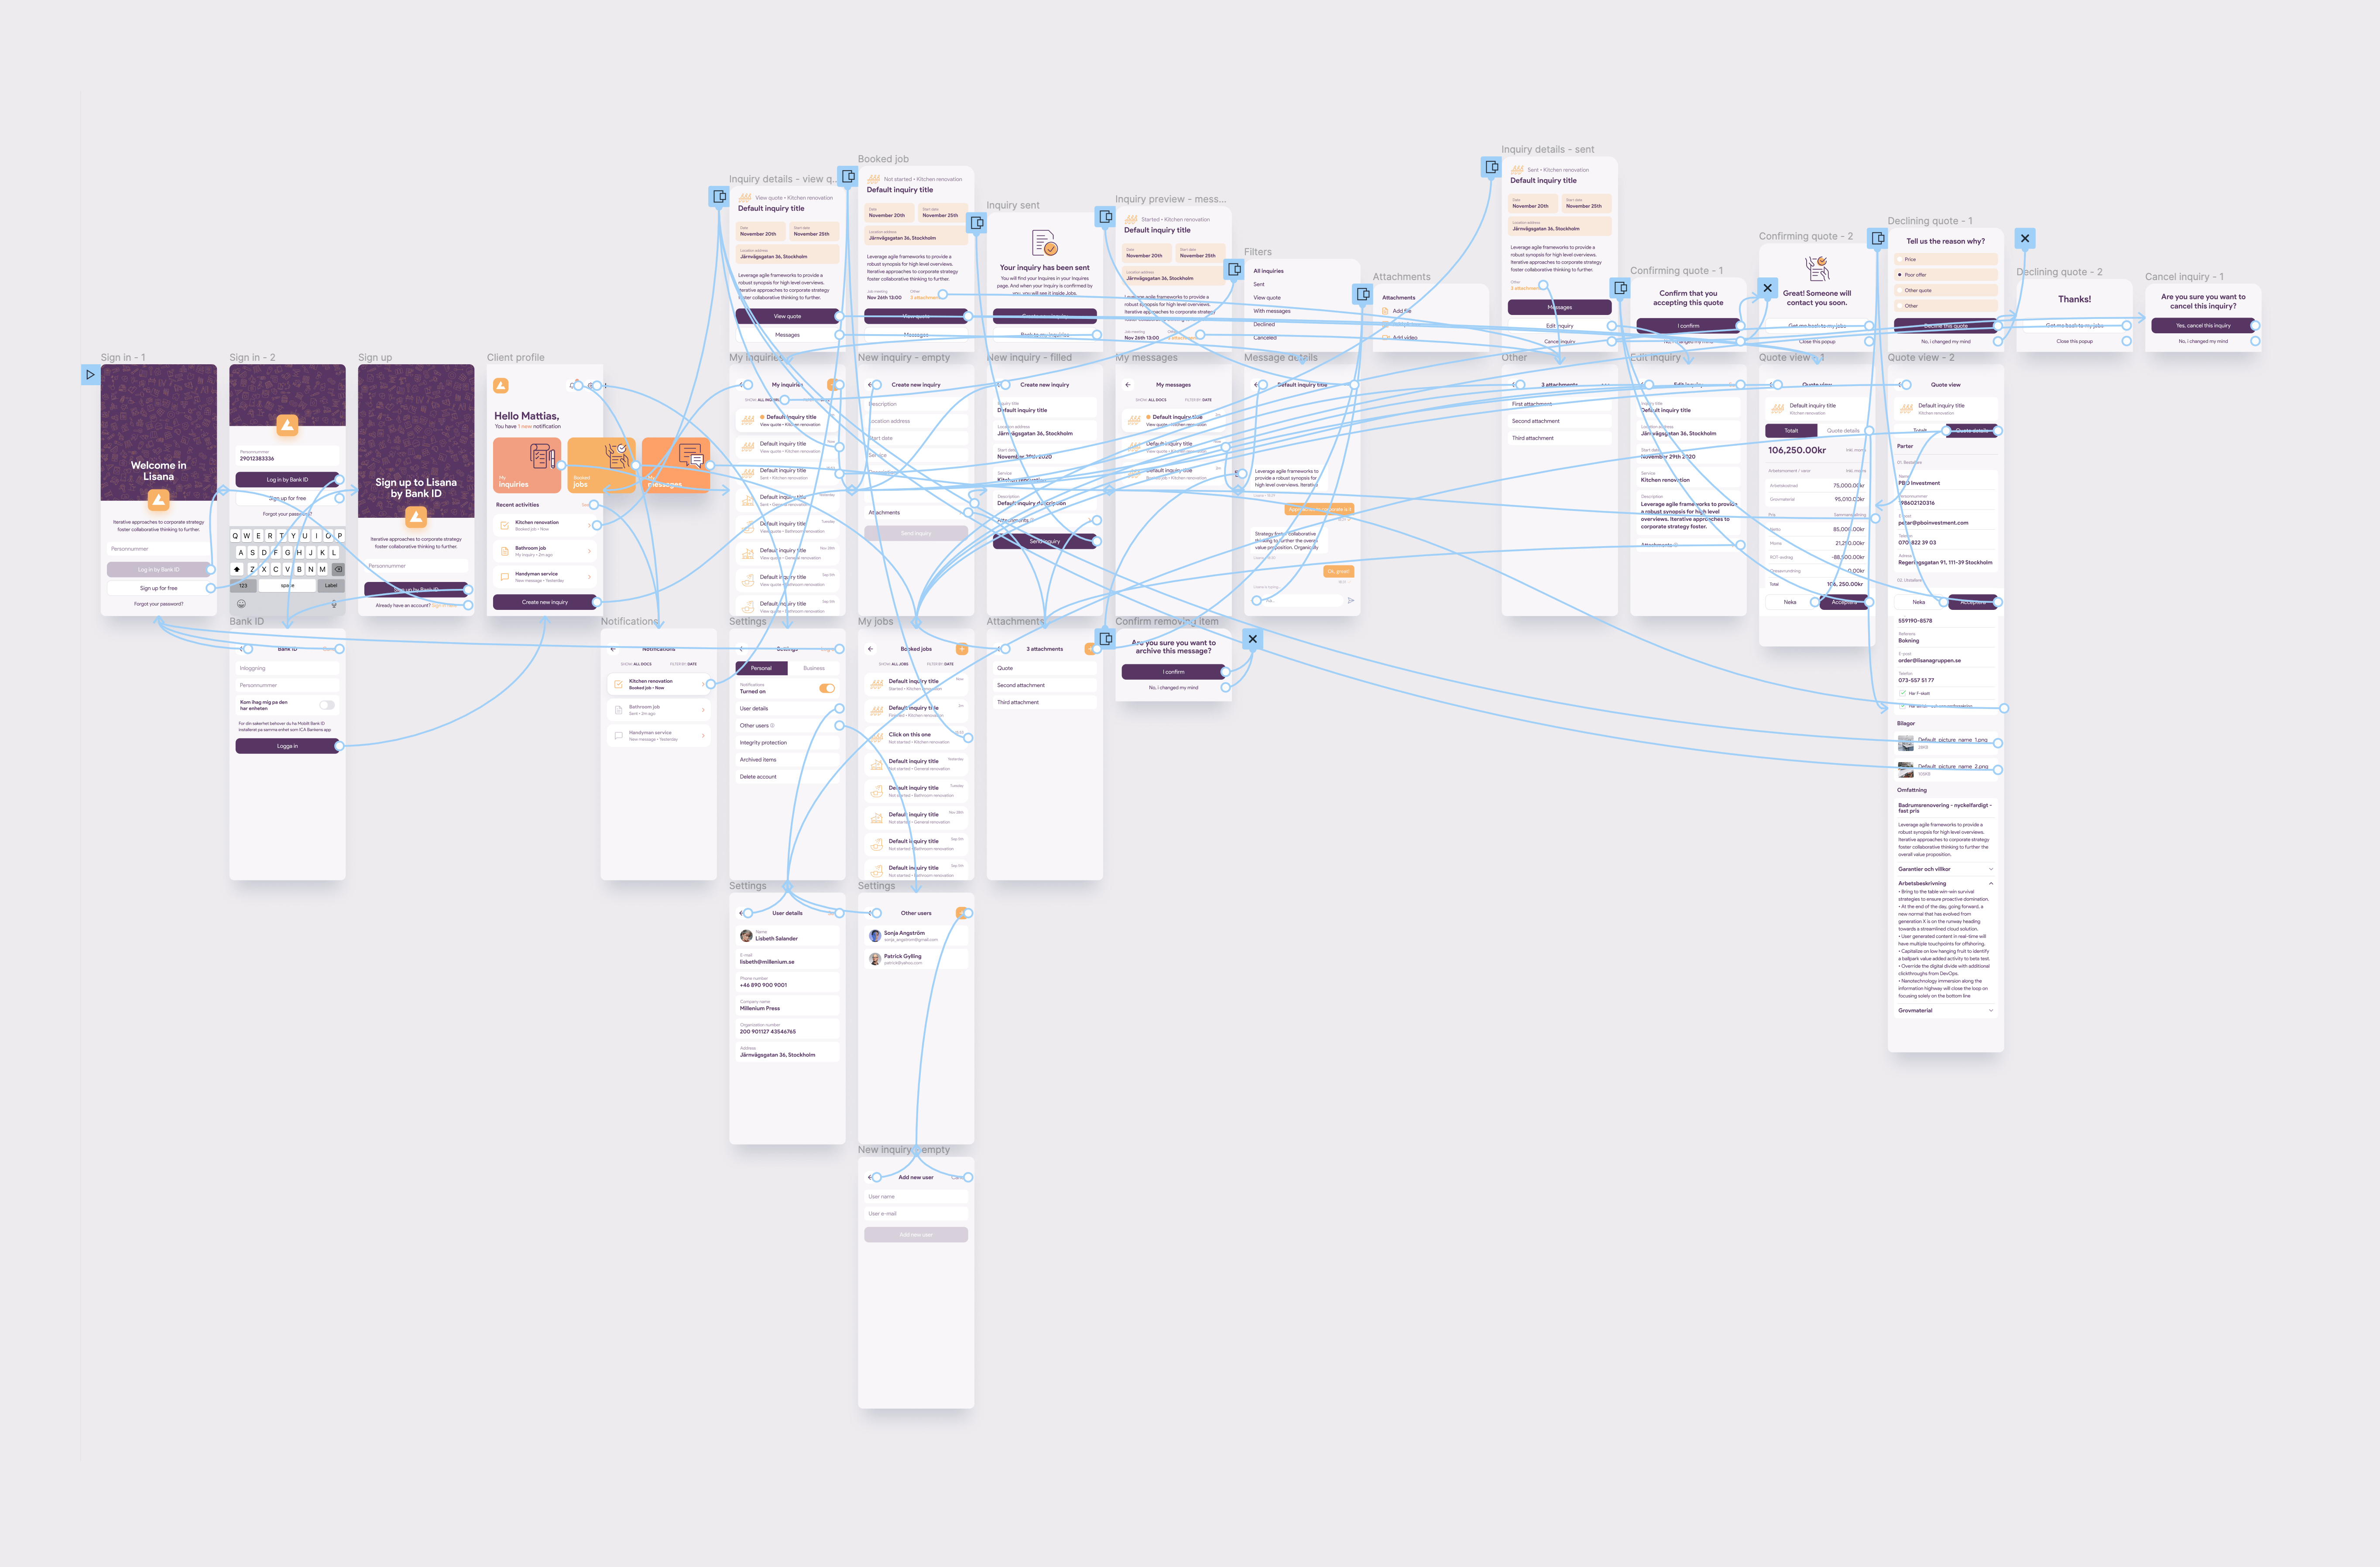
At the moment, Figma’s capabilities are sufficient to create a clickable prototype that gives the feeling of using a real application. But every rose has its thorns, and in Figma’s case, that’s creating a prototype of the entire application. (depending on the complexity of course). I tried, and from my own experience, you’ll only going to freeze Figma and turn your computer into a launching space rocket. But there’s a way around it, just export your project to Principle, and the sky is the limit!
I think about seamless workflow when picking app prototyping tools for the entire team
The market for the best prototyping tools is in a constant rush towards innovation, increasing value for product designers, and growing business possibilities. Apps that don’t keep up, drop out.
I often wonder if I abandon Figma for Framer, will I make better prototypes? Nope.
There’s no wrong or right prototyping tool. A popular prototyping tool offers exactly the same features, as its alternatives, sometimes under different names (Figma’s components = Sketch’s symbols). It’s about you thoroughly understanding the ideas behind the prototyping process, you’ll be able to practice it on any prototyping tool.
My final advice? Focus on a maximum of three prototyping tools. You’ll be able to gradually explore their secrets, and you’ll be able to pick the right prototyping tool FOR YOUR NEEDS.
It’s like playing an instrument. If you play a classic guitar, switching to electric, acoustic, bass, or banjo will be a matter of days. So don’t worry if you can prototype in Framer, and the company you’re applying to uses InVision or Adobe XD. You’ll master other prototyping tools in no time.
Need help with prototyping your one-in-a-million project? We've got the people, the tools, and the technology
Aleksander is just one of many super experienced and creative Product Designers we’ve got onboard. If you wish to meet our talented bunch and discuss your project idea with them, book a free, one-hour consultation. Yup, really, no strings attached.

