27 November 2018
Git subtree or how I stopped worrying and learned to love external dependencies

What is Git subtree? When should you use it? How to split, merge and remove external repositories using subtree? Who would win the “subtree vs submodules” battle? I’m glad you asked! This article will answer all of your questions. Well, at least most of them.
For many years, the only way to merge several Git repositories was to use submodules. This approach, however, was problematic, as it resulted in inserting additional metadata in our repository (.gitmodule files) and meant further work after cloning the repo. You had to update submodules manually after updating a branch. And if the submodules depended greatly on each other, it was really hard to make sure that they stay current.
When using subtree, you may forget about it all. The code of your dependency is available immediately after you start working with the repo, as the dependencies become, in fact, a part of your project. Therefore, it’s easier to inject even a dozen of dependencies and stop worrying about additional difficulties. And if you think that you can do something better, you can just modify it and send it (or not) to the leader of the project.
Below, I’d like to present the most important functions of subtree: splitting, merging, and removing external repositories.
📗 State of Frontend 2020: Report on frontend development trends based on the opinions of 4.500 developers. Get your free copy!
Divide Split and conquer
Do you know that every commit, in fact, represents a snapshot of the whole repository? Many people believe that a commit is simply a list of changes made in the repo since an older commit. And it’s not surprising, as even the git show HEAD command presents us the commit like this:
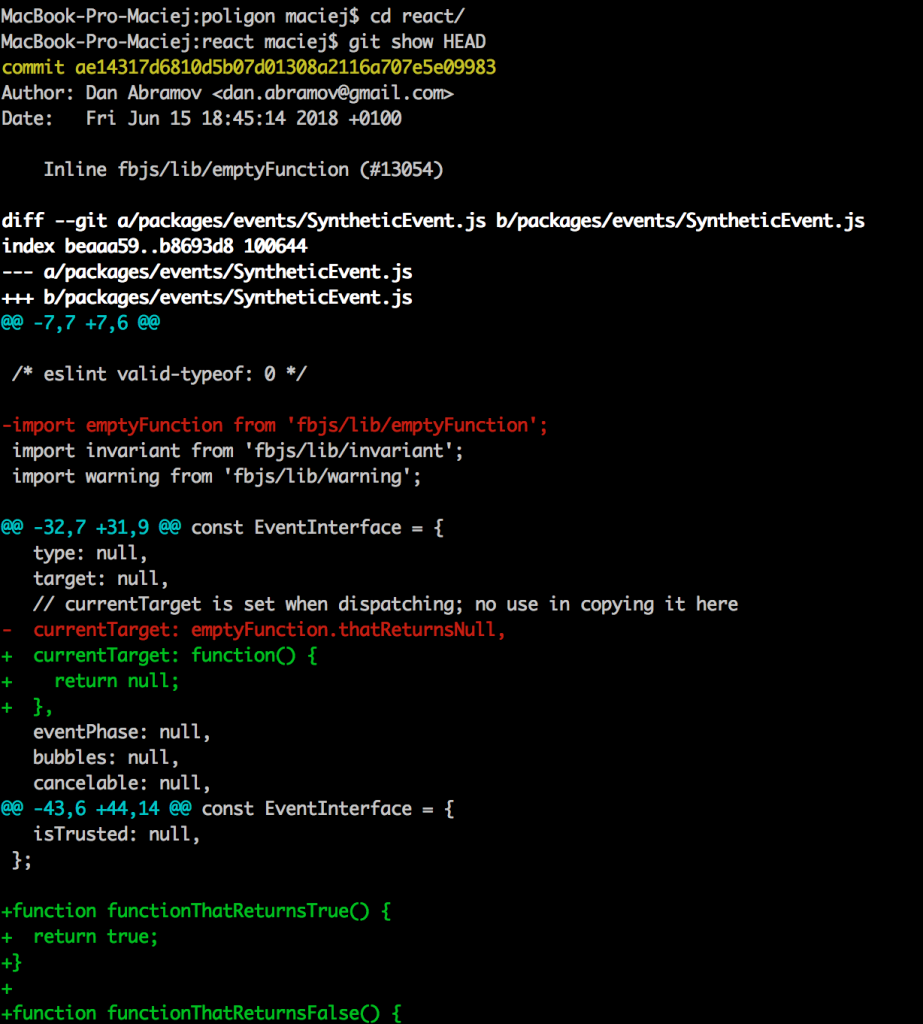
Therefore, what we really see here is a diff. No wonder many people get the whole idea wrong. However, let me state this once again: every commit is, in fact, the present state of the repository; diff, on the other hand, is simply a patch that we apply on the parent to get the present state. Such an approach has many pros, however, it makes splitting the repo pretty difficult.
Well, what can we do with the splitting? Imagine that we have a repository and we want to split into a folder to make another repo out of it. Why? Let’s say that there’s a great module in this folder and – being evangelists of code reusing – we want to use it in other projects. If the commits were diffs, the whole process would be easy as pie. All we would have to do would be to inspect all the commits and check out if there are some changes made in the folder. If yes, we would just section the changes off to a separate repo, save the whole thing, and – voila – mission accomplished. Unfortunately, commits do not equal diffs. What should we do then?
We should make use of the Git subtree!
A subtree is a fairly new Git’s feature (available since the v1.7.11) and definitely not a well-known one. It’s a pity, as subtree comes with a bunch of useful stuff, and – if used properly – it makes it possible to get rid of those awful submodules.
Firstly, let’s focus on splitting the repository in half. Here’s our primary repo:
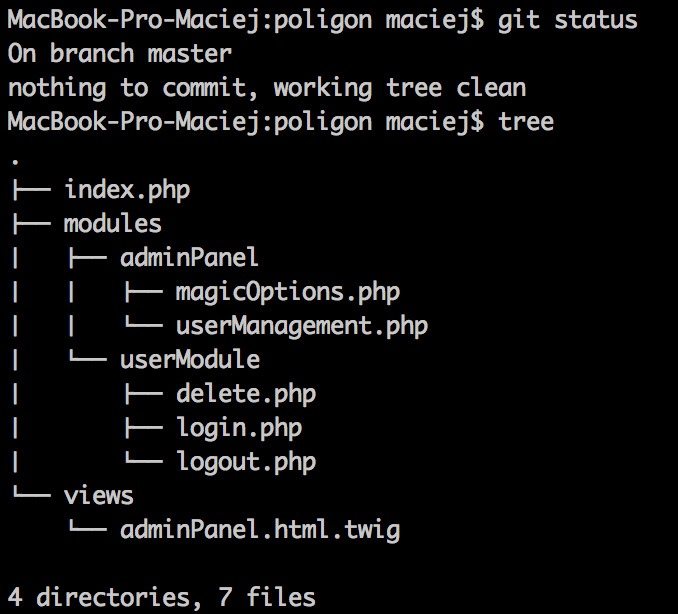
The user module grew into a big one and we want to section it off. Let’s see what else can we find in the history of our repo:

As you can see, various commits regarding various functionalities of our system are completely mixed up. Ok, let us then cut our submodule out to a separate branch and call it userModule-subtree:

What has exactly happened? Well, the commits regarding the userModule funcionality have been moved to a separate branch. Which branch? The userModule-subtree one. Let’s check out what’s inside:

Great! That’s exactly what we wanted. But what should we do with the module’s files which are still out there in the master branch? As we no longer need them, we should delete them:

Now, it’s time to create a second repository and to export our branch (the one with with the module in it) there:
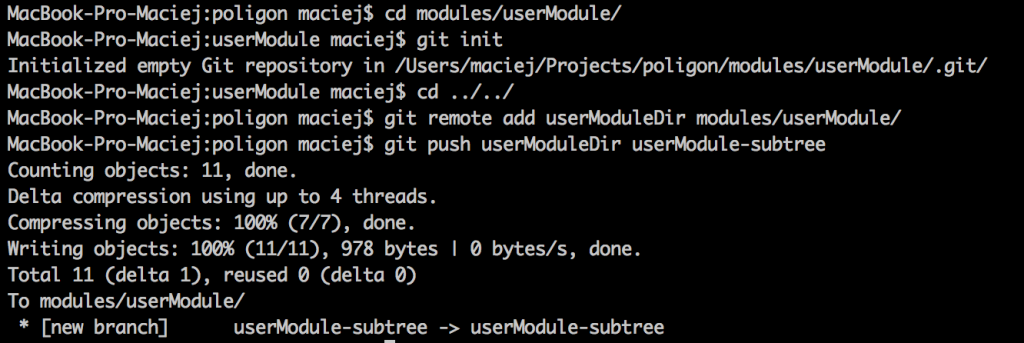
Ok, we’ve exported the branch with the module to the other repository. Therefore, it’s time for a checkout:

The files look exactly like before but there’s one big difference – the modules/userModule folder is a separate, independent repo.

We can congratulate ourselves as we’ve made the first step. Now, we should upload the main project’s repo and the user module’s repo to Bitbucket and carry on with the second part of the guide – using the module in our project.


Using a module
We start with cloning the main project. Then, we’ll use the userModule – just like we did before, when using the Git submodule, but better.
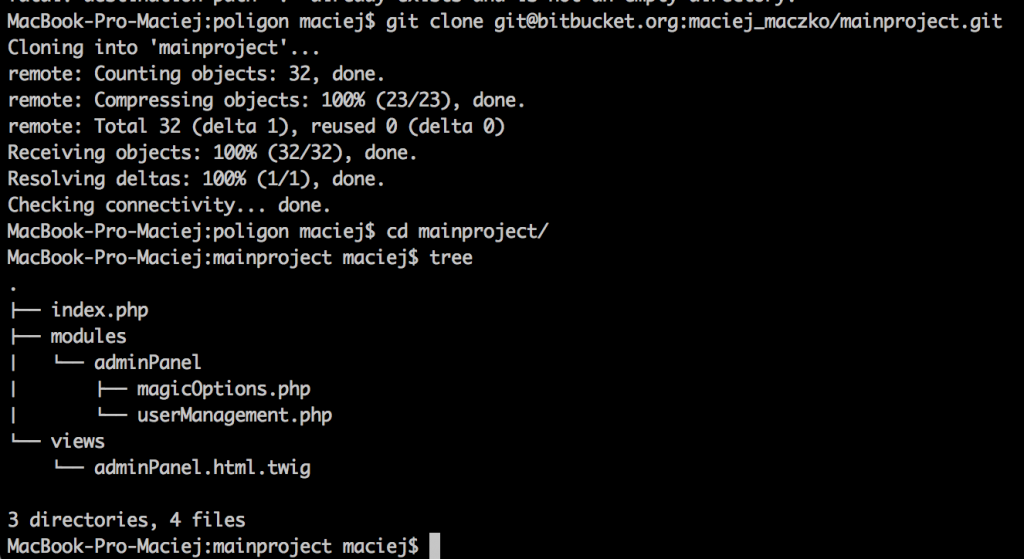
As you can see, there’s no userModule in our main repo. We need to merge it into the project separately.
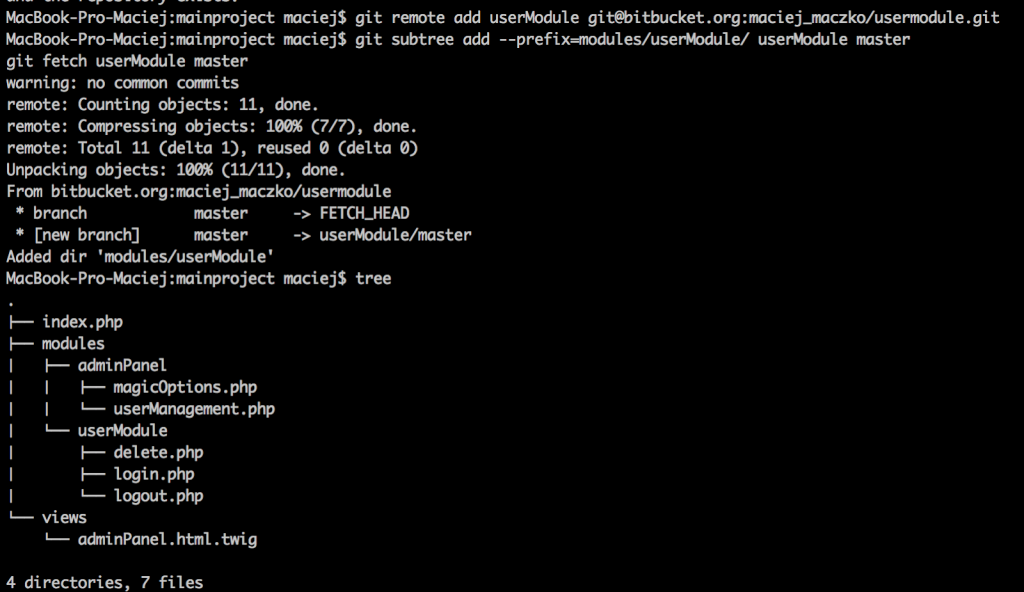
Ta-da! Remember when you had to pick every commit from a remote repo that we wanted in our branch? Now, you can forget about it, as the code is merged directly into our repo – with the full history of both repos. How’s that possible? Well, I’m glad you asked. Git adopts the “subtree strategy” which equals merging the commit. Just as if we were joining two various branches (with the branches don’t have the same master).
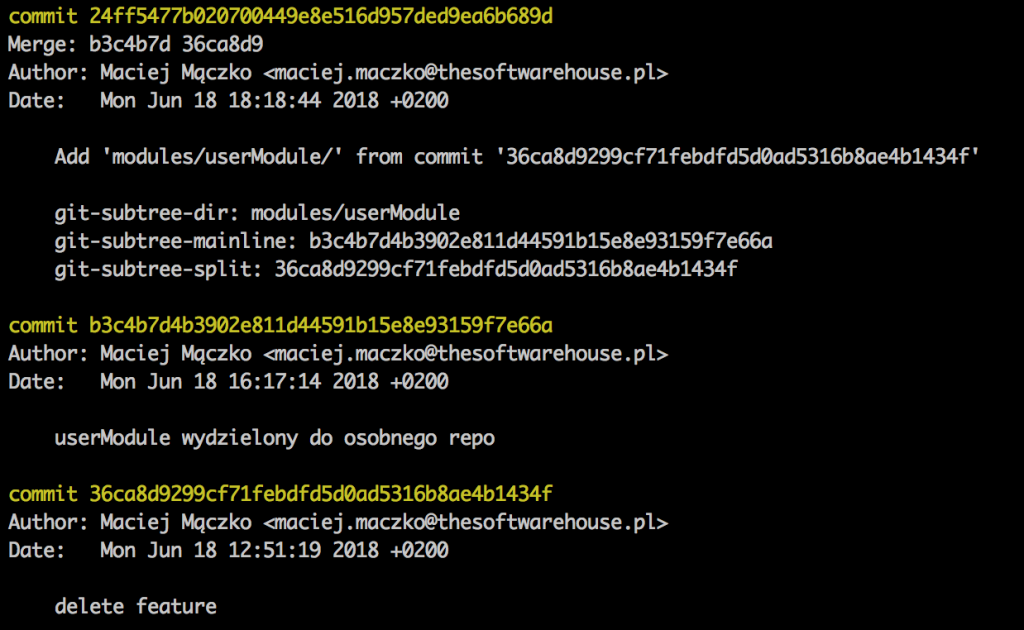
What does it look like in Bitbucket? Well, that’s how:
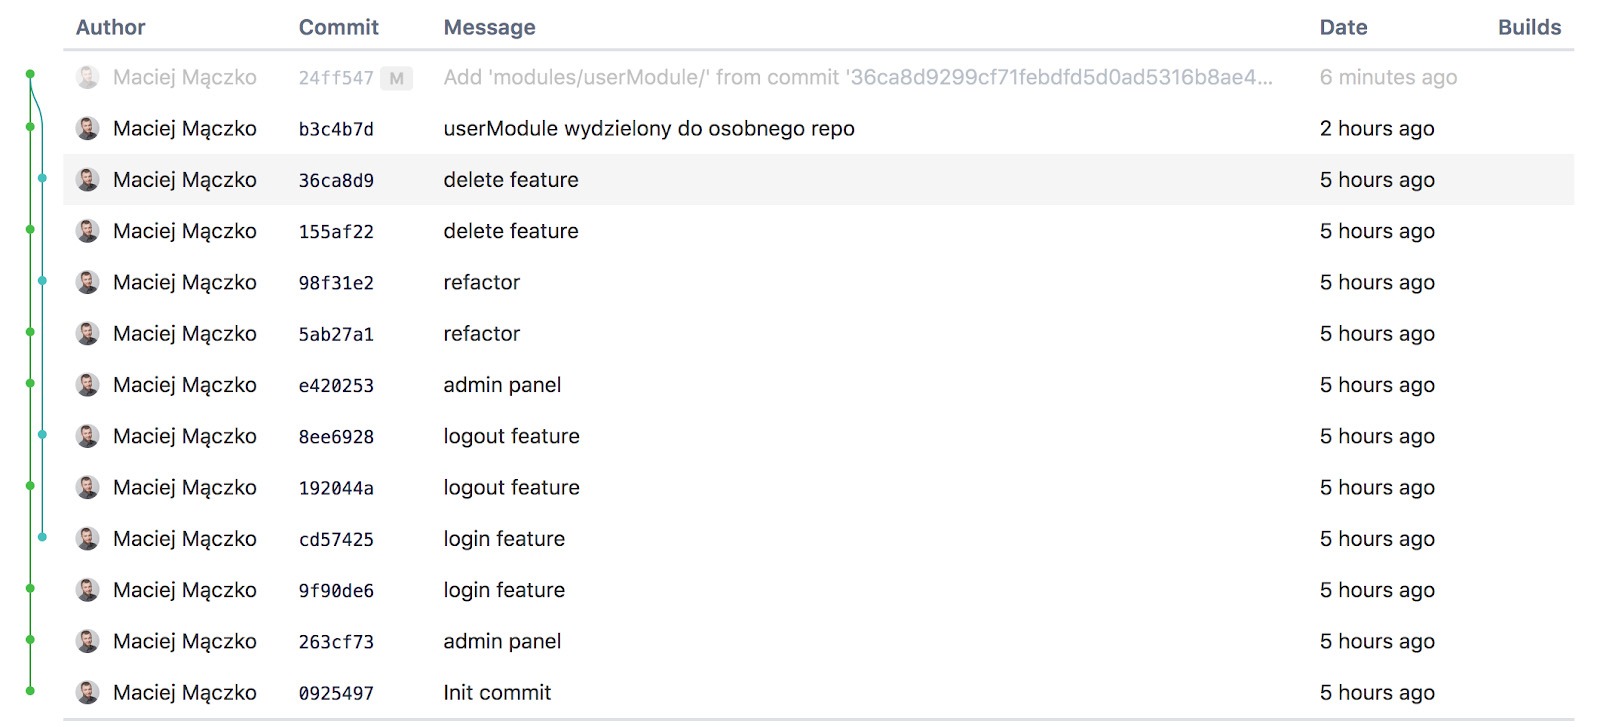
Here we have a commit merge, joining two branches that don’t come from the same commit. It’s a subtree, man.
Ok, we’ve used the user module in our project and everything’s working as it should. But let’s imagine that we find a critical error in the code – the logging script lets every user in, no matter what password they type. We need to fix that!
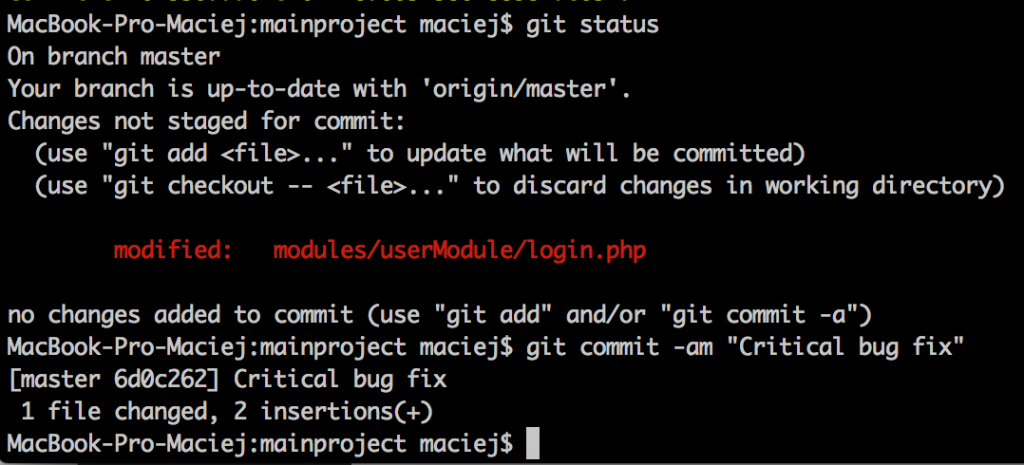
Now, the production environment:

So, have we fixed it? Yup. At least locally…

And in the repo of the module that we’re using?

Well, nope. And it’s one of the biggest pros of using subtree: our module is an integral part of our repo but, in the same time, you can manage it as you wish, separate it, modify it according to your will. When using submodule, it was not so easy, as two various repositories did not share the same commits.
Ok, but that’s not all. We’ve fixed the critical error, so it’d be nice to send the fix to the author of the original module. Here’s how we do that:

What happened here? Well, Git checked out the history of commits made since the implementation of the module, chose the ones which modified the files in the userModule folder (only those) and made commits out of them – with the same authors, the same dates, etc.

Pretty clever, isn’t it? Well, not exactly. If you look closely, you’ll see that the commit id has changed. Therefore, the history seems the same (and most people probably won’t see the difference) but, under the hood, it’s different. Is that a problem? Well, it somehow is, as the tags are not shared. There’s some good reasoning behind it, as there cannot be two tags of the same name or, in different words, we can connect a tag to one commit only. And here we’ve got two.
OK, but what if someone updates the module? The answer is simple: git pull -s subtree userModule master.

And that’s it! If some conflicts appear, we need to resolve them, as what subtree really does under the hood is running a merge (or an octopus – if you’re merging more than two branches).
Removing a module
When using a submodule, removing a module was pretty simple. How do you do that in subtree? Well, you don’t.
Why? Because, as I’ve already mentioned, the commits from the repo being joined, as well as its whole history, are being put into our repo and stay there forever. Of course, we can delete our subtree’s files and delete information regarding the remote repository. This way, we won’t get any updates from this module’s repo (duh!).
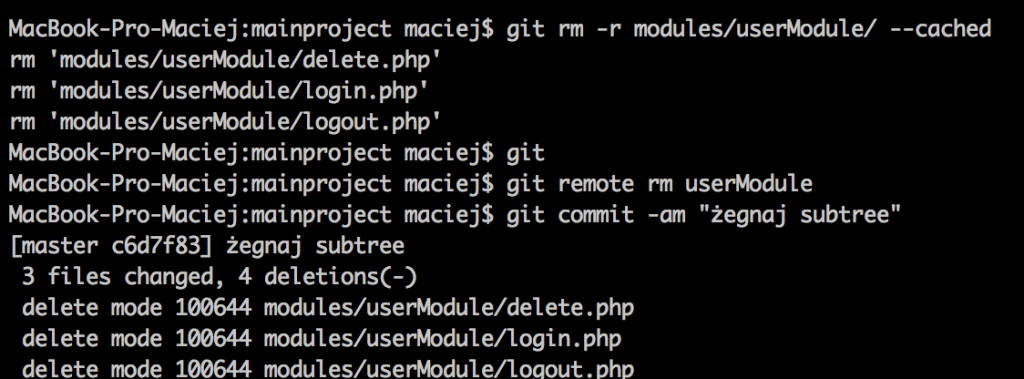
As you can see, the remote repo was removed and the files are not tracked anymore (however, they’re still there on the disk):

We can just commit it again and consider them as files created exclusively in our main repo.

As I’ve already mentioned, git-subtree is a pretty new tool and it doesn’t have as many features as the older Git functionalities. However, it’s still a very useful thing and I hope that this article proves it. If you believe that you can make use of Subtree, don’t wait – try out the steps presented above in your own project. I’m sure that you won’t regret it.

